
A kitchen takes a beating that most rooms never see. Doors and drawers open thousands of times a year, steam rises off the stovetop, water splashes around the sink, and the whole space swings through temperature and humidity changes every single day. In a coastal city like Vancouver, where damp air settles in for months at a stretch, that daily wear adds up fast. The cabinets that shrug it off are not the lucky ones. They are the ones engineered to handle it from the first cut of board to the final adjustment of a hinge.
That is the real story behind durable German kitchen cabinets. Longevity is not an accident or a marketing claim. It is the predictable result of tight tolerances, sealed materials, hardware tested to survive decades of use, and a fit measured for one specific room. Bauformat has been refining that approach in Lohne, Germany since 1917, and our Vancouver team carries it through to the install. Here is how durability actually gets built into a kitchen, and why it matters so much for Metro Vancouver homes.
Key Takeaways
- German cabinet durability comes from precision manufacturing and tight tolerances, not chance, so parts fit and stay fitting for decades.
- Quality carcass boards and fully sealed edges keep moisture out, which matters in Vancouver’s damp coastal climate.
- Cabinet hardware is cycle-tested in the lab. Leading runners and hinges are rated from 50,000 to 200,000 open-close cycles, simulating decades of daily use.
- Made-to-order construction removes the gaps and filler strips that become weak points in stock cabinets.
- Buying once and keeping it for 25 to 40 years often costs less over time than replacing cheaper cabinets twice, and a quality kitchen refresh holds strong resale value.
Precision Manufacturing: Durability Starts at the Tolerances
Walk through how a German cabinet is made and the first thing you notice is how little is left to guesswork. Boards are cut by computer-controlled machinery to tolerances measured in fractions of a millimetre. Holes for shelf pins, hinge cups, and connecting hardware are drilled to the same exacting standard, so every part lines up the way it was designed to.
That precision is not just about looking sharp on day one. When panels meet at perfectly square corners and joints close tight, the carcass carries weight evenly and resists the racking and sagging that loosens lesser cabinets over time. A drawer front that sits a hair out of alignment will rub, bind, and wear unevenly for years. A door hung on a frame that is even slightly off-square will stress its hinges every time it swings. Tight tolerances spread the load and remove those small daily stresses, which is exactly why precision-built cabinets stay solid long after cheaper ones start to sag and gap. Durability, in other words, is engineered at the factory before a single screw goes in.
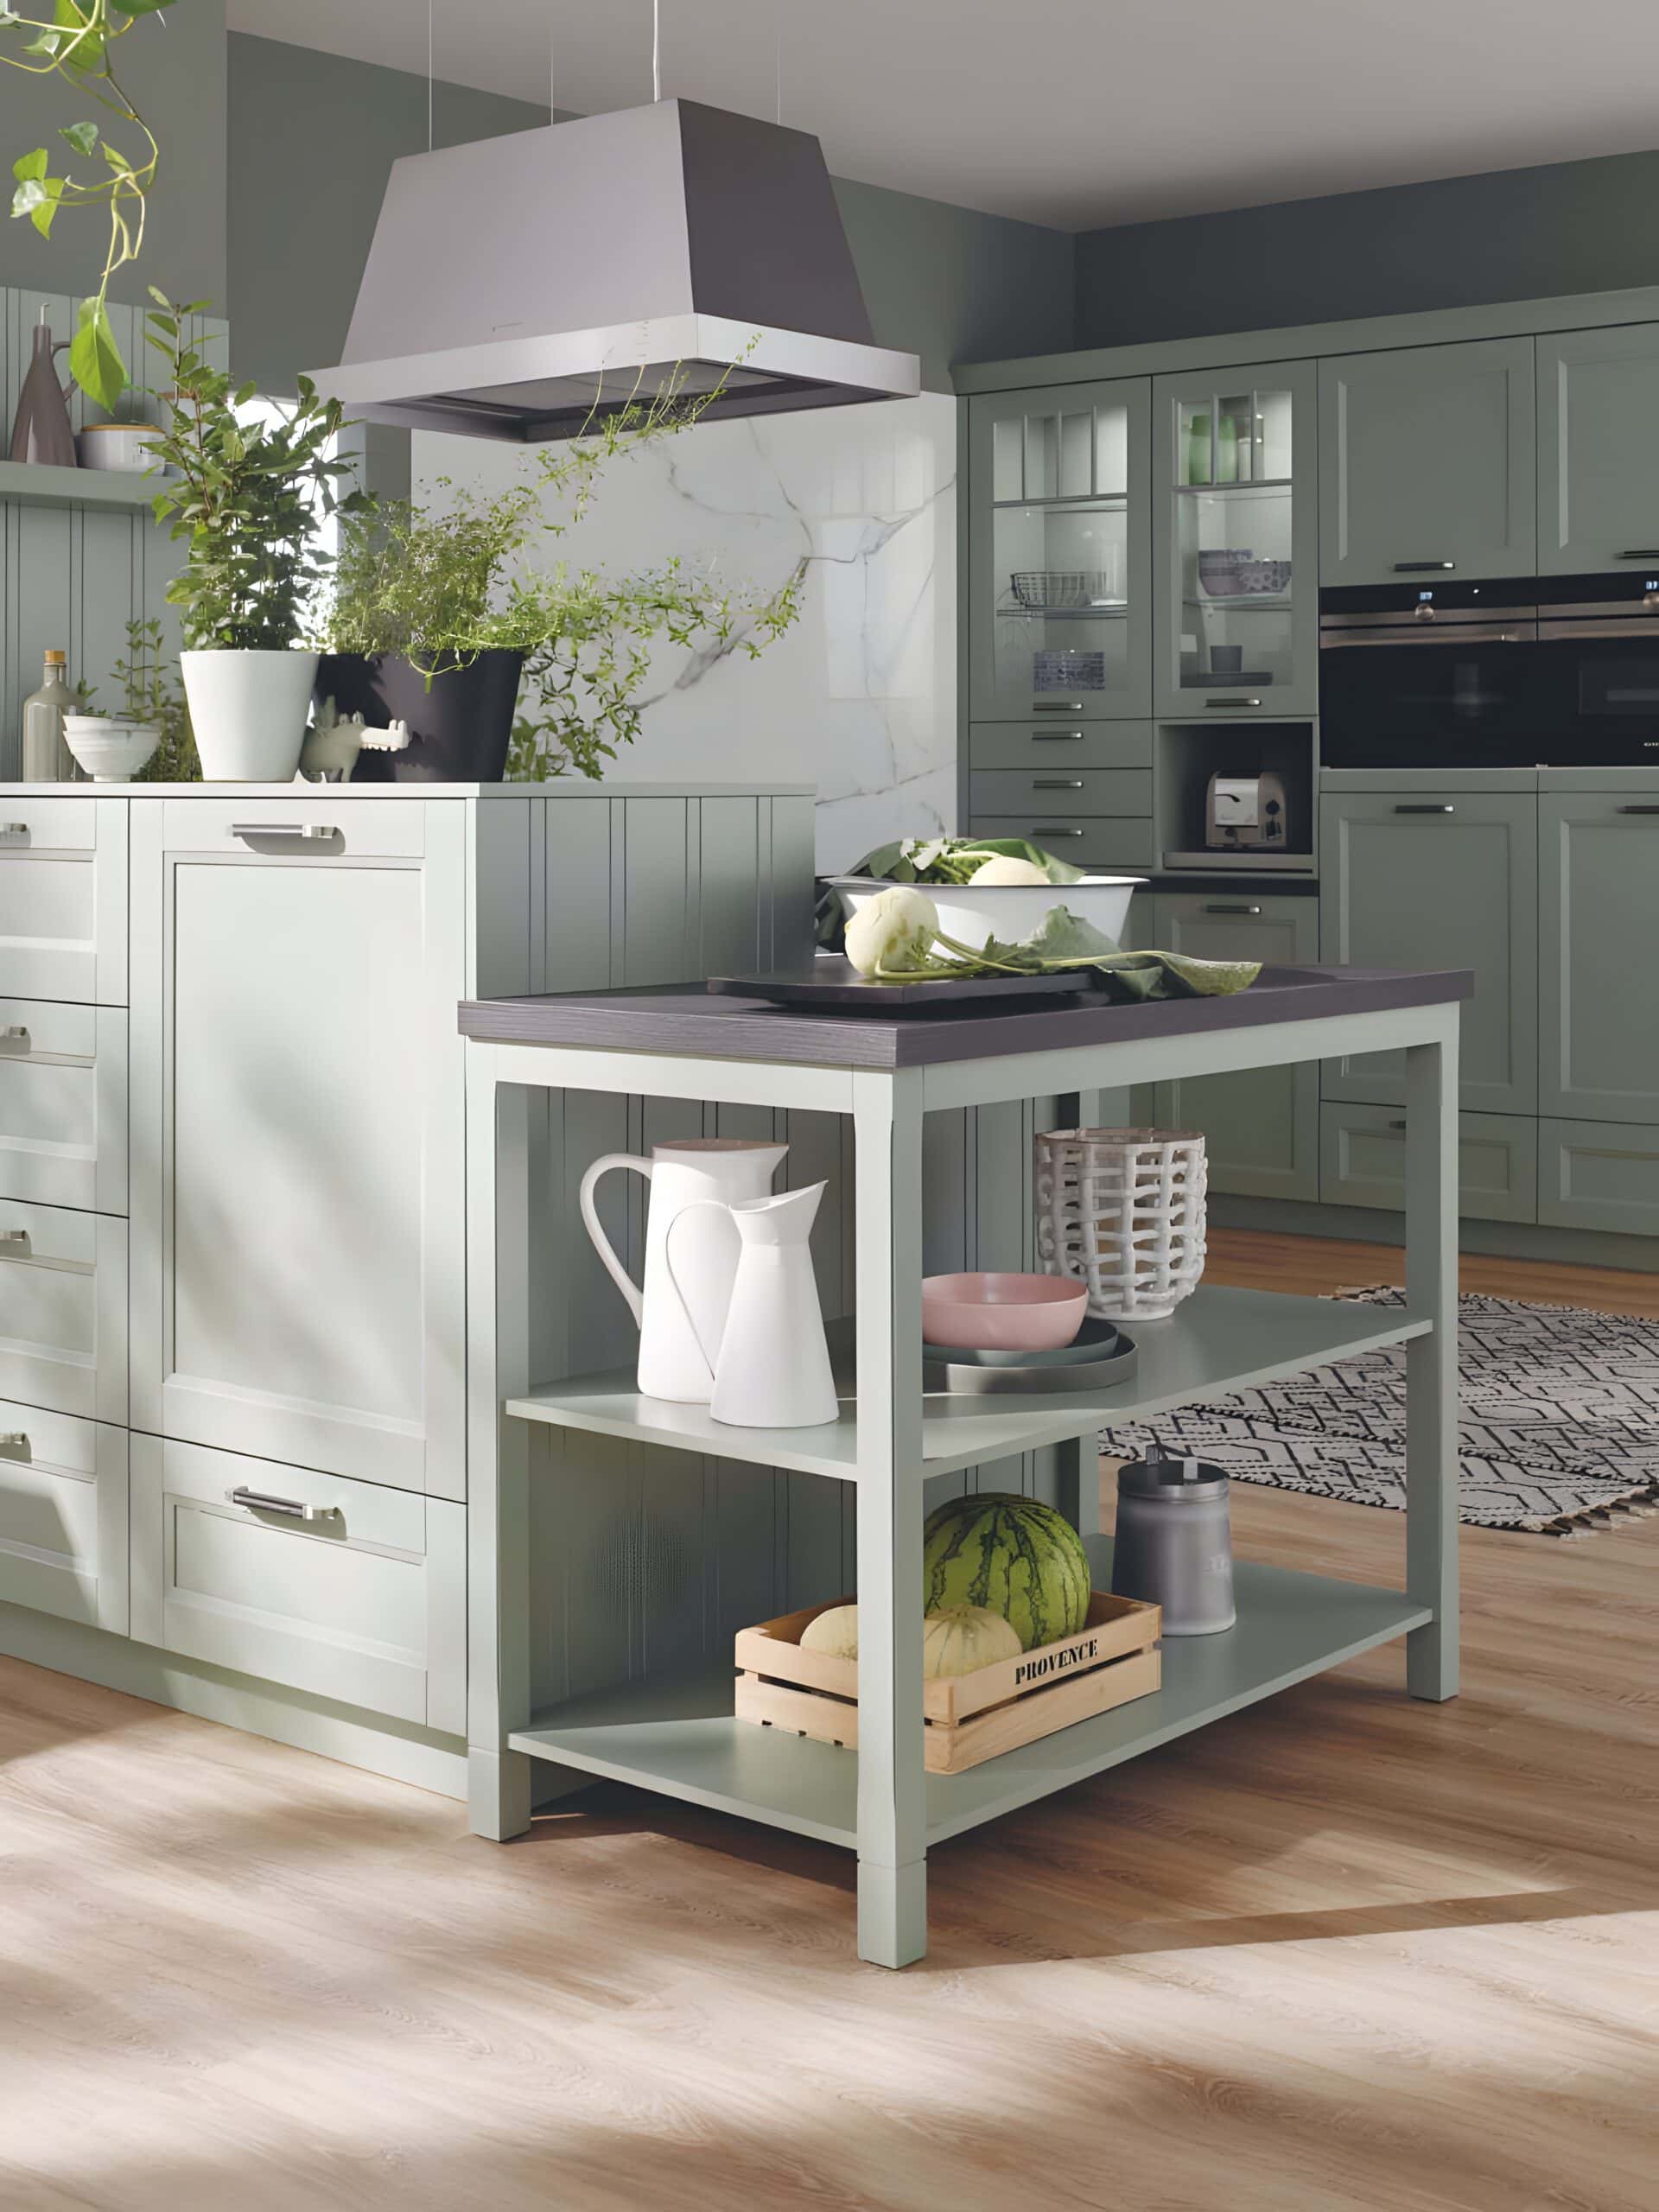
Quality Carcass Materials and Sealed Edges
The carcass is the box that does the real work, and it is where corners get cut in lower-end kitchens. German manufacturers build carcasses from dense, high-grade engineered board chosen for dimensional stability, meaning it holds its shape rather than swelling, bowing, or warping as conditions change. A stable box keeps doors aligned, drawers running true, and the whole kitchen feeling tight years down the road.
Just as important is what happens at the edges. Raw board edges are the entry point for moisture, and once water wicks into the core, the board swells and the surface lifts. German cabinets are finished with edge banding bonded under heat and pressure so the seal is continuous, with no open seams for damp air to creep into. Industry guidance on cabinet materials notes that high-quality engineered boards typically last 20 to 30 years, while well-built cabinets as a whole commonly run 25 to 40 years or more when made with durable materials and properly installed (cabinet industry data, 2025). That sealing is the quiet hero of a long-lasting kitchen. It is also why this matters more here than almost anywhere else, which brings us to the coast.
Hardware Tested for Tens of Thousands of Cycles
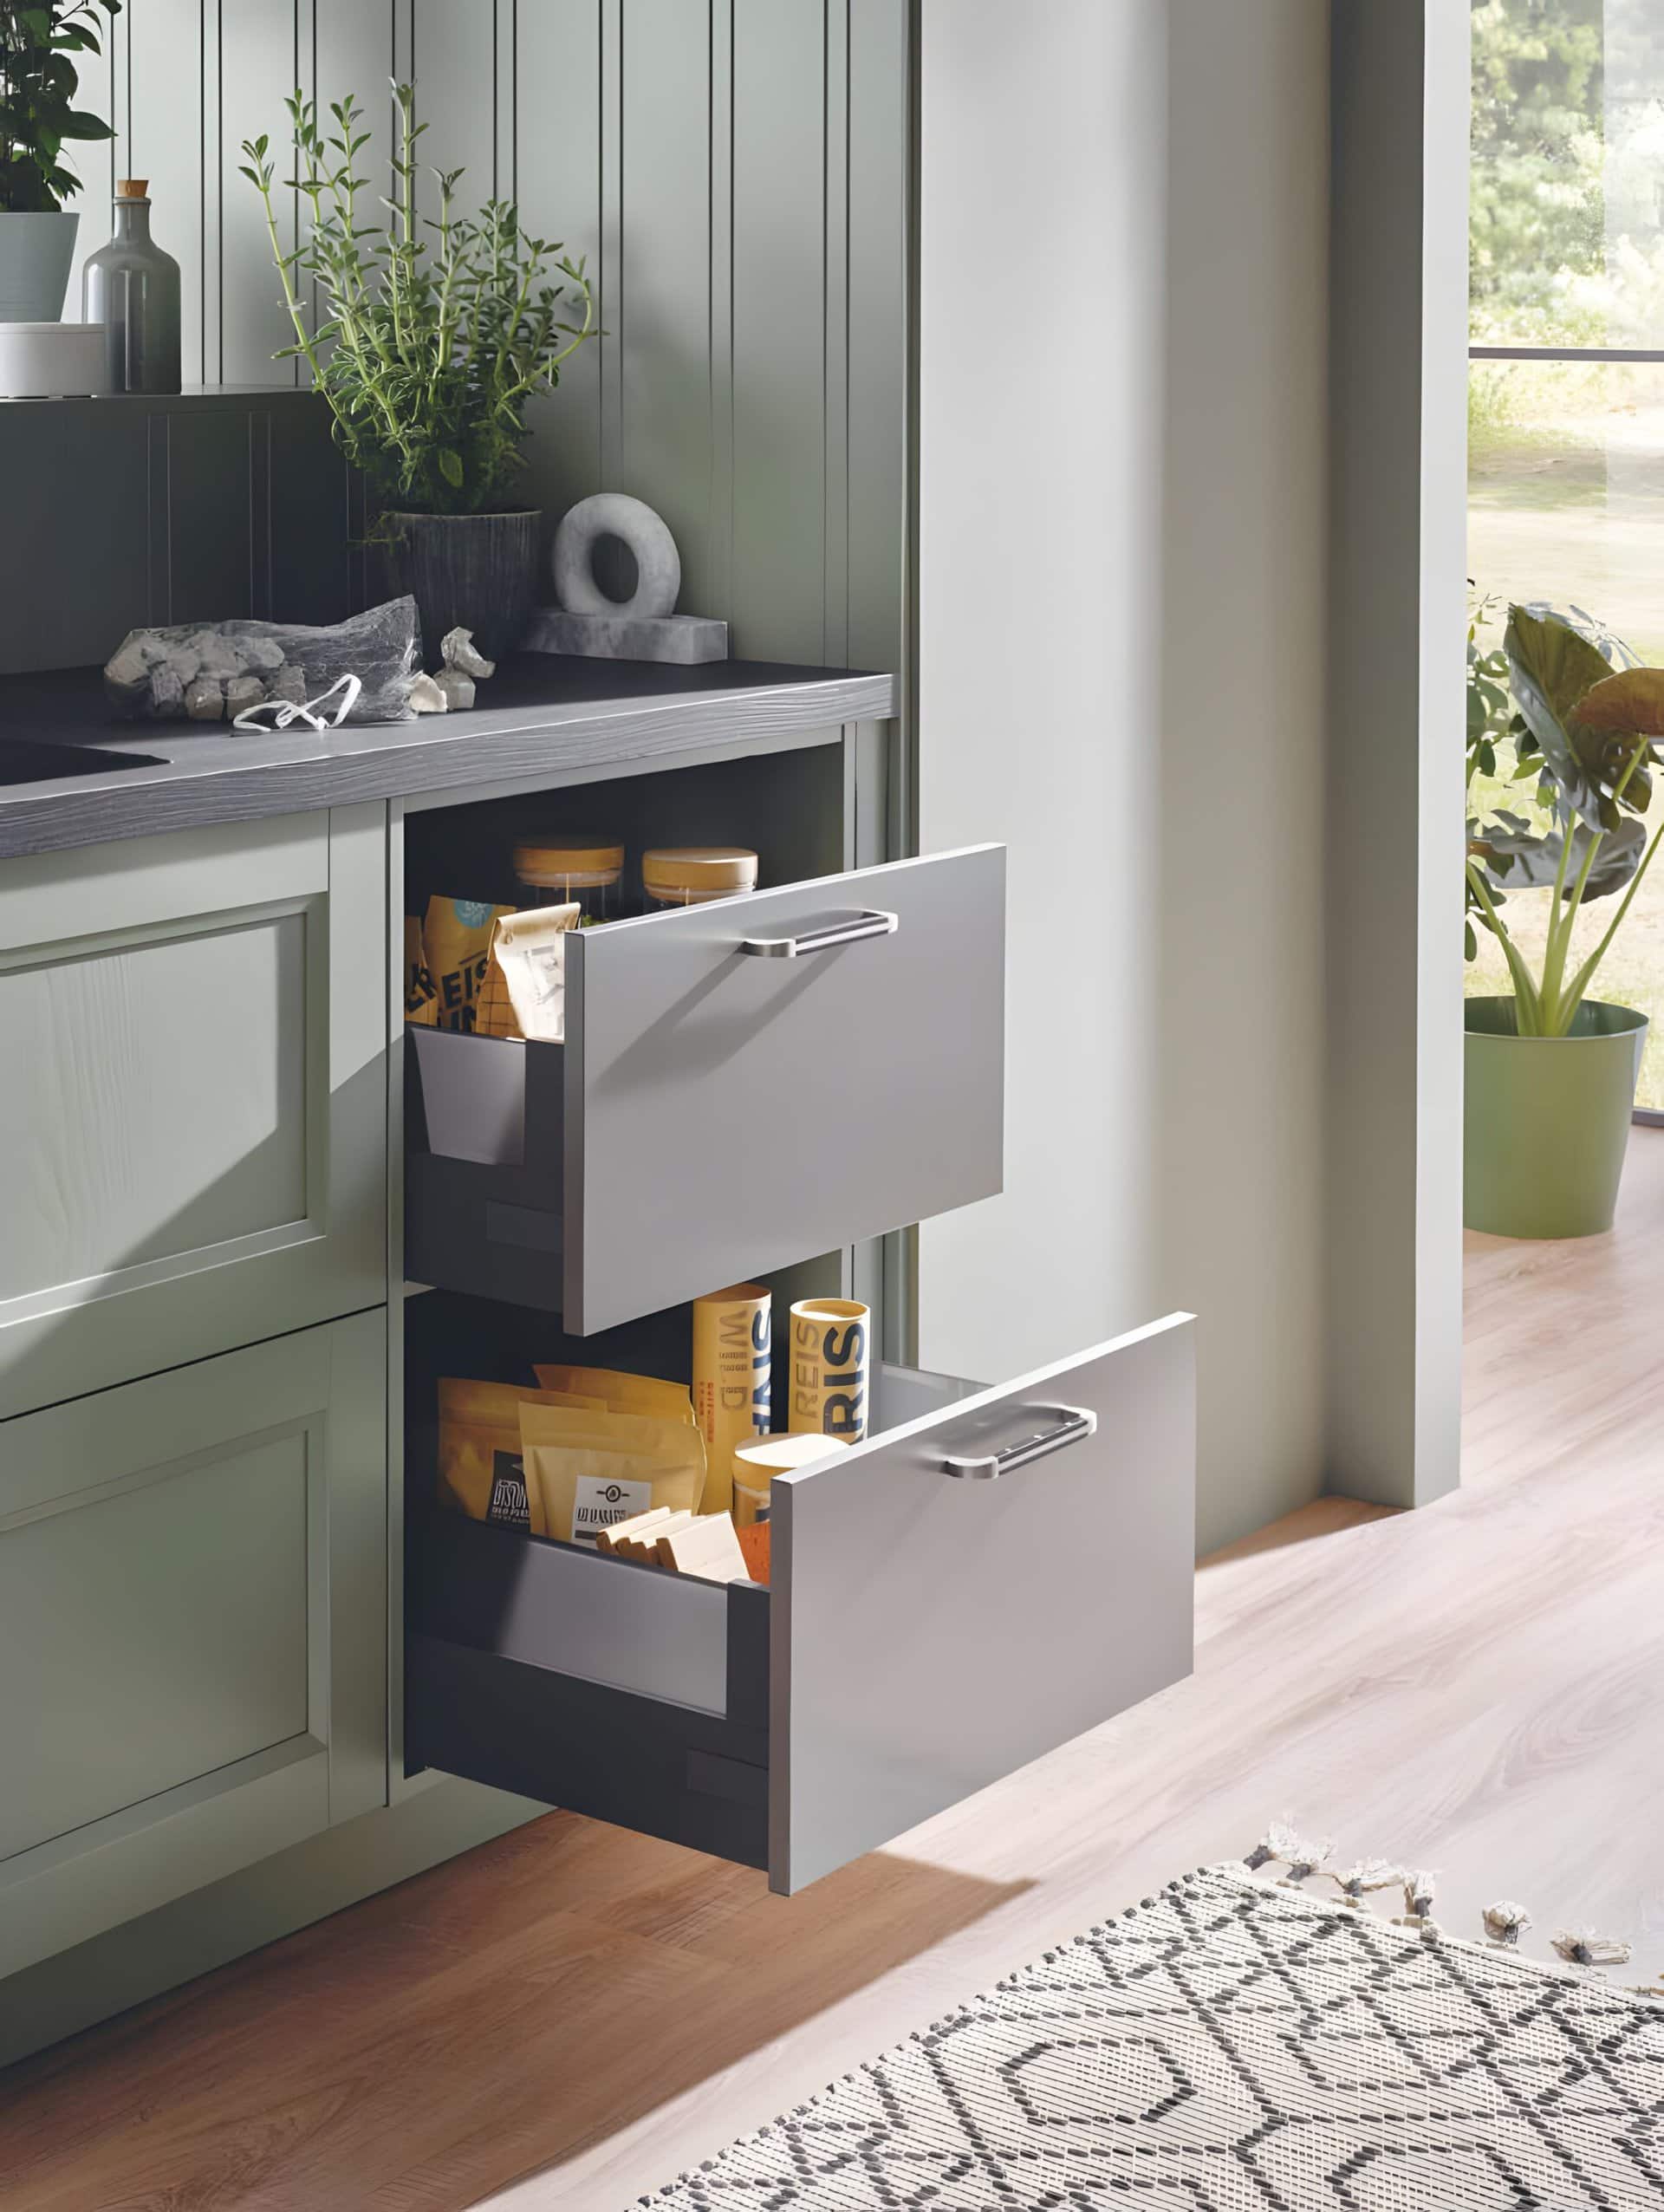
Open a well-made drawer and you feel it immediately. It glides out fully, takes weight without complaint, and eases itself shut without a slam. That motion is the most-used mechanical action in your whole home, and it is the one most likely to fail in a budget kitchen. This is where German engineering earns its reputation.
Bauformat fits full-extension soft-close runners and 3D-adjustable concealed hinges, and quality hardware of this kind is not shipped on faith. It is cycle-tested in the lab. Premium drawer runners are commonly certified to 50,000 opening and closing cycles, with some models also passing a 72-hour condensation test against rusting, while the most rigorously tested runners and hinges are rated to withstand 200,000 open-close cycles without damage (independent cabinet hardware testing, 2025). To put that in perspective, opening a drawer twenty times a day every day would take well over a quarter of a century to reach 200,000 cycles. The European standard EN 15570 covers exactly this kind of durability testing for cabinet hinges, rating them across performance levels based on how many cycles and how much load they survive (EN 15570 standard, 2025). The 3D-adjustable hinges add another layer of longevity, because a quick turn of a screw realigns a door that has shifted, so small movements get corrected instead of wearing the cabinet out.
Moisture and Humidity Resistance for the Coast
Vancouver kitchens live in a damp climate. Months of rain, ocean air, and the steam of everyday cooking keep indoor humidity high, and humidity is the slow enemy of cabinetry. It works into unsealed edges, swells unstable cores, corrodes cheap metal hardware, and lifts surfaces from the inside out. A cabinet that performs beautifully in a dry interior climate can quietly deteriorate in a coastal one if it was not built to resist moisture in the first place.
This is where the engineering choices above pay off all at once. Dimensionally stable carcass board resists swelling when the air is heavy. Continuously sealed edges deny moisture the entry point it needs. Hardware tested against condensation and corrosion keeps running smoothly in a steamy kitchen rather than seizing or rusting. None of that is a coincidence of climate. It is the same precision and material quality, applied to the one challenge that defines durability on the West Coast. For a home near the water, choosing cabinets engineered to handle damp is not a luxury detail. It is the difference between a kitchen that lasts a few years and one that lasts a few decades.
Made-to-Order Fit Avoids the Weak Points
Stock cabinets come in fixed sizes, so they almost never fill a real room exactly. The gaps get covered with filler strips, scribe pieces, and shims, and every one of those is a weak point. Filler strips flex and crack. Shimmed cabinets carry weight unevenly and work loose. Spaces that do not quite fit invite the awkward joints where moisture and movement do their damage.
Bauformat kitchens are made to order, measured and planned for your specific space and then installed by our local Vancouver team. Cabinets are built to the dimensions of your room rather than forced to fit it, which removes the filler-and-shim compromises before they can become problems. A kitchen that fits precisely sits flush against walls, carries its loads through the structure as designed, and presents no open seams for damp air to exploit. With three collections to choose from, Baulux, Bauformat with the widest range of options, and Burger for the best value, that made-to-order precision carries across the whole lineup. The fit is not just about looks. It removes the very places where durability tends to fail first.
The Long-Term Value of Buying Once
Durability is ultimately a money question, even if it does not feel like one at the showroom. A cabinet that needs replacing in 10 to 15 years costs you the full price again, plus the demolition, the disposal, and the disruption of living through a second renovation. Cabinets built to last 25 to 40 years skip that entire second round. Buying once, and buying well, is usually the cheaper path once you look past the first invoice.
There is resale value in it too. A quality kitchen refresh has consistently been one of the strongest returns in home improvement, with Zonda’s 2025 Cost vs. Value Report putting the minor kitchen remodel at a 113 percent return nationally, up from 96.1 percent the year before, the only interior project ranked in the top five (Zonda, 2025). A kitchen that still looks tight and runs smoothly after two decades protects that value rather than eroding it. Durable cabinets are not the expensive choice. Over the years you actually own them, they tend to be the economical one.
Frequently Asked Questions
How long do German kitchen cabinets actually last?
Well-built cabinets made from quality engineered board and properly installed commonly last 25 to 40 years or more, and industry sources put high-grade engineered carcass materials at 20 to 30 years on their own (cabinet industry data, 2025). German cabinets sit at the upper end of that range because of their precision construction, sealed edges, and cycle-tested hardware. Real-world lifespan also depends on installation quality and everyday care.
What makes the hardware so durable?
The runners and hinges are tested in the lab to survive decades of daily use. Premium drawer runners are commonly certified to 50,000 cycles, and the most rigorously tested hardware is rated to 200,000 open-close cycles without damage (independent cabinet hardware testing, 2025). The European EN 15570 standard formally rates cabinet hinge durability by cycle and load testing. The 3D-adjustable hinges also let small misalignments be corrected with a screwdriver, so the cabinet stays true instead of wearing out.
Do German cabinets really hold up in Vancouver’s damp climate?
That is one of their strengths. Dimensionally stable carcass board resists swelling, continuously sealed edges block moisture at the seams, and corrosion-tested hardware keeps running in steamy conditions. Some runners are also certified against a 72-hour condensation test. Those features matter most in a coastal climate, where high humidity is the main thing that shortens a kitchen’s life.
Is it worth paying more for durable cabinets?
For most homeowners, yes, once you look at the full timeline. Replacing cheaper cabinets in 10 to 15 years means paying twice and renovating twice. Cabinets built to last 25 to 40 years avoid that, and a quality kitchen also returns strong resale value, with the minor kitchen remodel returning 113 percent nationally in 2025 (Zonda, 2025).
Durability in a kitchen is never one feature. It is precision manufacturing, stable materials, sealed edges, tested hardware, and a made-to-order fit all working together, with each one covering for the daily stresses the others might miss. That is what built to last really means, and for a Metro Vancouver home facing years of coastal damp, it is what separates a kitchen you replace from one you simply keep.
Explore more from Bauformat BC
- Your German Kitchen, Step by Step: From First Sketch to Installation
- German Kitchen Design on a Budget: Your 2026 Options
- Unravelling the Secrets Elegance of Premium Custom Kitchen Design
German cabinetry, planned and built for Metro Vancouver
The kitchen is one of the highest-return rooms in a home: the 2025 Cost vs. Value Report found a minor kitchen remodel recoups roughly 96% of its cost at resale. Choosing cabinetry that lasts is central to that return, which is where German engineering earns its place. Every Bauformat kitchen is manufactured in Germany, then measured, planned, and installed by our Vancouver team, built to fit your room to the millimetre.
See the Baulux, Bauformat, and Burger collections in person at 1410 Marine Dr Unit 205, North Vancouver, learn more about the manufacturer at bauformat.de.
Book a 30-minute consultation with our Metro Vancouver kitchen designers to plan a kitchen built to last.
Few decisions shape the daily feel of a kitchen more than the countertop. It is the surface you wipe down every morning, the spot where groceries land, where dough gets rolled and homework gets done. In a region where many of us cook, gather, and work from the same open-plan room, that surface earns its keep. Quartz has become the answer a growing number of Metro Vancouver homeowners reach for, and the reasons go well beyond looks.
Engineered quartz now leads the countertop conversation. Industry tracking shows quartz has overtaken granite as the surface of choice, with quartz at roughly 36 percent of the market against granite’s 24 percent by 2026, a reversal from a decade earlier when granite led (SlabWise, 2026). This guide walks through what quartz actually is, where it shines, where it asks for care, and how a quartz top works alongside German-engineered cabinetry to finish a room.
Key Takeaways
- Quartz is an engineered stone, roughly 90 to 95 percent ground natural quartz bound with resins and pigments, which makes it non-porous and consistent.
- Because it is non-porous, quartz never needs sealing and resists stains, scratches, and bacteria better than most natural stone.
- The look range is wide: convincing marble-style veining, calm solid colours, and both matte and polished finishes.
- Quartz handles heat well but is not heatproof, so trivets remain a good habit.
- Installed cost in Canada generally runs from about 90 to 200 dollars per square foot depending on colour, thickness, and edge detail (Bhumi Calculator, 2026).
- A quartz top and well-built cabinetry are a system; planning them together gives the cleanest result.
What Quartz Countertops Actually Are
Quartz countertops are an engineered surface, and that word matters. Natural quartz is one of the hardest minerals found in the earth. To make a countertop slab, manufacturers grind that quartz down, then blend it with a small percentage of resins, polymers, and pigments under intense heat and pressure. The result is typically around 90 to 95 percent stone by content, formed into a dense, uniform slab.
This is the key difference from natural stone like granite or marble, which is quarried in solid blocks and cut into slabs as nature made them. A granite slab is a snapshot of geology, beautiful and unpredictable. A quartz slab is designed. Because the colour and pattern are introduced during manufacturing, you get tight consistency from one slab to the next, and a sample in a showroom genuinely reflects what arrives in your kitchen. For anyone matching a long run of counter or a kitchen island to a perimeter, that predictability removes a lot of guesswork.
The engineering also closes off the tiny pores that natural stone carries. That single trait, being non-porous, drives most of the practical benefits below.
The Benefits That Win People Over
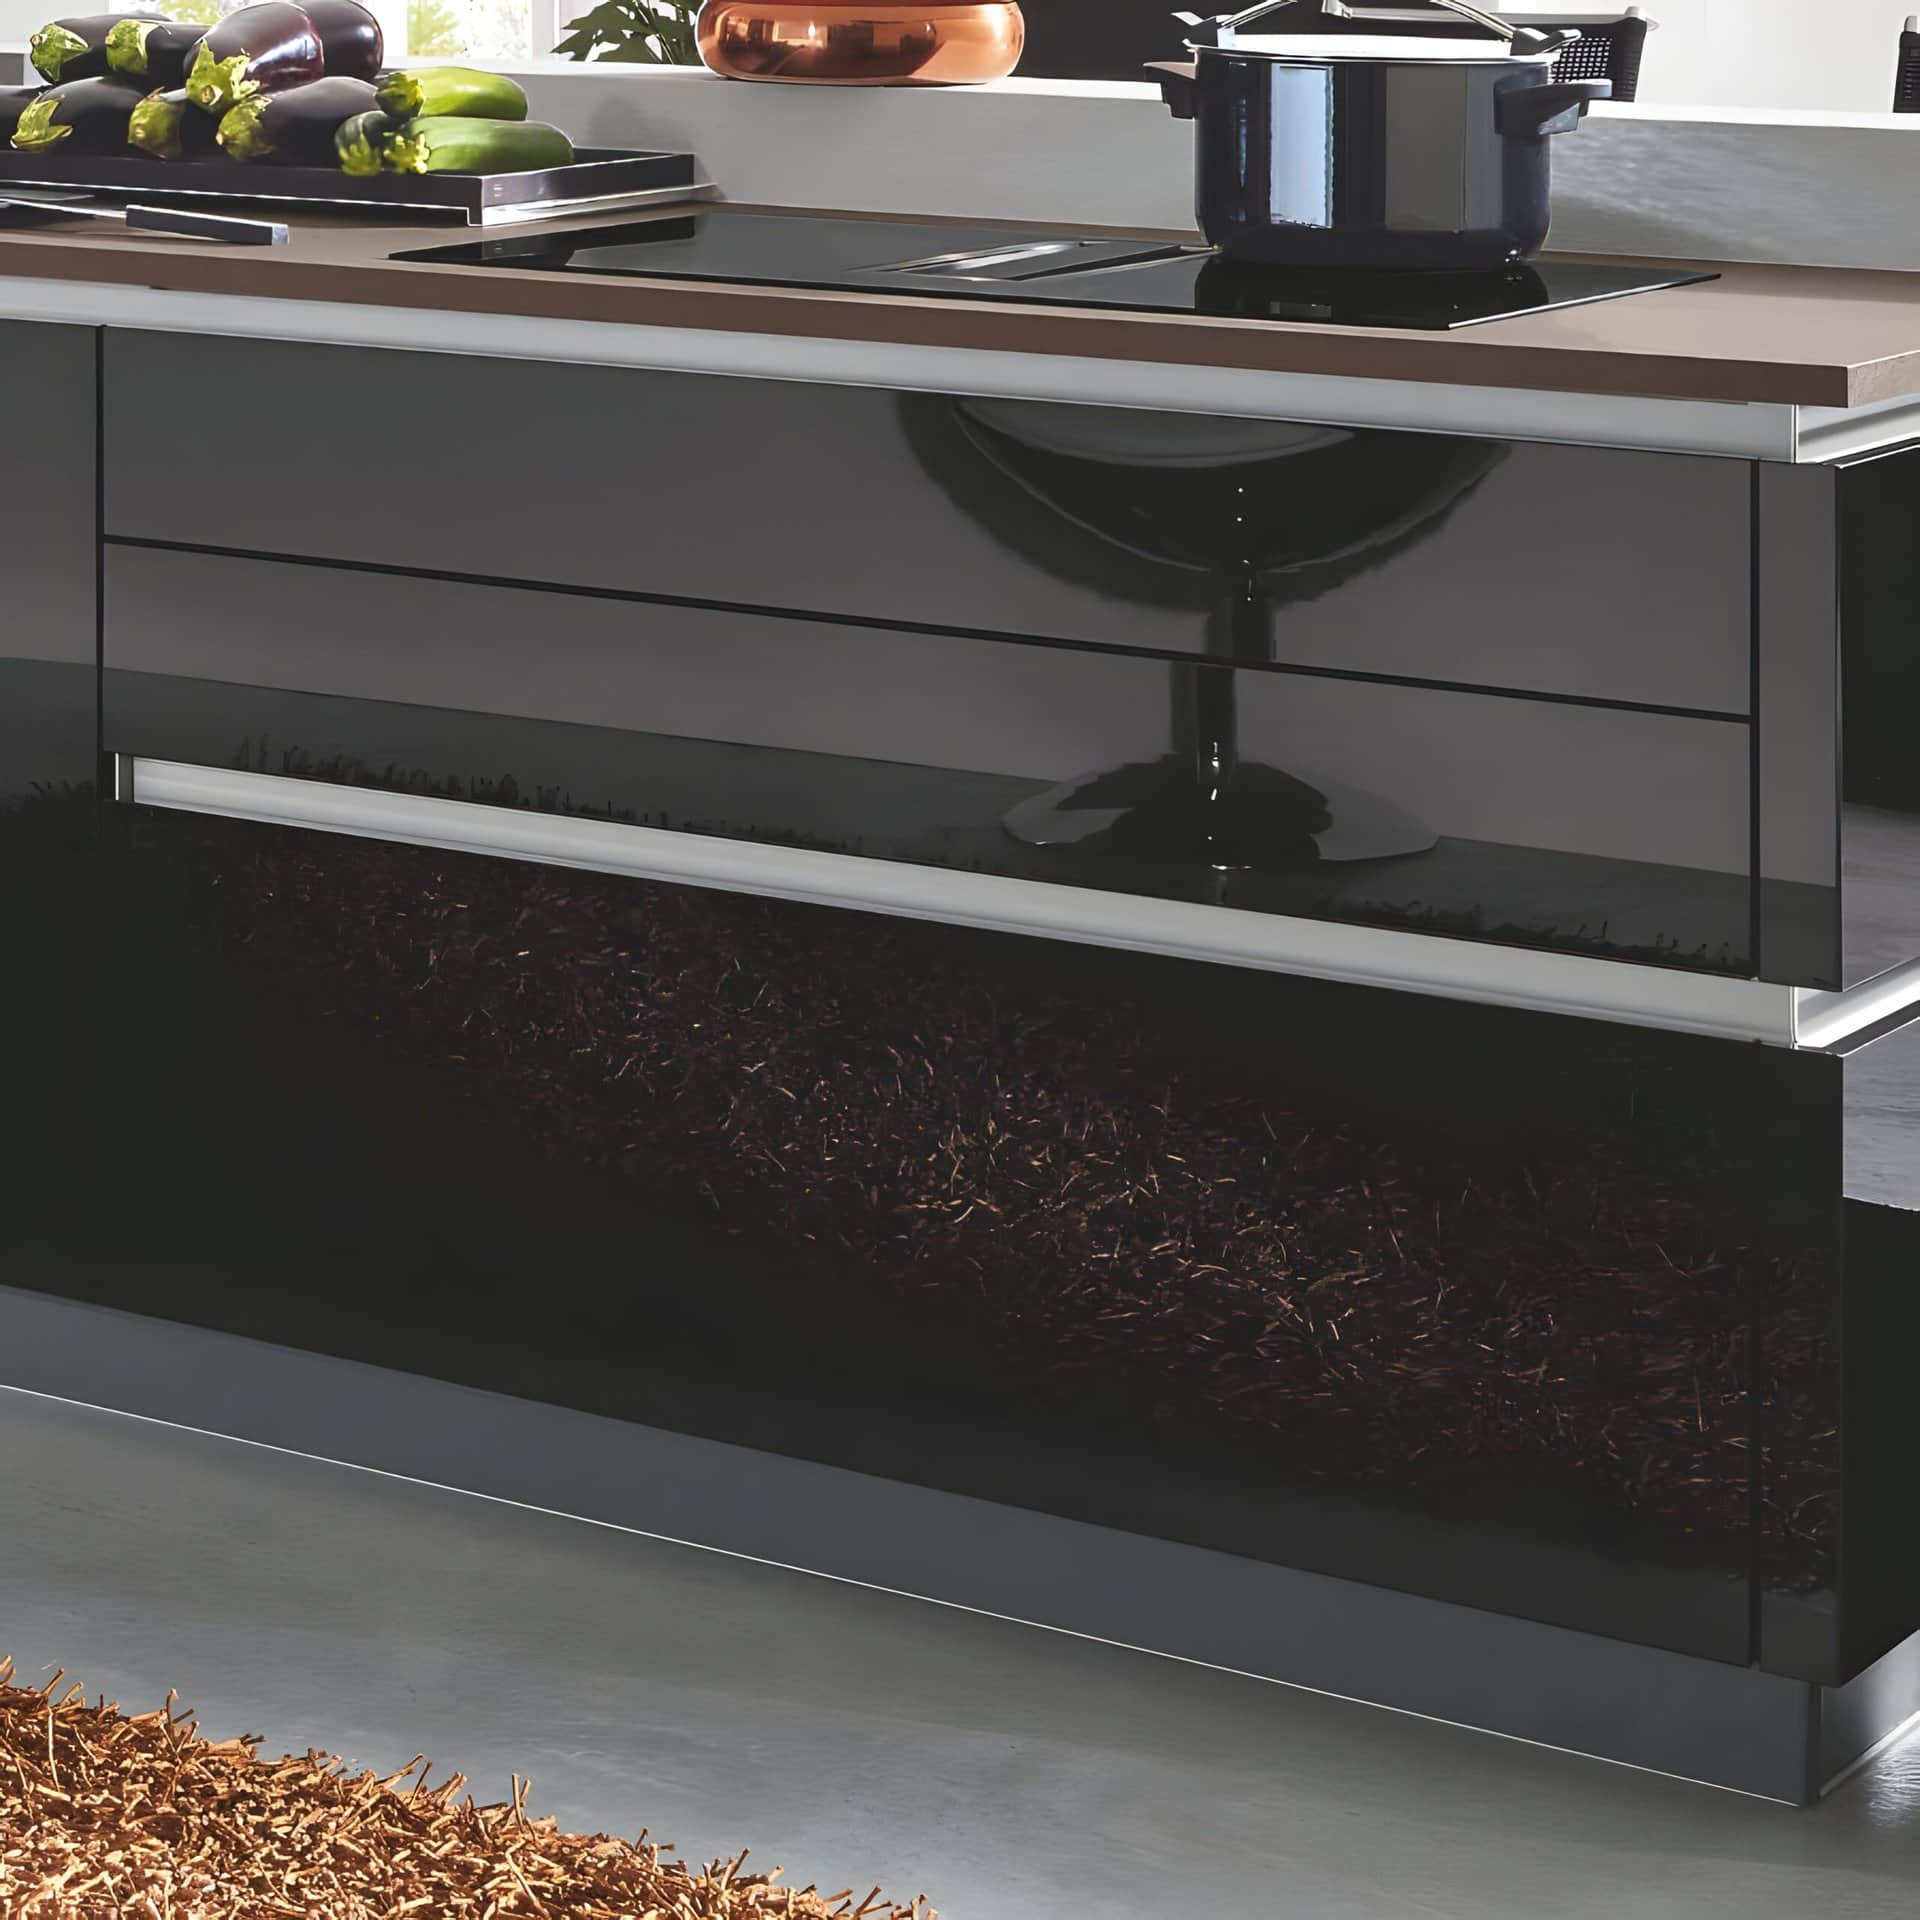
Start with maintenance, because it is where quartz separates itself. Natural stone needs periodic sealing to keep liquids from soaking in. Quartz never does. The surface does not absorb water, wine, oil, or coffee, so a spill sits on top until you wipe it away rather than working its way into the stone. For a busy household, that is one less chore on the calendar and far less worry about the red-wine ring or the turmeric splash.
Non-porous also means hygienic. With nowhere for moisture and food residue to seep, bacteria have little to cling to, which is reassuring on a food-prep surface. Quartz resists stains and shrugs off everyday scratches thanks to its hardness, though no countertop is truly scratch-proof, so a cutting board is still wise.
Then there is the colour and pattern range, which is broader than natural stone can offer. Because the look is engineered, you can choose anything from a quiet warm white to deep charcoal to a dramatic veined pattern, all with reliable consistency. This combination of durability, low upkeep, and design freedom is exactly why surveys show quartz sitting as the first choice for the majority of buyers shopping for new countertops (SlabWise, 2026).
Quartz Compared With Granite, Marble, and Other Surfaces
Against granite, the trade is character for control. Granite gives you a one-of-a-kind natural slab and excellent heat tolerance, but it needs sealing and its pattern can vary from the sample you fell for. Quartz gives you sealing-free maintenance and dependable consistency, at the cost of that wild natural variation some people love. Both are hard-wearing. The choice usually comes down to whether you want nature’s randomness or a designed, repeatable look.
Against marble, the contrast is sharper. Marble is stunning and prized for its soft veining, but it is porous, relatively soft, and reactive to acids, so lemon juice or vinegar can etch it and spills can stain. This is why so many people who love the marble aesthetic choose a marble-look quartz instead: they get the veined elegance without the babysitting. Marble rewards owners who treat it as a living surface that develops a patina; quartz suits those who want the look to stay put.
Compared with solid surface acrylic, laminate, or butcher block, quartz generally outlasts and outperforms on durability and stain resistance, which is part of why kitchens, the largest application by far, keep driving quartz demand (Grand View Research, 2025). Each material has its place, but for a hard-working kitchen counter, quartz tends to be the balanced pick.
The Look Options: Veining, Colour, and Finish
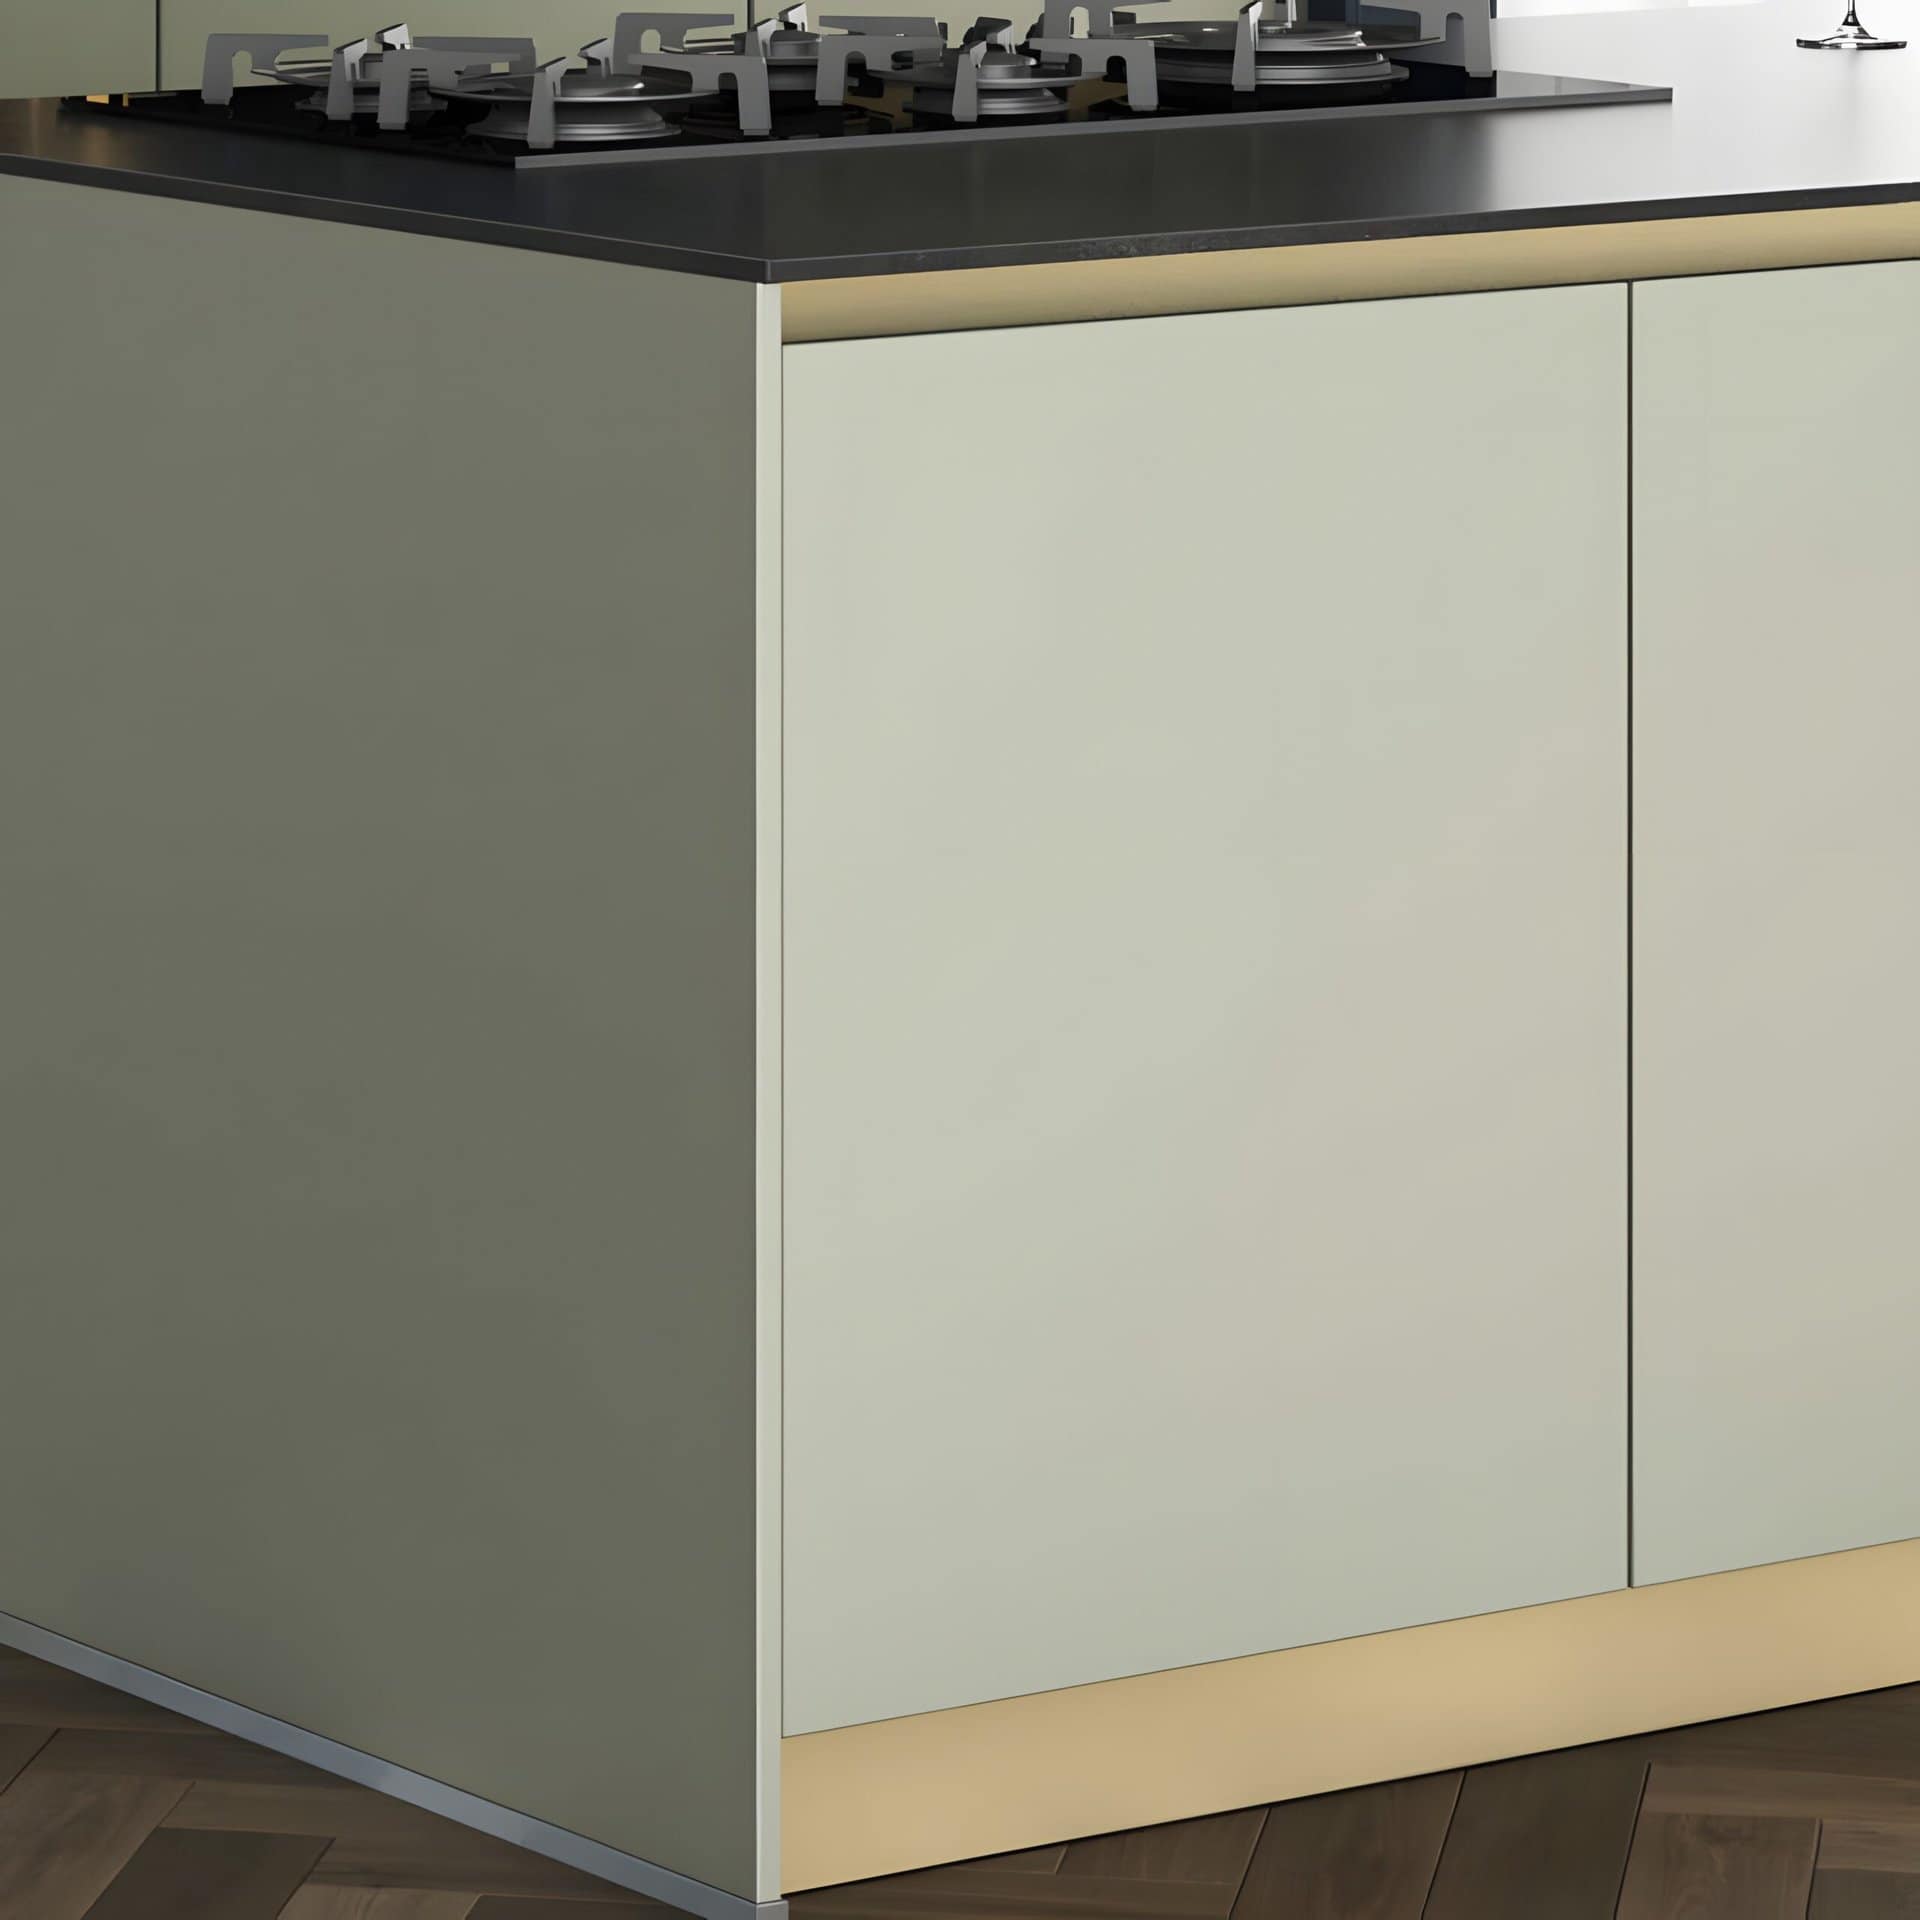
Choosing quartz is really two decisions: the pattern and the finish. On pattern, the most popular direction right now is marble-look veining, where soft grey or warm gold veins drift across a pale background. Modern manufacturing has made these veins run through the depth of the slab rather than sitting only on the surface, so an exposed edge or a mitred corner reads as natural. If you want something calmer, solid and near-solid colours, from crisp whites to greiges to inky blacks, give a clean, architectural backdrop that lets cabinetry and hardware take the lead.
On finish, the main choice is polished versus matte. A polished surface has a light reflective sheen that brightens a room, a real advantage during the long grey stretches of a Vancouver winter when natural light is scarce. A matte or honed finish reads softer and more contemporary, hides fingerprints and water spots well, and has been gaining ground in current design. Many showrooms will let you see the same colour in both finishes side by side, which is the easiest way to feel the difference. There are also lightly textured finishes that add a tactile, stone-like quality if you want to move further from the high-gloss look.
Edges, Waterfall Ends, and Detailing
The edge profile is a small detail that changes the whole character of a counter. A square or eased edge with a crisp top line suits clean, modern kitchens and pairs naturally with flat-panel cabinet doors. Softer profiles, where the edge is rounded or chamfered, feel a touch more traditional and are gentle on hips and elbows in a tight galley. A thicker, built-up edge gives a substantial, anchored look, while a thin profile feels light and current.
The waterfall end has become a signature move, especially on islands. Instead of stopping the countertop at the cabinet and showing a side panel, the quartz turns ninety degrees and runs down to the floor, so the slab appears to pour over the edge. With a veined quartz, a well-executed waterfall carries the pattern down the side in a continuous flow, which is striking in an open-plan space where the island is on full view from the living room. It uses more material and careful fabrication, so it adds cost, but as a focal point it is hard to beat. Mitred edges, integrated drainboards, and matching backsplashes are other ways quartz can be detailed to feel custom rather than off the shelf.
Heat, Care, and Living With Quartz
Quartz is low-maintenance, not no-maintenance, and one honest caveat is heat. The natural quartz itself is highly heat tolerant, but the resins that bind it are not. A pot straight off the burner or a baking sheet out of the oven can scorch or discolour the surface or cause a thermal shock crack. The fix is simple: keep trivets and hot pads within reach and use them every time. It is the single habit that protects the surface for decades.
Daily care could not be easier. Warm water, a little mild dish soap, and a soft cloth handle almost everything, and because the surface is non-porous there is no sealing schedule to remember. Avoid harsh abrasive pads and strong chemicals like oven cleaner or bleach-heavy products, which can dull the finish over time. Wipe acidic spills when you see them as good practice, even though quartz resists them far better than marble. Use a cutting board to protect both your knives and the polish. Treated this way, a quartz counter looks the same in year fifteen as it did on install day, which is a large part of its appeal in a long-term family home.
Pairing Quartz With Cabinetry, and What It Costs
A countertop never works alone. It sits on cabinetry, meets a backsplash, and frames the hardware, and the most satisfying kitchens are the ones where those elements were planned as a whole. This is where the surface and the cabinets become a true system. A veined marble-look quartz brings movement and warmth, so it tends to pair beautifully with calm, handleless cabinet fronts that let the stone speak. A solid, quiet quartz does the opposite, giving you room to choose expressive wood-grain or richly coloured doors without the room feeling busy.
German-engineered Bauformat cabinetry is built to make that pairing clean. The collections give you range to match almost any quartz direction: Baulux for a refined modern look, Bauformat for the widest choice of fronts and finishes, and Burger for the best value without giving up the engineering. The mechanics matter here too, because full-extension soft-close runners let drawers glide fully open and close quietly under a heavy stone top, and 3D-adjustable concealed hinges allow the doors to be dialled in so the lines under your countertop stay even and precise. Made in Germany since 1917 in Lohne, the cabinets are measured, planned, and installed by the local Vancouver team, so the fit between cabinet and counter is handled on the ground rather than left to chance.
On budget, quartz sits in the mid-to-upper range and the spread is wide. In Canada, installed quartz generally runs from roughly 90 to 200 dollars per square foot, depending on the colour, the slab thickness, and the complexity of edges and details like a waterfall (Bhumi Calculator, 2026). It is an investment, but kitchens are also one of the strongest places to put renovation dollars: a well-executed kitchen update typically returns in the range of 60 to 80 percent of its cost at resale and ranks among the top home improvements for return in Canada (RE/MAX Canada, 2025). In a Metro Vancouver market where buyers scrutinize kitchens closely, a durable quartz surface paired with precise cabinetry reads as quality that holds.
Frequently Asked Questions
Do quartz countertops ever need to be sealed?
No. Because quartz is engineered to be non-porous, it does not absorb liquid the way natural stone does, so there is no sealing step at install and none to repeat over the years. This is one of the main practical reasons people choose it over granite or marble. Routine cleaning with warm water and mild soap is all the upkeep the surface asks for.
Can I put a hot pan directly on quartz?
It is best not to. The natural quartz withstands heat well, but the resins binding the slab can scorch, discolour, or crack under sudden high heat from a pot or a baking sheet. Always set hot cookware on a trivet or pad. It is a small habit that keeps the surface looking new for the long run.
Is quartz a good choice for a busy family kitchen in Vancouver?
It is one of the best. The non-porous surface resists stains and bacteria, holds up to daily wear, and needs no sealing, which suits homes where the kitchen is in constant use. Quartz now holds the largest share of new countertop choices, driven largely by kitchen demand (SlabWise, 2026). Paired with soft-close, fully adjustable cabinetry, it makes for a kitchen that stays calm and tidy under real life.
Will a quartz countertop look the same as the showroom sample?
Closely, yes, and that is a quartz advantage. Because the pattern is engineered rather than quarried, slabs are highly consistent, so the sample you choose reflects what gets installed. Natural stone can vary noticeably from a small sample to a full slab; quartz removes most of that uncertainty, which makes planning a coordinated kitchen far easier.
A quartz countertop is a long-term decision that quietly pays off every single day, in the wipe that takes seconds, the spill that never stains, and the surface that still looks right years on. Choose the pattern and finish that suit how your light falls and how your household lives, plan the edge and any waterfall with intent, and treat it to the few simple habits it asks for. Paired with cabinetry that was measured and built to meet it precisely, a quartz top is the surface that ties a Metro Vancouver kitchen together and keeps it looking that way.
Explore more from Bauformat BC
- Fresh Takes: The Five Hottest Innovations in Kitchen Backsplash Design
- Unveiling the Secrets of Kitchen Sinks: an Indispensable Guide
- Unearth the Secrets of Bauformat’s Heat-Defying Kitchen Countertops
German cabinetry, planned and built for Metro Vancouver
The kitchen is one of the highest-return rooms in a home: the 2025 Cost vs. Value Report found a minor kitchen remodel recoups roughly 96% of its cost at resale. Choosing cabinetry that lasts is central to that return, which is where German engineering earns its place. Every Bauformat kitchen is manufactured in Germany, then measured, planned, and installed by our Vancouver team, built to fit your room to the millimetre.
See the Baulux, Bauformat, and Burger collections in person at 1410 Marine Dr Unit 205, North Vancouver, learn more about the manufacturer at bauformat.de.
Book a 30-minute consultation with our Metro Vancouver kitchen designers to plan a kitchen built to last.
Walk through any Metro Vancouver kitchen built fifteen years ago and you can read the era in the cabinetry: raised-panel doors, decorative corbels, glossy thermofoil, a wall of upper cabinets with ornate crown moulding on top. It looked current then. Today it reads as dated, and the reason is not just colour. The cabinets themselves, how they open, what they are made of, how they are built, have changed at every level.
That arc is the real story of kitchen cabinet trends 2026. We have moved from busy and decorative to calm and tactile, from doors you tug to drawers and push-to-open fronts, from disposable flat-pack to made-to-order furniture meant to last decades. Here is how kitchens got here, and what defines a current Vancouver kitchen now.
Key Takeaways
- Flat and handleless won. Slab doors lead the NKBA 2026 report at 69 percent of designers naming them a growing style, and they are the base of every handleless kitchen.
- Wood is back. 59 percent of design pros call wood grain a rising trend, and wood overtook white for the first time in a decade, with white oak the top species.
- Drawers replaced doors below the counter, bringing storage to eye level and ending the crouch-and-dig.
- Matte beat gloss, and two-tone layouts (light uppers, deeper lowers and islands) are now mainstream.
- Focused renovations pay best: a minor kitchen remodel returns about 113 percent at resale nationally, far ahead of full gut jobs.
From Ornate to Clean and Handleless
The biggest shift is also the quietest one. For years a kitchen signalled quality through ornament: layered mouldings, applied trim, fluted columns flanking the range, glass-front uppers with mullions. The look borrowed from traditional furniture, and it carried a lot of visual noise. The cabinet front was something to decorate.
In 2026 the front is something to simplify. Flat, full-overlay slab doors top the NKBA and KBIS 2026 Kitchen Trends Report at 69 percent of designers naming them a growing style, the single highest-ranked door trend in the study (NKBA, 2026). The slab is also the foundation of the handleless kitchen, where there is no hardware to interrupt the run of cabinetry. Instead you get a recessed grip channel along the top edge, an integrated J-pull, or true push-to-open mechanics behind the door.
This is where German engineering earns its place. Handleless only works when the gaps are dead even and the doors swing back to exactly where they started, every time. Our Baulux collection is built around this clean, handleless language, and the 3D-adjustable concealed hinges let the local Vancouver team fine-tune each door on three axes after install, so the lines stay true even as a heritage Mount Pleasant home settles through the seasons.

The Return of Wood and Warmth
For most of the last decade the default answer to what colour cabinets was white. That era has closed. In the NKBA 2026 report, 59 percent of design professionals identified wood grain as a growing trend, and wood overtook white for the first time in ten years, with white oak the most-specified species at 51 percent (NKBA, 2026). Warm neutrals, the mushrooms, taupes and greiges, now dominate over stark white.
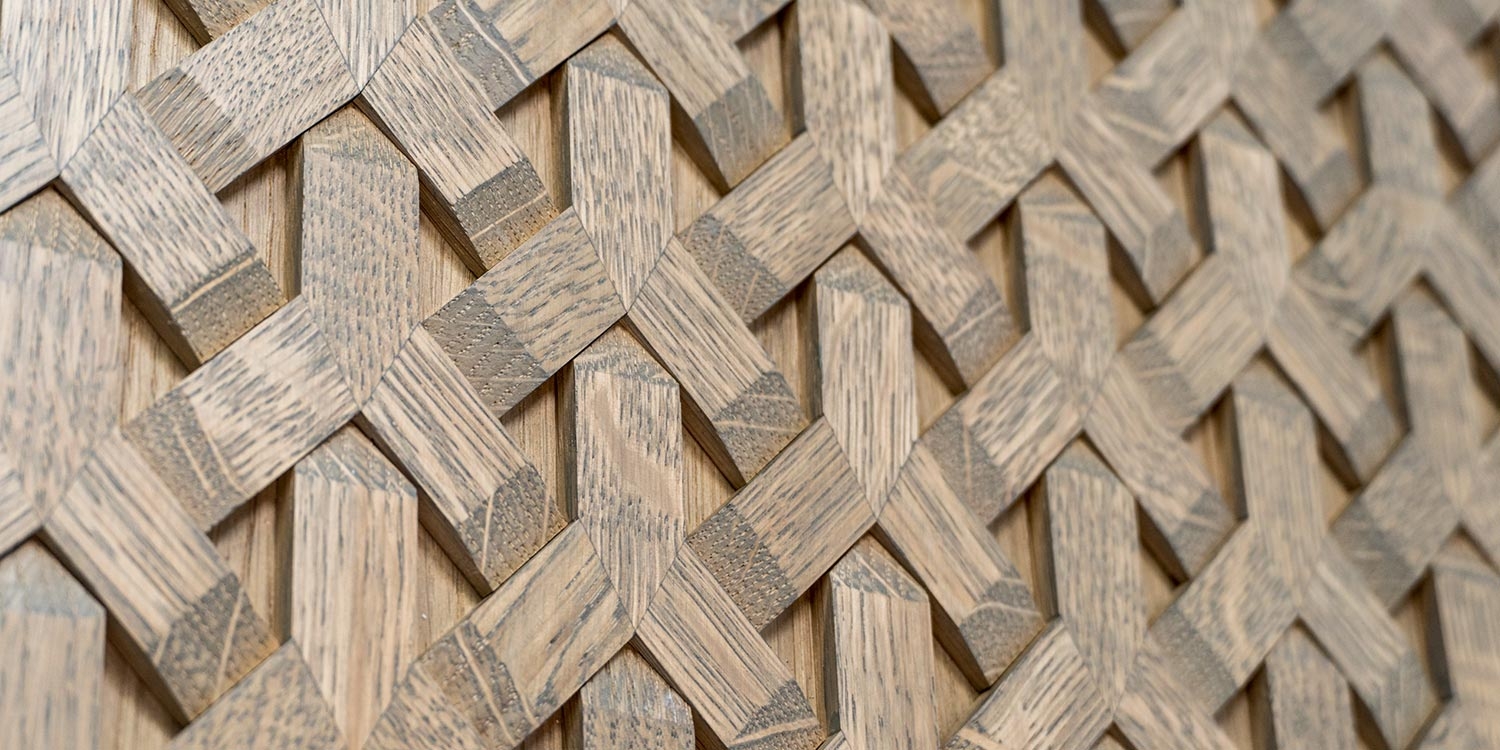
The reason is partly fatigue and partly feel. An all-white kitchen can read as clinical, and after years of them homeowners want a room that feels grounded. Wood grain brings that warmth without sacrificing the clean lines, because the grain itself becomes the only decoration the door needs. Reeded and fluted fronts have arrived for the same reason: texture you can run your hand across, doing the work that applied ornament used to do.
This suits Metro Vancouver well. So many homes here pair cabinetry with cedar, fir and big west-facing windows, and a warm wood-grain front sits more naturally in that light than a flat white box. The Bauformat collection carries the widest choice for exactly this reason, with authentic wood-grain finishes alongside shaker and handleless fronts, so a Kitsilano character home and a Brentwood tower condo can each find the right register.
Drawers and Smarter Storage
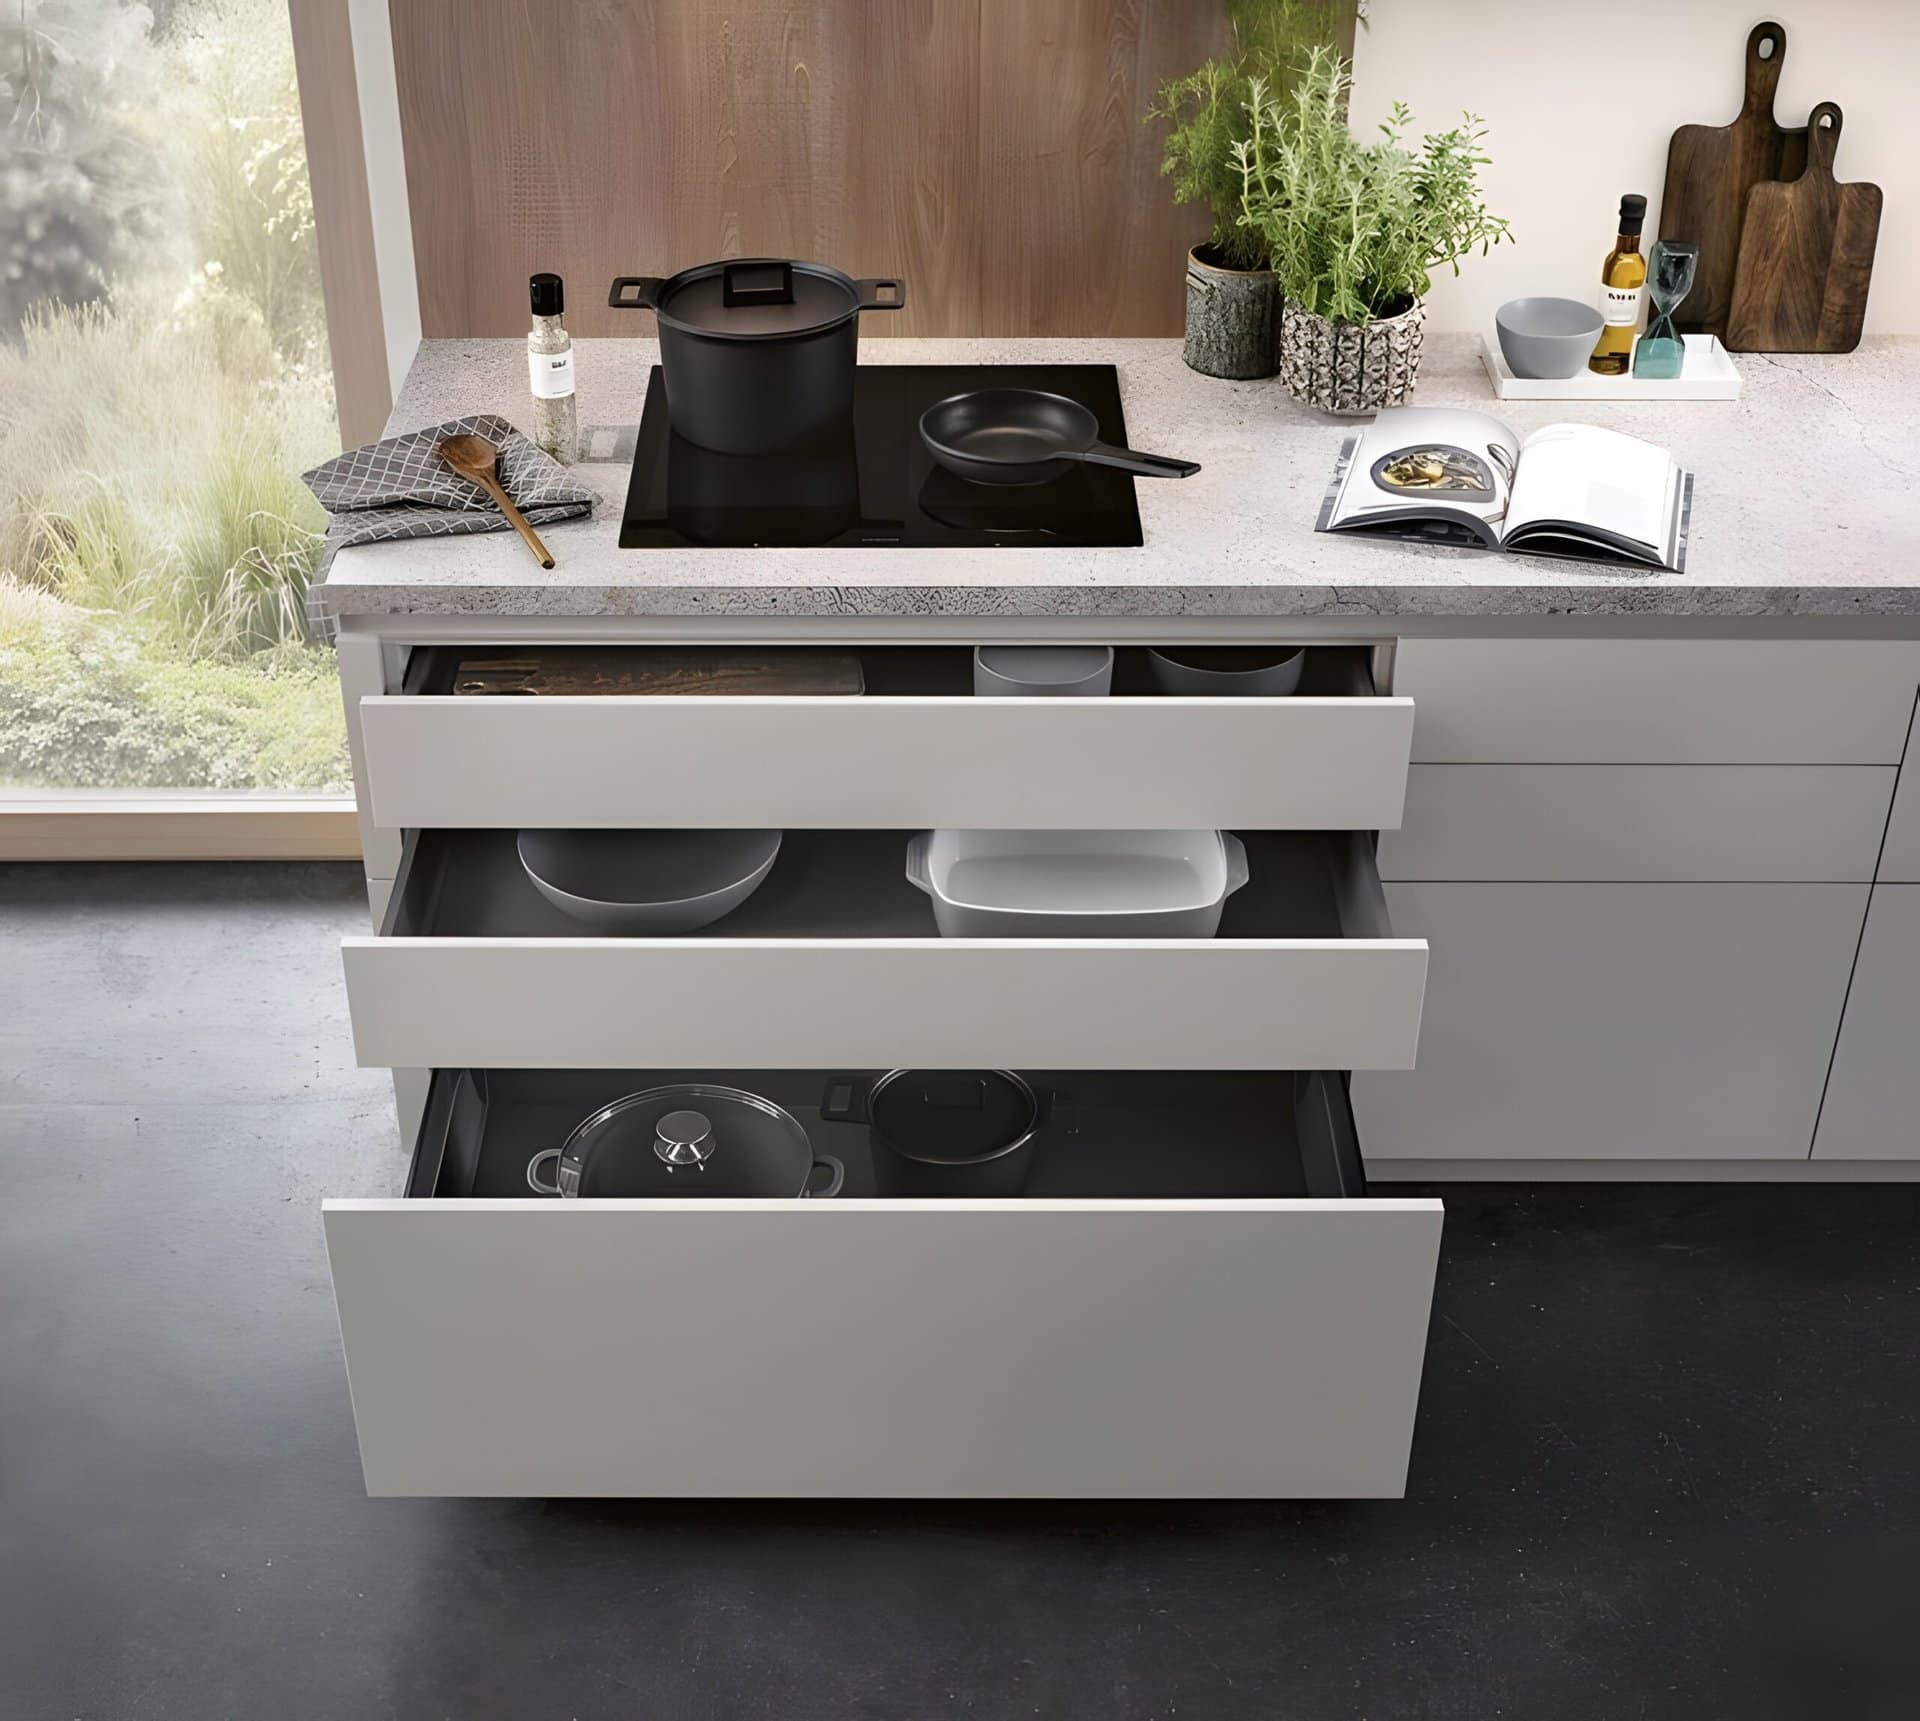
Open a kitchen built in 2005 and the lower cabinets are mostly doors: a hinged door, a fixed shelf, and a dark cavity behind it where the stockpots go to be forgotten. You crouch, you reach, you dig. The single biggest functional change in modern kitchens is that those base doors have been replaced by deep, full-extension drawers.
The logic is simple once you live with it. A drawer brings the entire contents out to you and up to eye level, so the back of the cabinet is as usable as the front. Pots, pans, dry goods and even dishes now live in graduated drawer banks. Around them sits a layer of interior intelligence: cutlery and utensil dividers, pull-out organizers for the corners that used to be dead space, and tall pantry pull-outs that use vertical room a swing door cannot.
Bauformat builds this in as standard rather than as an upsell. Full-extension soft-close runners mean every drawer glides fully open and closes itself without a slam, and the smart interior storage is planned around how you actually cook. In a compact Yaletown or Coal Harbour condo, where every centimetre of a galley kitchen counts, that planned interior is often the difference between a kitchen that works and one that fights you.

Integrated and Concealed Appliances
The older kitchen wore its appliances proudly: stainless faces lined up across the room, a microwave bulging from the upper run, small appliances colonizing the counter. The current direction is the opposite. Appliances are being concealed behind cabinet panels so the eye reads one continuous, calm surface.
Panel-ready fridges and dishwashers disappear behind matching fronts. The microwave moves into a drawer or a tall cabinet. And the appliance garage has been reinvented: instead of the old roll-top that jammed, 2026 favours tambour doors and lift-up fronts that tuck the kettle, toaster and coffee machine out of sight, keeping the counter clear while leaving everything within reach. Industry coverage of the NKBA 2026 findings points to integrated panel-ready appliances, slab backsplashes and hidden storage doors working together to create one cohesive space (Kitchen and Bath Business, 2026).
Concealment is unforgiving of sloppy fabrication. A panel-ready front only reads as built-in if it lines up perfectly with the cabinet doors beside it, which again comes back to precise carcass construction and adjustable hinges. This is the kind of detail that gets settled when a kitchen is measured and planned on site by the team that will install it, rather than ordered blind from a catalogue.
Matte Over Gloss, and Two-Tone
High-gloss lacquer was the shorthand for a modern kitchen not long ago: mirror-bright doors that bounced light around the room. In 2026 that look has cooled, literally and figuratively. Matte and satin finishes now read as the modern choice, and gloss has started to look of its moment. Matte hides fingerprints and small scuffs better, which matters more than ever in a handleless kitchen where you are touching the door faces to open them.
Alongside the finish shift came a colour structure: two-tone cabinetry. Rather than a single finish wrapping the whole room, designers now pair lighter uppers (cream, warm white, soft greige) with a deeper, grounding tone below, on the lower cabinets, the island, or both. Olive, charcoal and walnut are common partners. Industry reporting on the 2026 trends notes colour migrating onto the perimeter cabinets, not just the island, with many kitchens now layering two, three or more finishes in one room (Business of Home, 2026).
This is where the Baulux range fits the moment, with its ultra-matte, ceramic and glass fronts built for exactly this restrained, tactile look, and the breadth of the Bauformat line makes a considered two-tone scheme straightforward rather than a special order. For a budget-conscious renovation, the Burger collection delivers the same clean matte direction at the best value, which keeps a current-looking kitchen within reach for more Metro Vancouver households.
Durability Over Disposable
There is a deeper trend underneath all of these, and it is about how long a kitchen is meant to last. The flat-pack era trained people to think of cabinets as semi-disposable, fine for five or ten years, then replaced. The current direction treats cabinetry as built-in furniture: made to order, engineered to take daily use, and expected to outlast several rounds of paint and decor.
The renovation maths supports it. A minor kitchen remodel returns roughly 113 percent of its cost at resale nationally, the highest-performing interior renovation, while full gut jobs recoup closer to 50 to 60 percent (Kitchen Cabinet Kings 2026 ROI Report, citing Cost vs. Value data). The takeaway is that quality cabinetry, soft-close runners that survive tens of thousands of cycles, hinges you can readjust instead of replace, carcasses that stay square, is where the value sits, not in tearing everything to the studs.
That is the through-line for Bauformat. Made in Germany since 1917 in Lohne, then measured, planned and installed by the local Vancouver team, these are kitchens designed to be lived in hard and to still close cleanly a decade later. In a market where Metro Vancouver homeowners hold and improve rather than flip, cabinetry built to last is less a luxury than a sensible bet.
Frequently Asked Questions
Are handleless kitchens just a passing trend?
The evidence points the other way. Slab fronts, the basis of every handleless kitchen, lead the NKBA 2026 report at 69 percent of designers naming them a growing style. Handleless is less a fad than the logical end of a long move toward cleaner cabinetry, and the grip channels and push-to-open mechanics behind it are mature, proven hardware rather than something experimental.
Is wood grain replacing white cabinets entirely?
Not entirely, but the balance has shifted decisively. Wood overtook white for the first time in a decade in the NKBA 2026 findings, with white oak the leading species. White is still used, often as the lighter half of a two-tone scheme, but it is no longer the automatic default it was a few years ago.
Why are drawers better than doors in lower cabinets?
A drawer brings the full contents out to you, so you never have to crouch and reach into a dark cavity. The back of the cabinet becomes as usable as the front, and full-extension soft-close runners let heavy pots glide out completely. In smaller Vancouver condo kitchens, that recovered usability often matters more than any finish.
Does a kitchen renovation actually pay off at resale?
A focused one does. National Cost vs. Value data puts a minor kitchen remodel at around 113 percent return, well ahead of major gut renovations at roughly 50 to 60 percent. Investing in quality, durable cabinetry within a sensible scope tends to recover more than over-building.
The kitchens of 2026 are quieter, warmer and smarter than the ones they replaced, and the change runs deeper than colour. It is in the flat handleless fronts, the wood grain you want to touch, the drawers that bring everything to hand, and the made-to-order construction meant to last. For Metro Vancouver homeowners deciding where to put their renovation dollars, that is a reassuring direction: the current look and the durable choice are, for once, the same thing.
Explore more from Bauformat BC
- Your German Kitchen, Step by Step: From First Sketch to Installation
- German Kitchen Design on a Budget: Your 2026 Options
- Unravelling the Secrets Elegance of Premium Custom Kitchen Design
German cabinetry, planned and built for Metro Vancouver
The kitchen is one of the highest-return rooms in a home: the 2025 Cost vs. Value Report found a minor kitchen remodel recoups roughly 96% of its cost at resale. Choosing cabinetry that lasts is central to that return, which is where German engineering earns its place. Every Bauformat kitchen is manufactured in Germany, then measured, planned, and installed by our Vancouver team, built to fit your room to the millimetre.
See the Baulux, Bauformat, and Burger collections in person at 1410 Marine Dr Unit 205, North Vancouver, learn more about the manufacturer at bauformat.de.
Book a 30-minute consultation with our Metro Vancouver kitchen designers to plan a kitchen built to last.
A kitchen cabinet is two things at once: the box you never see and the door you touch every day. Both are made of materials, and the materials are where good cabinetry quietly wins or loses. In Metro Vancouver, where coastal humidity sits in our kitchens for much of the year, the choice matters more than it does in a dry interior climate. The right board and the right front can outlast a roof. The wrong ones can swell, sag, and crumble within a few damp winters.
This is a comparison of what cabinets are actually built from, not a shopping checklist. We will go through the materials used for the carcass (the structural box) and the materials used for the fronts (the doors and drawer faces), with honest pros, cons, cost, and moisture behaviour for each. Then we will talk about which combinations make sense on a wet coast, and what quality German cabinetry uses and why.
Key Takeaways
- No single material is best for everything. The carcass and the front have different jobs, so the smartest kitchens mix materials on purpose.
- For the box, plywood and high-grade moisture-resistant engineered board outperform standard particleboard in damp conditions. Plywood resists warping and holds screws well; cheap particleboard swells and the damage is permanent.
- Plywood costs roughly 30 to 50 percent more than particleboard upfront, but it can last decades longer, so the cost per year often favours the better material (Windsor Plywood, 2025).
- For fronts, the choice is mostly about looks, touch, and how the surface handles moisture and cleaning. Lacquer, laminate, ceramic, glass, and acrylic each suit a different kitchen.
- In Metro Vancouver’s coastal humidity, edge sealing and finish quality matter as much as the core board itself.
- Quality German cabinetry, including Bauformat, builds on high-grade moisture-resistant engineered carcasses with precisely sealed edges, paired with a wide range of fronts.
The Carcass: Comparing the Materials That Build the Box
The carcass carries the weight of your dishes, your countertop, and years of opening and closing. It is the part that fails first when the material is wrong, and the part you rarely think about because a door is hiding it.
Solid wood is the material people imagine when they picture quality. It is strong, repairable, and beautiful. The honest catch is that solid wood moves. It expands and contracts with humidity, which is exactly what happens through a coastal year here, and that movement can cause panels to crack or joints to open. Solid wood is also heavy and expensive, and almost no modern manufacturer builds a full carcass from it. It earns its place in face frames, doors, and trim rather than the box. Lifespan can reach 50 years or more with care (Designer Cabinets Online, 2025), but only when it is detailed correctly.
Plywood is layers of wood veneer glued in alternating grain directions. That cross-grain construction is its superpower: it stays flat, holds screws tightly, and resists warping far better than MDF or particleboard in moisture-prone kitchens (Kitchen Cabinet Kings, 2026). Standard three-quarter-inch plywood supports roughly 50 to 60 pounds per square foot, against 35 to 40 for equivalent particleboard, a 25 to 30 percent strength advantage (Windsor Plywood, 2025). Plywood cabinets commonly last 20 to 30 years (Designer Cabinets Online, 2025). The trade-off is cost and the occasional void inside a cheaper sheet.
MDF (medium-density fibreboard) is fine wood fibres compressed with resin into a dense, smooth, uniform board. It has no grain and no voids, which makes it excellent for painted and routed surfaces. As a structural carcass it is heavy and, untreated, it is the material most vulnerable to water: exposed to moisture it swells and loses integrity, so it is not suited to damp areas unless properly sealed (Casta Cabinetry, 2025). MDF typically lasts 15 to 20 years with good installation and care (Maplewood Cabinetry, 2025). It shines as a front material more than a box.
Particleboard and chipboard is wood chips, sawdust, and resin pressed into sheets. It is the budget option, costing 30 to 50 percent less than plywood, and a standard sheet runs roughly 15 to 25 dollars against 35 to 80 for plywood (Windsor Plywood, 2025). It is also the weakest and the least forgiving with water. Once moisture gets past the surface, particleboard absorbs it, swells, bubbles, and the inner core softens and crumbles, and that damage is irreversible (Windsor Plywood, 2025). Low-grade particleboard cabinets can need replacing in as little as 3 to 15 years, especially with heavy use or moisture (Designer Cabinets Online, 2025). In a dry pantry it is acceptable. In a humid coastal kitchen, the cheapest grade is a false economy.
Engineered and melamine board deserves its own note, because it is what most quality European cabinets are actually made from, and it is unfairly lumped in with cheap chipboard. This is a high-grade engineered core (typically a dense, moisture-resistant particleboard) faced on both sides with a tough melamine layer that is water-resistant, scratch-resistant, and easy to wipe clean. The quality gap between a cheap melamine board and a German one is enormous: top European suppliers use high-density, moisture-resistant cores with durable melamine and, critically, precise edge banding (MFC Direct, 2025). That last point is the whole game. The core itself dislikes water, so protection depends on every edge being sealed tight. Done well, the result is a stable, hygienic, moisture-resistant box. Done cheaply, water sneaks past a loose edge and the board warps and bubbles like any other (Demeter, 2025).

The Fronts: Comparing Door and Drawer Materials
Fronts are what you see and touch, so here the conversation shifts from structure to surface, feel, and how a finish copes with steam, splashes, and fingerprints.
Solid wood and wood veneer give you real grain and warmth. Solid wood doors are repairable and timeless but move with humidity and cost the most. Veneer is a thin slice of real wood bonded to a stable engineered core, so you get the genuine grain with far less movement and lower cost, which is often the smarter choice in a damp climate.
Laminate is a printed, resin-saturated surface bonded to a board. Modern laminates are tough, affordable, and come in nearly any colour or wood-look. They resist moisture well at the face and clean easily. The vulnerable point is the edges and any chip, where the core underneath can be exposed.
Lacquer is a sprayed, cured paint finish, available in high-gloss or matte. It gives a flawless, even colour with no visible grain and a furniture-quality depth. Gloss lacquer shows fingerprints and fine scratches; matte hides them better. It is a mid-to-premium finish and handles kitchen humidity well when applied over a stable core.
Ceramic and glass are the most moisture-proof and heat-proof fronts available. They do not absorb water, do not stain, and wipe perfectly clean, which is ideal for a steamy coastal kitchen. They are premium in price and heavier, so they rely on strong hinges and quality construction.
Acrylic is a high-gloss surface that delivers a mirror-like, ultra-reflective finish with great colour depth and good moisture resistance. It is more scratch-prone than ceramic or glass and shows smudges, but it is lighter and less costly than glass for a similar high-shine look.
Moisture Resistance for a Coastal Kitchen
Metro Vancouver’s climate is the quiet test every cabinet here has to pass. Damp air, long wet seasons, and the steam of daily cooking mean a kitchen rarely fully dries out. Materials that shrug off moisture in Calgary can quietly suffer here.
Three rules hold up well on the coast. First, the carcass core should be moisture-resistant by design, which points to plywood or a high-grade moisture-resistant engineered board rather than cheap particleboard. Second, edges matter as much as faces, because most water damage starts where a panel is cut and exposed, so sealed, well-banded edges are non-negotiable (MFC Direct, 2025). Third, fronts that do not absorb water, such as laminate, lacquer, acrylic, ceramic, and glass, give you the easiest long-term life around the sink and dishwasher, where splashes are constant.

Cost Versus Longevity: The Part That Actually Saves Money
The cheapest cabinet is rarely the least expensive over its life. The clearest way to see this is cost per year. Consider an 8,000-dollar plywood kitchen lasting 20 years: that is about 400 dollars a year. A 5,000-dollar particleboard kitchen lasting 7 years works out to roughly 714 dollars a year (Windsor Plywood, 2025). The budget kitchen costs more annually and arrives with the disruption and expense of an earlier replacement.
This does not mean every dollar belongs in the most expensive material. It means spending where the climate punishes failure: a moisture-resistant core, sealed edges, and a front finish suited to a wet kitchen. Save, if you must, on the colour or the trim, not on the structure that has to survive a decade of coastal humidity.
What to Choose for Your Situation
If you cook constantly and want decades of life, a plywood or high-grade moisture-resistant engineered carcass paired with laminate, lacquer, or ceramic fronts is hard to beat. If you love real wood, choose veneer over solid wood for the box and let solid wood appear on doors, where its movement is easier to manage.
If you want a flawless modern look, lacquer, acrylic, or ceramic fronts deliver it, with ceramic and glass leading on moisture and heat resistance. If budget is the deciding factor, you can still build a sound kitchen, but spend first on a moisture-resistant core and proper edges rather than the cheapest particleboard, because that is the part the coast tests hardest.
What Quality German Cabinetry Uses, and Why
German manufacturers settled this debate decades ago through standards and engineering rather than marketing. Quality German cabinetry, including Bauformat (made in Germany since 1917, in Lohne), builds carcasses from high-grade, moisture-resistant engineered board with precisely sealed edges, rather than relying on solid wood that moves or cheap chipboard that fails. The core is chosen for stability and hygiene, the melamine surfaces wipe clean, and the edge banding is applied tightly enough to keep moisture out of the board: exactly the construction a damp climate rewards.
On the fronts, the range is where the system shows its flexibility. The Baulux collection offers ceramic, glass, and ultra-matte fronts for the most moisture-proof, fingerprint-friendly finishes. The Bauformat collection carries the widest choice, including wood-grain, lacquer, and laminate. The Burger collection covers best-value options. Across all of them, the working parts are consistent: full-extension soft-close runners and 3D-adjustable concealed hinges, the hardware that keeps heavy doors and drawers moving smoothly for years. For Metro Vancouver kitchens, this is measured, planned, and installed by the local Vancouver team, which is how the right material ends up in the right place rather than left to chance.
Frequently Asked Questions
Is plywood always better than particleboard for cabinets?
For strength and moisture resistance, plywood has clear advantages: it holds screws better, resists warping, and carries more weight (Kitchen Cabinet Kings, 2026). But a high-grade, moisture-resistant engineered board with properly sealed edges performs very well and is what most quality European cabinetry uses. The material to avoid in a damp kitchen is the cheapest unsealed particleboard, which swells permanently once water gets in (Windsor Plywood, 2025).
What is the best cabinet front for a humid Vancouver kitchen?
Non-absorbent fronts handle coastal humidity best. Ceramic and glass are the most moisture-proof and heat-proof, lacquer and laminate are excellent everyday performers, and acrylic gives a high-gloss look with good moisture resistance. Real-wood veneer is fine when bonded to a stable core. The key is a surface that does not soak up the steam and splashes a busy kitchen produces.
Does MDF belong in a kitchen at all?
Yes, in the right role. MDF is smooth, uniform, and excellent for painted and routed fronts. Its weakness is water: untreated, it swells when wet, so it is not ideal as an exposed structural box and must be properly sealed (Casta Cabinetry, 2025). As a finished, sealed front it performs well and lasts 15 to 20 years with good care (Maplewood Cabinetry, 2025).
How long should good kitchen cabinets last?
It depends entirely on material and care. Solid wood can exceed 50 years, quality plywood construction runs 20 to 30 years, MDF roughly 15 to 20, and low-grade particleboard sometimes only 3 to 15 years, especially in moisture (Designer Cabinets Online, 2025). Well-built engineered cabinetry with sealed edges and quality hardware sits at the long end of that range.
The best material for kitchen cabinets is not one material but the right one in each place: a moisture-resistant, well-sealed core for the box, and a front that suits your taste and your kitchen’s daily life. On a coast where humidity never fully lets go, that combination is what separates a kitchen you replace in a few years from one that still looks and works the way it should a decade or two on.
Explore more from Bauformat BC
- What Factors Should You Keep in Mind When Choosing the Perfect Kitchen Cabinets? Incorporating Bauformat into Your Selection
- How to Maintain the Quality of Your Kitchen Cabinets
- How to Design Kitchen Cabinets: A Practical 2026 Guide
German cabinetry, planned and built for Metro Vancouver
The kitchen is one of the highest-return rooms in a home: the 2025 Cost vs. Value Report found a minor kitchen remodel recoups roughly 96% of its cost at resale. Choosing cabinetry that lasts is central to that return, which is where German engineering earns its place. Every Bauformat kitchen is manufactured in Germany, then measured, planned, and installed by our Vancouver team, built to fit your room to the millimetre.
See the Baulux, Bauformat, and Burger collections in person at 1410 Marine Dr Unit 205, North Vancouver, learn more about the manufacturer at bauformat.de.
Book a 30-minute consultation with our Metro Vancouver kitchen designers to plan a kitchen built to last.
A kitchen can be the warmest room in a family home and also the busiest. Kids do homework at the island, a partner reaches past you for a glass of water, the dog weaves underfoot, and somewhere on the cooktop a pot is coming to a boil. In a Metro Vancouver home, where many of us cook in open-plan condos or compact family kitchens that flow straight into the living space, the way a kitchen is laid out matters as much as anything you put in it.
Good safety starts before the cabinets are even chosen. It starts with the floor plan: where the cooking happens, where people walk, and where children can be near the action without being in the path of it. This guide focuses on that planning stage. Get the layout and flow right, and a busy family kitchen becomes far easier to keep safe.
Key Takeaways
- Keep the cooking zone out of the main walking route so no one passes the cooktop carrying a child or a load of groceries.
- Plan a tight work triangle and treat the area around it as a hot zone that traffic does not cross.
- Position islands and peninsulas with enough clearance on all sides, and choose rounded or softened ends to reduce sharp corners at child height.
- Follow recognized clearance guidance: at least 36 inches for walkways and 42 to 48 inches for work aisles, per NKBA standards.
- Build in clear sightlines from the cooking spot to a designated kid zone away from the stove.
- Choose slip-resistant flooring and layered lighting so movement around the kitchen stays sure-footed.
Keep the Cooking Zone Out of the Traffic Path
The single most useful layout decision a family can make is to separate where food is cooked from where people walk. In an open-plan Vancouver condo, the natural route often runs from the entry, through the kitchen, and out to the balcony or living area. If that route passes directly in front of the range, every person crossing the room is brushing past hot pots and a busy cook.
When we plan a kitchen, we look first at the doorways and the destinations beyond them, then trace the lines people will actually walk. The goal is to set the cooktop on a run of cabinetry that sits to the side of that flow, not across it. A child running from the front door to the sofa should never have to cut between the cook and the stove to get there.
This matters because so many child burns happen during ordinary food preparation. According to the Children’s Safety Network (2025), most childhood burn injuries involve products used for preparing, serving, or consuming food and drink, and children ages 0 to 4 account for just over half of burn cases in the under-19 group. A cooking zone tucked out of the main traffic path removes one of the most common ways a small child ends up too close to heat.
The Work Triangle and the Hot Zone
The work triangle is the relationship between the three spots a cook moves between most: the cooktop, the sink, and the fridge. The National Kitchen and Bath Association recommends each leg of that triangle measure between 4 and 9 feet, with the three legs adding up to no more than 26 feet, and crucially, no major traffic should cut through it. That last point is the safety rule. A triangle that household traffic walks through is a triangle where collisions happen, often while someone is holding a hot pan.
For families, it helps to think of the triangle not just as a workflow but as a hot zone: the floor space where the cook is carrying boiling water, draining pasta, or moving a tray from the oven. The aim is to keep that zone compact and protected. A fridge placed at the edge of the kitchen, for example, lets a thirsty child grab a juice box without wandering into the area between the stove and the sink.
In smaller Metro Vancouver kitchens, a tight triangle is usually easy to achieve simply because the room is compact. The challenge in larger family homes is the opposite: an oversized triangle that forces long, hurried trips with hot items. When we plan a made-to-order Bauformat kitchen, we size the layout so the cook’s most dangerous movements happen over the shortest, clearest possible path.
Safe Island and Peninsula Placement
An island is the social heart of most family kitchens, and it can be a safety asset or a hazard depending on how it is placed. Used well, an island acts as a buffer: it gives children a spot to sit, snack, and do homework on the far side, away from the cooking run, while still being part of the room.
The risk comes when an island is squeezed in too tightly or fitted with a cooktop. We generally keep cooking off the island in a family kitchen, so children seated at the counter are never on the other side of an open flame. If a client wants the island to be the prep and gathering centre, the heat stays on the perimeter run, and the island becomes the safe zone rather than the hot one.
Clearance around the island is the other half of the equation. NKBA guidance calls for at least 42 inches of aisle around work areas, widening to 48 inches where two people cook together. Tighten that gap and an adult turning with a hot pot can collide with a child on a stool. The corners matter too. Bauformat offers rounded and softened edge profiles, which take the sharp point off an island or peninsula end right at the height where a running toddler is most likely to meet it.
Clear Walkways and Room to Turn
Walkways are where most of the day-to-day near-misses happen. The NKBA recommends a minimum walkway width of 36 inches, and at least 42 inches where two walkways cross. Those numbers are not just about comfort. They are the difference between a cook being able to pivot from the counter to the sink without bumping a child, and a cramped aisle where two bodies cannot pass.
Falls are worth taking seriously here. The National Safety Council (2025) estimates more than 9 million slip-and-fall incidents in the United States each year, and a cramped, cluttered kitchen aisle is exactly where one happens. In a family home, the floor is often shared with toys, a high chair, and a pet bowl, so the planned-for clearance disappears fast. Building in generous walkways from the start leaves room for real life.
Turning space matters as much as straight-line width. The spot in front of the oven and the dishwasher needs enough clearance for someone to open a hot door, step back, and turn with a tray, all without backing into traffic. We plan these landing spots deliberately, because the moment a hot oven door swings open is the moment you most want a clear, predictable space around it.
Sightlines and a Designated Kid Zone
One of the quiet advantages of an open-plan layout is the sightline. A cook standing at the range should be able to look up and see where the children are. When we plan a family kitchen, we orient the cooking position so the cook faces into the room or toward the spot where kids gather, rather than toward a blank wall with their back to everything happening behind them.
That spot where the kids gather should be a deliberate part of the plan, not an afterthought. A designated kid zone, a stretch of island seating, a window banquette, or a low cabinet run set aside for their things, gives children a place that is theirs and, just as importantly, keeps them out of the cooking run. The goal is to draw them naturally to a safe area rather than relying on constant reminders to stay back from the stove.
This is especially valuable in the open condos common across Yaletown and the rest of Metro Vancouver, where the kitchen, dining, and living areas share one continuous space. With the cooking position and the kid zone planned in relation to each other, that openness becomes a safety feature: one adult can cook dinner and keep an eye on a child reading on the sofa at the same time.
Secure Cooktop and Oven Placement
Where the heat lives is a layout decision, not just an appliance choice. A cooktop set into a long, uninterrupted counter run is safer than one perched at the end of a cabinet, because the continuous landing space on both sides gives the cook somewhere to set a hot pan and keeps the burners away from the edge a child could reach.
Pot handles should be able to turn inward over solid counter, never out over open air or a walkway, and the layout is what makes that possible. We also favour positioning the cooktop so it is not the first thing a small child encounters when they wander in. Pediatric data backs this up. The American Burn Association reports that scald burns account for roughly 65 percent of burn-related hospitalizations among children four and under, and the kitchen is where most of those scalds originate.
For ovens, a wall oven set at counter height can be a strong choice in a family kitchen, because there is no need to bend and lift a heavy, hot dish down low past a child’s reach. Whatever the configuration, the area directly in front of the oven gets planned as protected landing space, so opening that door never means swinging it into a passing person.
Slip-Resistant Floors and Lighting for Safe Movement
Even a perfectly planned layout depends on sure footing. Kitchen floors collect water by the sink, oil near the cooktop, and the occasional spilled drink, and a glossy surface turns those into a hazard. The FDA Food Code recommends a minimum static coefficient of friction of 0.6 for kitchen floors, a useful benchmark when choosing a finish for a busy family kitchen. A textured tile, a matte engineered floor, or a quality vinyl plank gives small feet and rushing adults more grip than a high-gloss surface.
Lighting is the other half of safe movement, and it works best when it is layered. Bright, even ambient light removes the shadows people trip over. Task lighting under the upper cabinets puts light directly on the counter and the cooktop, so a cook can see what is sharp and what is hot. A little low-level light near the floor helps for the late-night glass of water, when a half-asleep adult or a child is moving through a dark room. Planning the lighting alongside the cabinetry, rather than after, means the fixtures actually land where the work and the walking happen.
Frequently Asked Questions
What is the safest kitchen layout for families with young children?
There is no single perfect shape, but the safest family layouts share a few traits: the cooking zone sits out of the main walking path, the work triangle is compact and free of through-traffic, and there is a designated kid zone with clear sightlines from where the cook stands. An island can help by giving children a place to gather on the opposite side from the heat. The right configuration depends on your room, which is why we measure and plan each Bauformat kitchen to the actual space.
How much clearance should I leave around an island in a family kitchen?
The NKBA recommends at least 42 inches of aisle around work areas, and 48 inches where two people cook at once. In a family kitchen with stools, strollers, and the occasional pet, leaning toward the wider end is wise. That extra space is what lets an adult turn with a hot pan without colliding with a child seated at the counter.
Should the cooktop go on the island in a home with kids?
We usually steer families away from putting the cooktop on the island. When the heat is on the island, anyone seated at the counter is on the other side of an open flame, and children are drawn to exactly that spot. Keeping the cooktop on the perimeter run lets the island stay the safe gathering zone, with continuous landing counter on both sides of the burners.
Does a safer layout add to my home’s value?
A well-planned kitchen is one of the strongest renovation investments. Zonda’s 2025 Cost vs. Value report found a minor kitchen remodel returns roughly 96 percent of its cost at resale, the top performer among interior projects. A layout that is safe, efficient, and easy to move through reads as quality to buyers, and in a family-focused market like Metro Vancouver it is a genuine selling point.
A family-friendly kitchen is really a story about movement: who walks where, who reaches across whom, and how a cook keeps watch over the room while the stove is on. Those questions are answered on the plan, long before a single cabinet is hung. With made-to-order German cabinetry from collections like Baulux, Bauformat, and Burger, measured and planned by our local Vancouver team, the layout can be shaped around how your family actually lives, so the busiest room in the house is also one of the calmest to keep safe.
Explore more from Bauformat BC
- Why Large Families Should Choose Classic Kitchen Designs
- Spice Up Your Home: 7 Kid-Friendly Kitchen Designs That Combine Fun With Functionality, Featuring Bauformat
- Creating Kitchens for Better Accessibility: Uncomplicated Designs for Wheelchair Users
German cabinetry, planned and built for Metro Vancouver
The kitchen is one of the highest-return rooms in a home: the 2025 Cost vs. Value Report found a minor kitchen remodel recoups roughly 96% of its cost at resale. Choosing cabinetry that lasts is central to that return, which is where German engineering earns its place. Every Bauformat kitchen is manufactured in Germany, then measured, planned, and installed by our Vancouver team, built to fit your room to the millimetre.
See the Baulux, Bauformat, and Burger collections in person at 1410 Marine Dr Unit 205, North Vancouver, learn more about the manufacturer at bauformat.de.
Book a 30-minute consultation with our Metro Vancouver kitchen designers to plan a kitchen built to last.
A minimalist kitchen is not an empty kitchen. It is a room where every line, surface, and storage choice has been considered, so the space feels calm instead of bare. The clean look that reads as effortless in a Yaletown loft or a renovated Kitsilano character home is actually the result of careful sequencing: decisions made in the right order, each one building on the last. Skip a step, and you end up with handsome cabinets crowded by clutter, or a flawless palette undone by a row of mismatched small appliances on the counter.
This guide walks through that sequence as a process you can follow from start to finish. The goal is a kitchen that works as hard as it looks restrained, the kind of room that suits how people actually live in Metro Vancouver, where square footage is precious and natural light is worth protecting. Follow the steps in order, and the result will feel intentional rather than improvised.
Key Takeaways
- Minimalist design is a process, not a single style choice. Declutter and define your needs before you pick a single finish.
- The layout and work triangle come before aesthetics. A kitchen that flows naturally needs fewer visual fixes later.
- Flat or handleless fronts, a restrained palette, and concealed storage are the three pillars of the minimalist look.
- Integrated appliances and layered, hidden lighting remove the visual noise that breaks a clean run of cabinetry.
- German-engineered hardware does the quiet work behind the scenes, from soft-close runners to push-to-open fronts.
Step 1: Declutter and Define Your Needs
Before a single cabinet is drawn, take stock of what you own and how you cook. Empty your current cabinets and drawers onto a table, then sort honestly: what you use weekly, what you use a few times a year, and what you have not touched since you moved in. Minimalism starts here, because the storage you design should match the things you actually keep, not the things you have accumulated by habit.
This step matters more than it sounds. The shift away from open shelving and toward concealed, clutter-free storage is one of the strongest currents in kitchen design right now, with 87 percent of designers in the NKBA 2025 Kitchen Trends Report saying homeowners want pantries hidden behind cabinet doors or panels to keep the look uninterrupted (NKBA 2025 Kitchen Trends Report). Decide what stays before you decide where it goes. Write down how many cooks share the space, whether you entertain, and which appliances earn their counter space. Everything that follows is built on these answers.

Step 2: Plan the Layout and Work Triangle
With your needs defined, plan how you move through the room. The classic work triangle connects the three points you return to constantly, the sink, the cooktop, and the refrigerator, and the principle still holds: keep the total distance between them efficient, with no leg so short that the zones crowd each other or so long that cooking becomes a marathon. In a galley layout common to Vancouver condos, the triangle often flattens into two parallel runs, which works beautifully when the spacing is right.
Think in zones as well as triangles. A prep zone near the sink, a cooking zone at the range, and a storage zone by the fridge keep tools where you use them. This is where a professional planning service earns its keep. The Bauformat team measures your space precisely and plans the layout around how you actually work, so the cabinetry that comes later fits the room rather than fighting it. Getting the bones right now means fewer compromises when you reach the finishes.
Step 3: Choose Flat or Handleless Fronts
Cabinet fronts set the entire tone of a minimalist kitchen, and the choice comes down to flat-slab doors with discreet hardware or a fully handleless design. Handleless fronts, achieved through integrated grip channels or push-to-open mechanisms, give you that unbroken plane of cabinetry with nothing protruding to catch the eye or the hip. The appetite for this look is clear: industry reporting for 2026 points to handleless cabinets as a primary driver of minimalist design, with around 60 percent of surveyed professionals expecting minimalist style to keep climbing (Livingetc, 2026).
Bauformat builds this choice into its collections. The Baulux line is designed around ultra-matte, handleless fronts for the most pared-back look, while the broader Bauformat collection offers the widest range of handleless and flat-front options if you want to mix textures within a restrained vocabulary. For households watching the budget, the Burger collection delivers the same clean fronts at the best value. Whichever you choose, commit to one front style across the room to preserve the continuity that makes minimalism read as deliberate.
Step 4: Settle on a Restrained Palette
A minimalist palette is restrained, not necessarily white. The all-white, sterile kitchen is giving way to warmer, more livable tones, with designers reporting growing demand for soft naturals and muted greens over stark white. The discipline lies in limiting yourself: choose two, perhaps three, tones that carry through the cabinetry, counters, and walls, and let texture rather than colour create interest.
This suits Vancouver light well. Our long stretches of soft, grey daylight flatter matte finishes and muted tones, which can look chalky under harsher sun but read as calm and warm here. Pull your palette from the elements you cannot change, the floor, the view, the quality of light at your windows, and build outward from there. A handleless ultra-matte front in a warm neutral will hold its quiet confidence through a grey November and a bright July alike.
Step 5: Design Hidden and Integrated Storage
Now you put the decluttering work from Step 1 into practice. Minimalist kitchens hide their storage in plain sight: tall pantry units behind flush doors, deep drawers that swallow pots and pans, and internal dividers that keep everything in its place so the surfaces stay clear. The aim is a room where nothing needs to live on the counter because everything has a dedicated, concealed home.
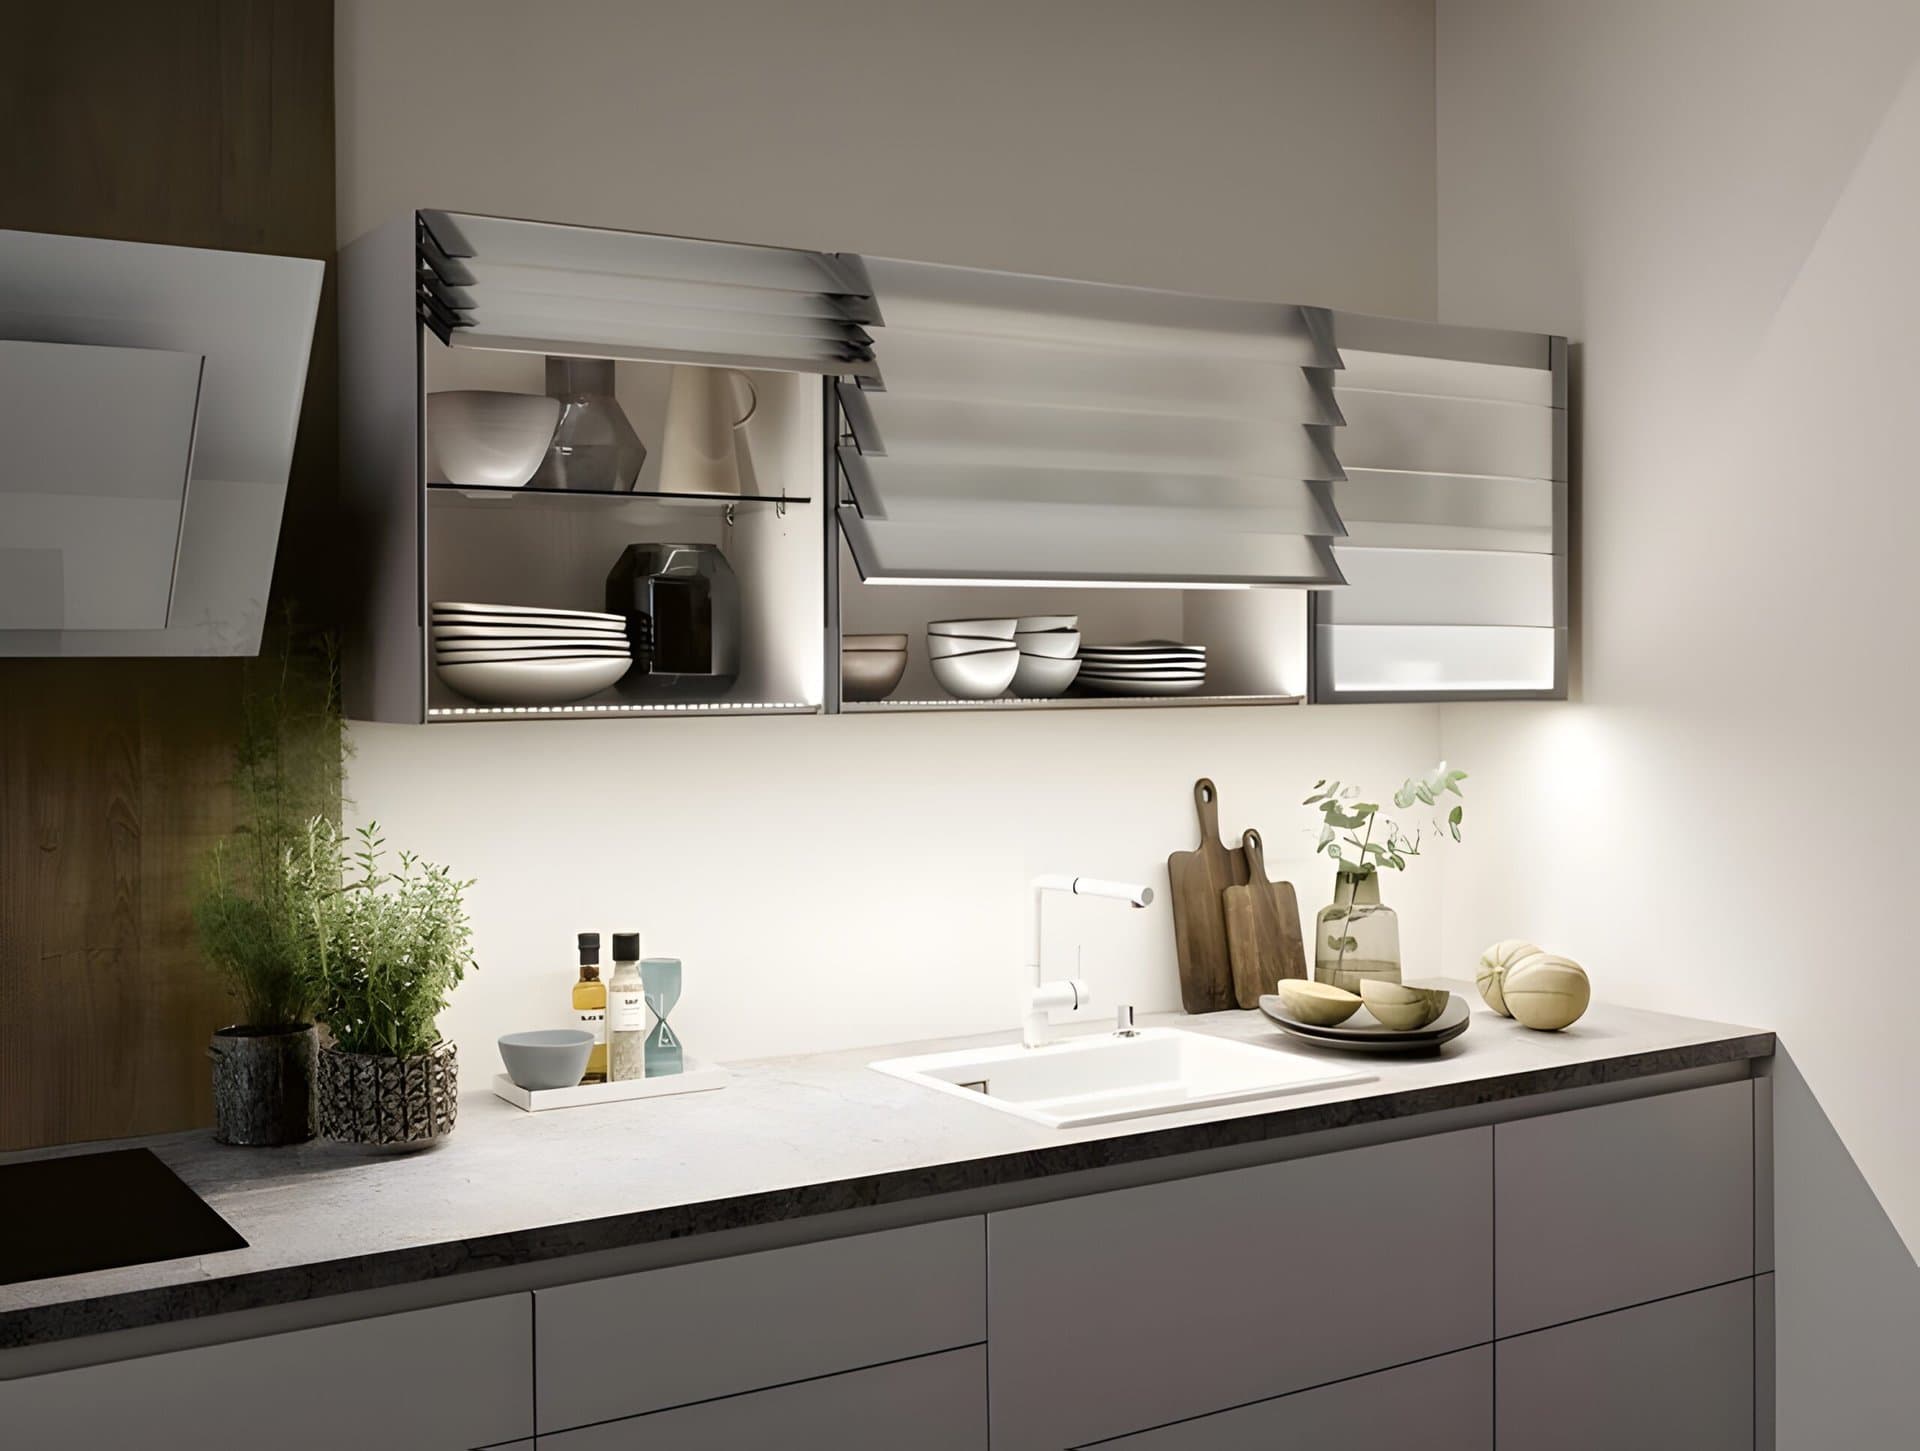
This is where engineered hardware does the heavy lifting. Bauformat fits full-extension, soft-close runners so a deep drawer opens completely and closes without a sound, and smart internal storage solutions make the most of awkward corners and narrow runs that are common in older Metro Vancouver homes. Well-planned drawers, not open shelves, are what keep a minimalist kitchen looking minimalist on a Tuesday night, not just on the day the photos were taken.
Step 6: Plan Concealed Appliances
A run of clean cabinetry loses its calm the moment a stainless fridge or a bold dishwasher front interrupts it. Concealing appliances behind matching panels keeps the visual line unbroken, which is exactly why the practice has moved into the mainstream. Three out of four homeowners now want built-in features for a more integrated, minimalist look, with panel-ready refrigerators and dishwashers blending into the cabinetry, according to the NKBA 2026 Kitchen Trends Report (NKBA, 2026).
Plan these early, because integration affects cabinet dimensions and ventilation. Panel-ready fridges and dishwashers wear a cabinet front that matches the surrounding doors. Cooktops can sit flush in the counter, and ovens can be stacked into a tall unit to free up the lower run. Bauformat’s integrated and concealed appliance options are designed to disappear into the cabinetry, so the eye travels across an uninterrupted surface instead of stopping at each machine.
Step 7: Layer in Simple Lighting
Lighting in a minimalist kitchen should be felt more than seen. Rather than one bright ceiling fixture, layer the light: discreet under-cabinet strips for task work at the counter, soft in-cabinet lighting that comes on when a door opens, and a single restrained pendant or recessed run for general light. The fixtures themselves stay quiet, letting the effect rather than the hardware do the talking.
This matters especially through Vancouver’s darker months, when good interior light keeps a kitchen feeling warm from late afternoon onward. Concealed and integrated lighting options remove the visual clutter of bulky fixtures while giving you control over mood and function. Plan the wiring at the design stage, because the cleanest results, such as lighting recessed into a shelf or tucked under a wall cabinet, are far easier to achieve before the cabinetry is installed than after.
Step 8: Finish with Minimal Hardware and Styling
The final step is restraint at the surface. If you chose handleless fronts in Step 3, the hardware question is already settled by push-to-open or integrated channels backed by 3D-adjustable concealed hinges, which let every door sit and align perfectly with the next. If you went with flat-slab fronts, keep handles slim and simple, a single edge pull or a recessed grip, in a finish that ties into your palette rather than announcing itself.
Then style with discipline. A minimalist kitchen is finished, not decorated. Leave most of the counter clear, choose a small number of objects you genuinely use or love, and resist the urge to fill empty space. A wooden board, a single bowl of fruit, one plant. The restraint you practised through every earlier step is what lets these few pieces breathe, and it is what separates a calm, intentional kitchen from one that simply looks new.
Frequently Asked Questions
Is a minimalist kitchen practical for a family?
Yes, when it is planned around real life. Minimalism is about hidden, well-organized storage rather than fewer belongings, so a family kitchen can stay clutter-free if every item has a concealed home. Deep soft-close drawers, integrated bins, and a generous concealed pantry do far more for daily order than open shelving ever could. The look stays clean because the chaos is simply behind a flush door.
Are handleless cabinets harder to use?
Not with quality mechanisms. Push-to-open fronts respond to a light touch, and integrated grip channels give your fingers a natural place to pull. The difference is in the engineering: well-made runners and 3D-adjustable hinges keep everything moving smoothly and aligned over years of use, which is why the hardware behind the front matters as much as the front itself.
Does a minimalist kitchen renovation add value at resale?
A well-executed kitchen update is consistently one of the strongest home improvements for return on investment. Recent Cost vs. Value data shows a minor mid-range kitchen remodel recoups a very high share of its cost at resale, among the best of any interior project (Remodeling, Cost vs. Value Report, 2025). Clean lines and integrated storage also photograph well and appeal broadly to buyers, which helps in a competitive Metro Vancouver market.
Where do I start if my kitchen is small?
Start with Steps 1 and 2, decluttering and layout, because they deliver the most in a compact space. In a small Vancouver condo, getting the work triangle tight and the storage concealed will transform the room more than any finish. Handleless fronts and a restrained palette then make the space feel larger by removing visual interruptions.
A minimalist kitchen rewards the time you put into planning it. Each step narrows the decisions of the next, so by the time you reach hardware and styling, the hard choices are behind you and the room almost finishes itself. Made in Germany since 1917 and measured, planned, and installed by a local Vancouver team, Bauformat cabinetry gives this process the precise foundation it needs, the kind of quiet engineering that lets a kitchen look effortless because everything underneath it was anything but.
Explore more from Bauformat BC
- crafting the perfect minimalist dream kitchen a design guide
- Uncovering the Top Trio of Budget-Friendly Minimalist Kitchen Designs
- Budget-Friendly Guide to Achieving a Streamlined Kitchen Makeover
German cabinetry, planned and built for Metro Vancouver
The kitchen is one of the highest-return rooms in a home: the 2025 Cost vs. Value Report found a minor kitchen remodel recoups roughly 96% of its cost at resale. Choosing cabinetry that lasts is central to that return, which is where German engineering earns its place. Every Bauformat kitchen is manufactured in Germany, then measured, planned, and installed by our Vancouver team, built to fit your room to the millimetre.
See the Baulux, Bauformat, and Burger collections in person at 1410 Marine Dr Unit 205, North Vancouver, learn more about the manufacturer at bauformat.de.
Book a 30-minute consultation with our Metro Vancouver kitchen designers to plan a kitchen built to last.
Walk through a hundred kitchens in Metro Vancouver and you will lose count of the shaker doors. They turn up in a 1912 Grandview character home, in a glassy Yaletown condo, in a Surrey new-build, and in a North Shore renovation that cost more than the house did when it was first bought. The same simple framed door, doing very different jobs, and looking right in every one of them.
That kind of range is rare. Most door styles belong to a moment or a mood. The shaker belongs to none of them, which is exactly why it has outlasted every fashion that came and went around it. Below is a closer look at where the shaker came from, why it refuses to date, and what separates a shaker front that lasts twenty years from one that looks tired in three.
Key Takeaways
- The shaker is a five-piece framed door with a flat recessed centre panel and clean square edges, with origins in 19th-century Shaker furniture built on the principle that usefulness is its own kind of beauty.
- It remains the most requested cabinet door in the market. Houzz’s 2026 Kitchen Trends Study put shaker at 58 percent of renovating homeowners, well ahead of flat-panel at 22 percent.
- Its plain frame is a neutral background, so it carries almost any colour, finish, and hardware without a fight.
- The slim or micro shaker, with a narrower frame, is the current refinement of the style and reads more contemporary while keeping the same bones.
- A well-made shaker front comes down to material stability, joinery, finish, and the hardware behind the door, which is where German-built Bauformat construction earns its keep.
What a Shaker Door Actually Is, and Where It Came From
A shaker door is built from five pieces: two vertical stiles, two horizontal rails, and a flat panel set into the middle. The frame sits slightly proud, the centre panel sits recessed, and the inside edges are usually square or very lightly eased. No raised centre, no applied moulding, no carving. That is the whole vocabulary, and the restraint is the point.
The name traces back to the Shakers, a religious community that settled in the northeastern United States in the late 1700s and built furniture for their own use through the 1800s. Their craft followed a plain rule: a thing should be honest about what it is and good at its job, and ornament that served no purpose was vanity. So their cabinets, chairs, and built-ins were stripped to function. Flat panels, clean joints, proportions that felt calm rather than grand. They were not chasing a look. The look is what is left when you take everything decorative away.
That history matters because it explains the durability. The shaker was never tied to a trend, so no trend has ever been able to take it down with it. A door designed around function instead of fashion has nothing to go out of style.
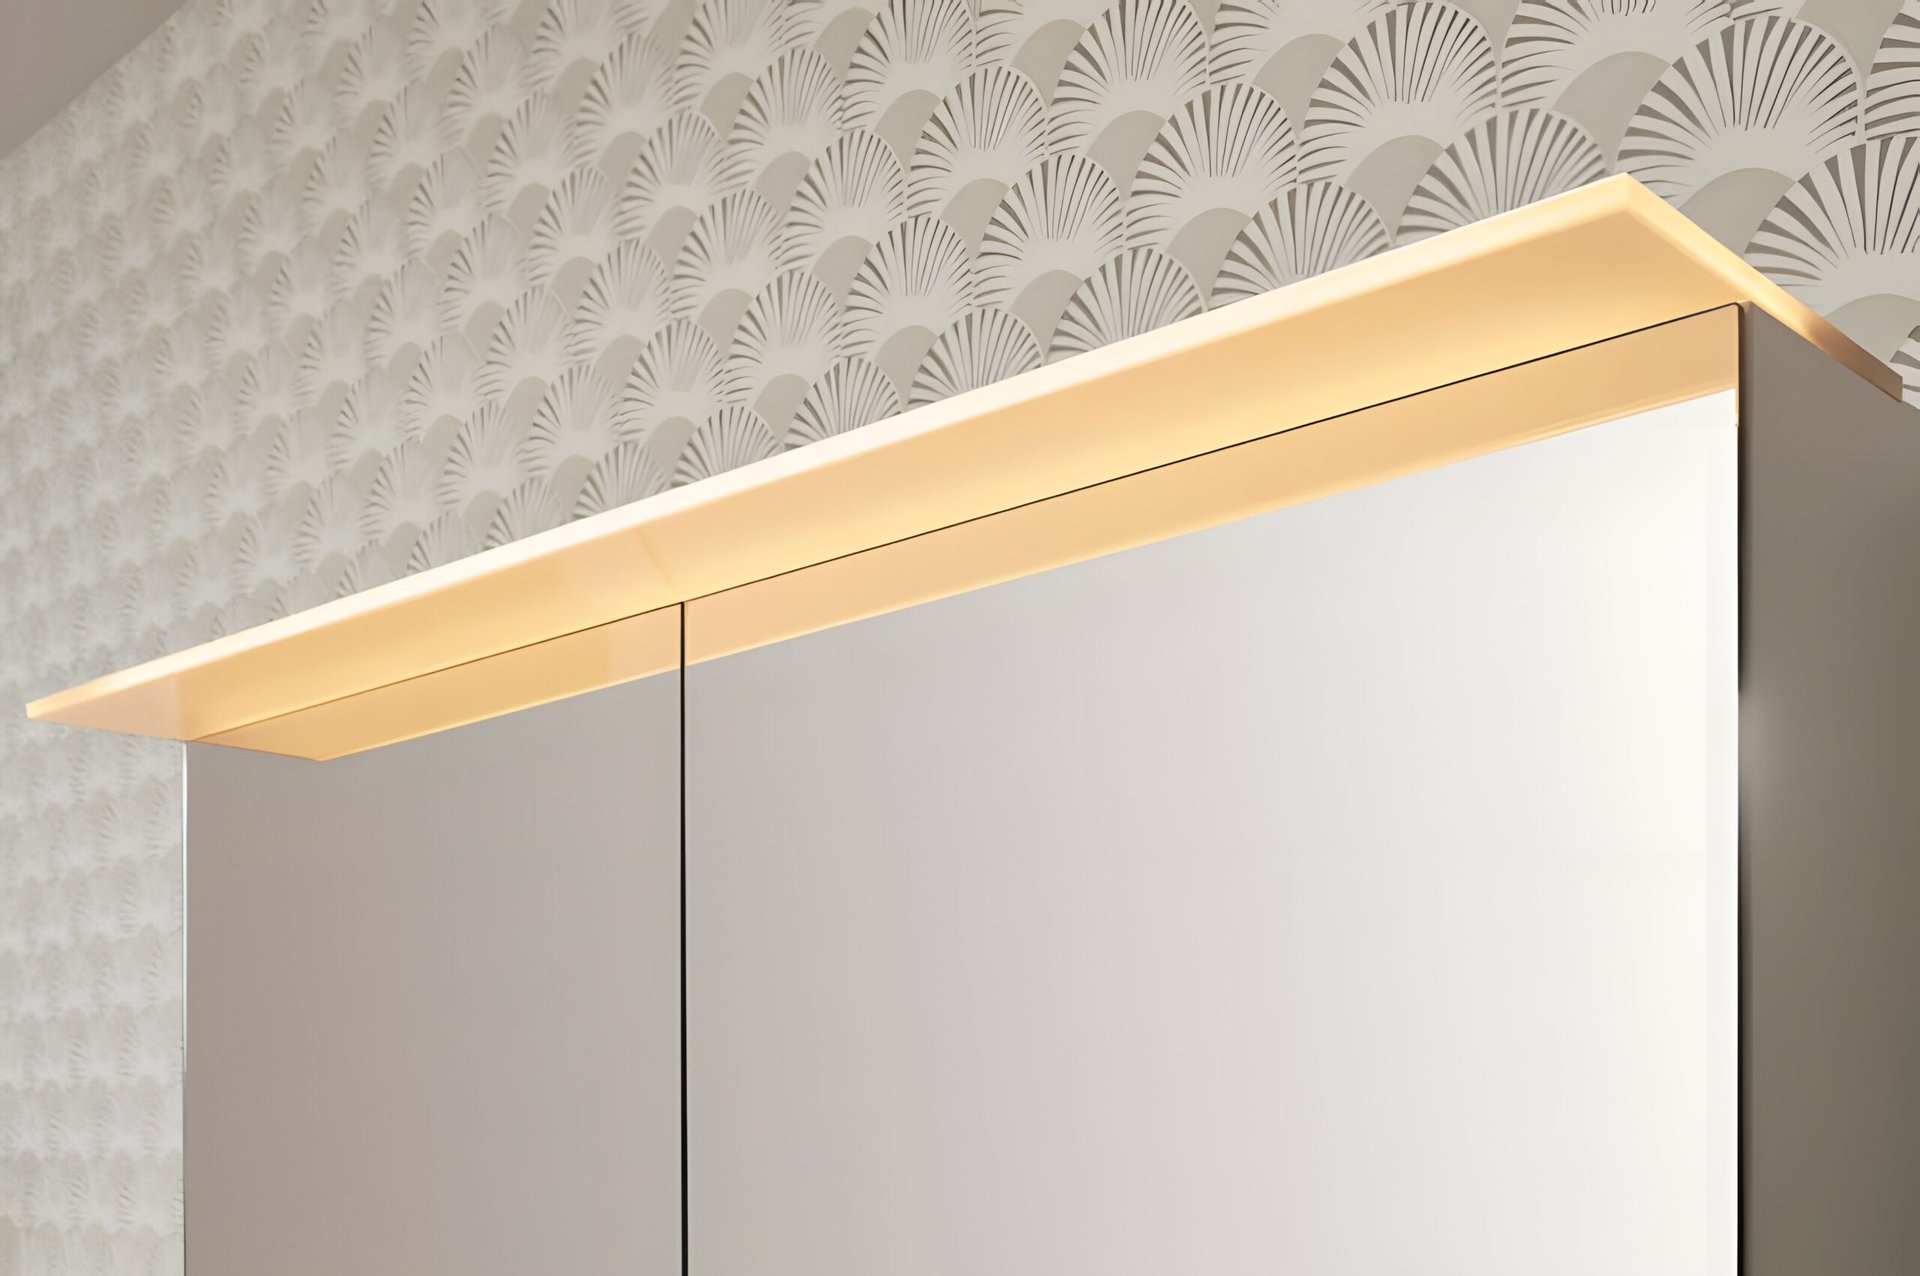
Why It Works in Almost Any Kitchen
The shaker’s real trick is that it sits in the middle of the design spectrum. Paint it a soft off-white, add a bin pull and a piece of trim, and it reads traditional, at home in an East Van character house with original fir floors. Take the same door, run it floor to ceiling in a deep matte green with a long bar pull, and it reads transitional. Strip it down further, narrow the frame, lose the visible hardware, and it reads modern enough for a downtown tower.
This is why designers reach for it when a kitchen has to do more than one thing at once, which in Metro Vancouver is most of the time. A lot of homes here mix eras: a heritage exterior with an open contemporary interior, or a condo with warm wood floors and cool concrete columns. The shaker bridges that gap instead of forcing the room to pick a side. It is the rare door that flatters both the old and the new in the same building.
The market reflects this flexibility. Shaker remains the most frequently requested door style across the industry and across every price point, and it accounted for roughly half of the cabinet designs shown at KBIS 2026, the largest kitchen and bath industry event in North America (Woodworking Network, 2026). A style does not hold that position by accident. It holds it by fitting more kitchens than anything else on the shelf.
It Suits Almost Any Colour and Any Hardware
Because the shaker face is flat and the frame is plain, the door behaves like a blank canvas. There is no fussy profile competing with the finish, so colour lands cleanly. That is one reason it is the door most often shown in the warm, earthy tones designers are moving toward now, away from the all-white kitchen that defined the last decade.
Consider how many finishes the shaker carries without complaint:
- Painted neutrals: off-whites, greiges, soft clays that suit bright West Coast light and the grey months alike.
- Deep saturated colours: forest green, navy, charcoal, oxblood, often on a lower run or island.
- Natural and matte wood: oak and walnut tones, back in demand as warmth returns to the kitchen.
- Two-tone layouts: a darker base with lighter uppers, which the simple frame handles cleanly.
Hardware is just as forgiving. A shaker takes a small knob, a cup pull, a long modern bar, or no visible hardware at all. The frame does not dictate a period, so the pull you choose sets the tone rather than fighting one. You can shift a shaker kitchen from country to contemporary by changing the handles and nothing else, which is a kind of future-proofing most door styles cannot offer.
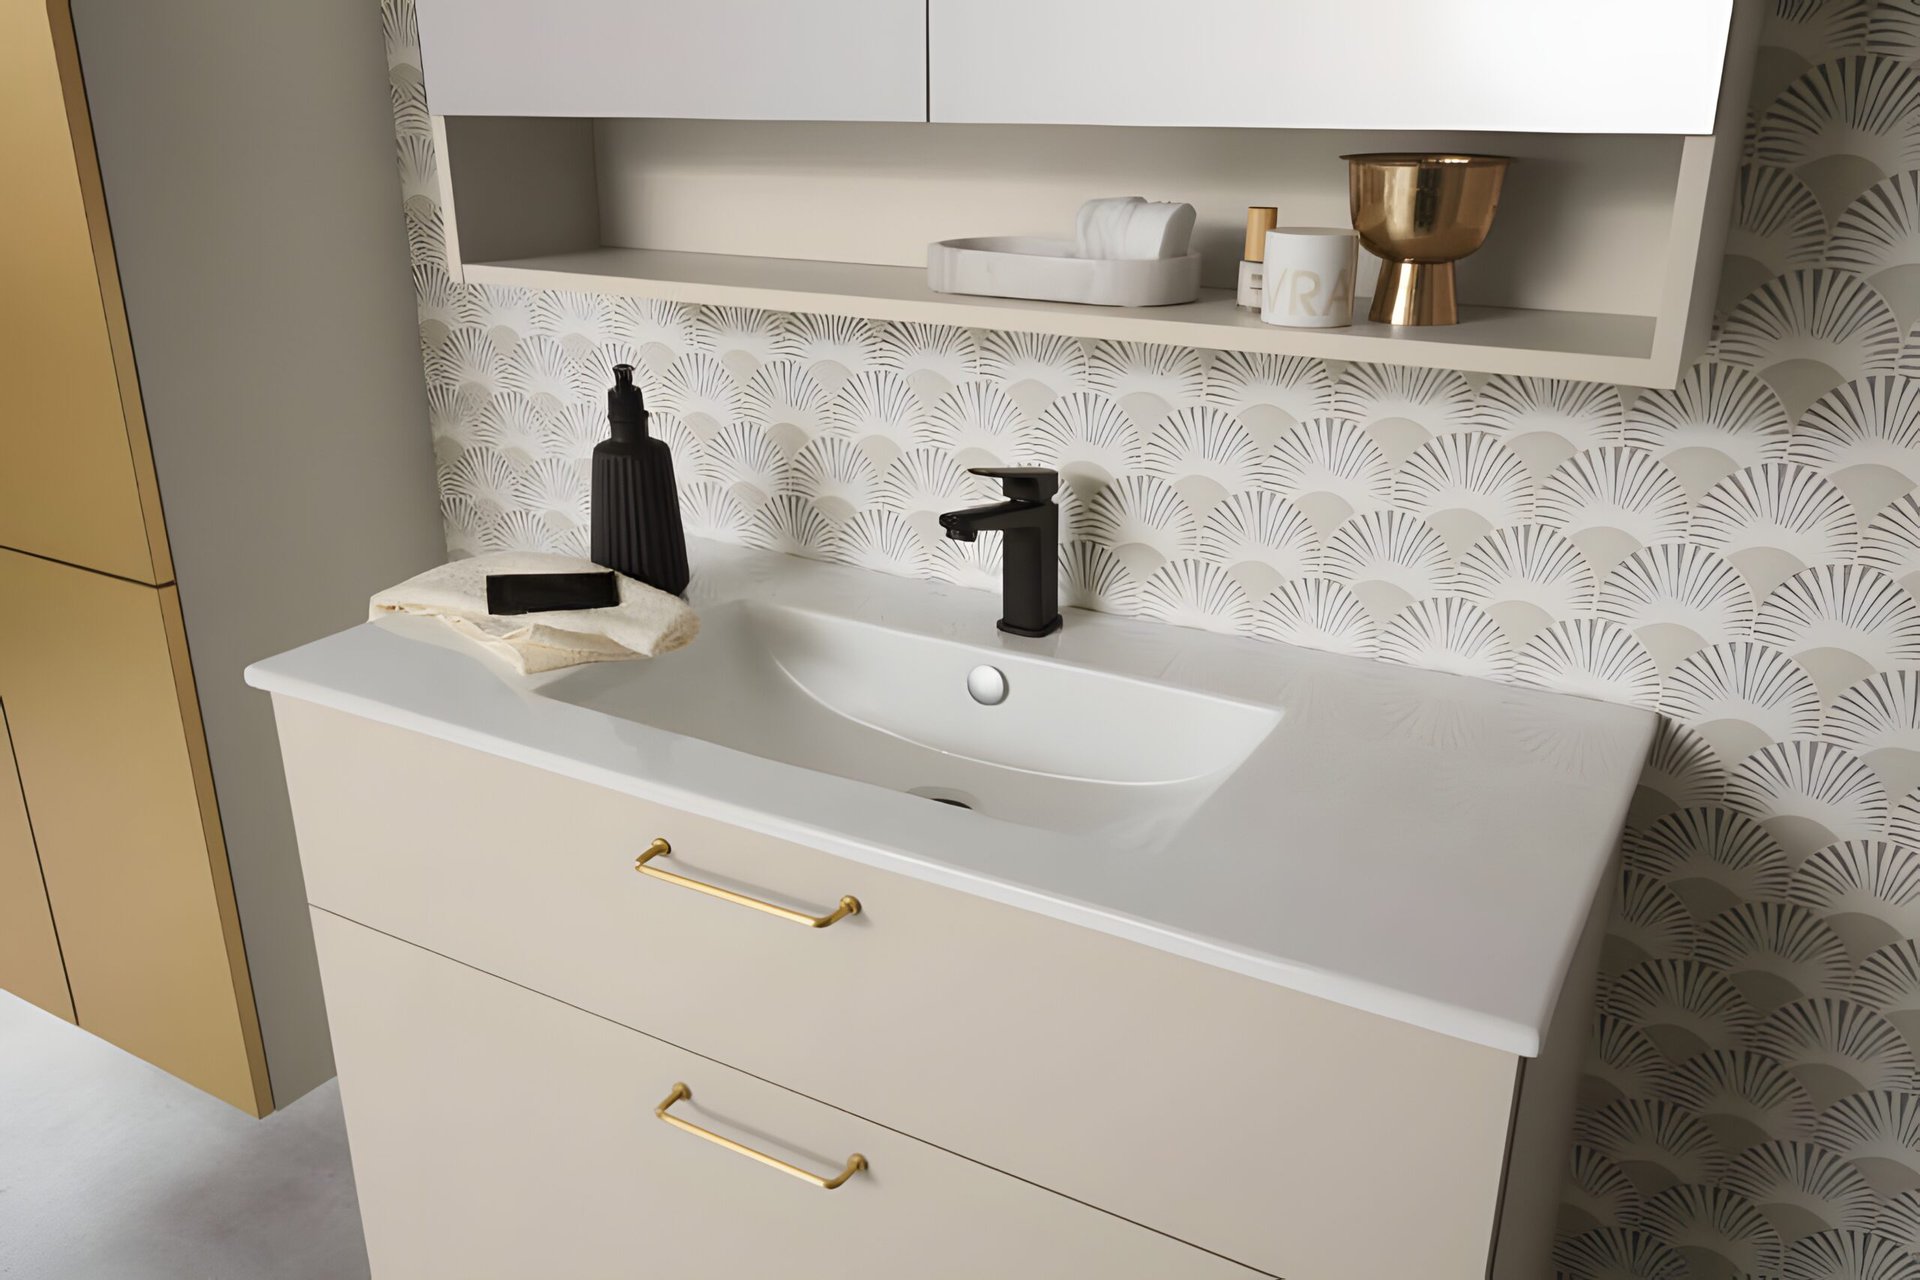
Why It Has Stayed Popular for So Long
Trends in kitchens move quickly. Glossy slab fronts, heavily moulded raised panels, distressed finishes, each had its run and each thinned out. The shaker kept its share through all of it, and the current data shows the gap is not narrowing. Houzz’s 2026 Kitchen Trends Study, drawn from more than 1,700 renovating homeowners, found shaker doors at 58 percent, flat-panel at 22 percent, and raised-panel at 12 percent (Houzz, 2026). More than half of people redoing a kitchen still choose the shaker over everything else combined.
There is a practical reason beyond looks. A kitchen is the part of a home that does the most for resale, and a door style that appeals to the widest pool of future buyers protects that value. Minor kitchen remodels were among the strongest performers in the most recent national cost-versus-value data, recouping roughly 96 percent of their cost at resale (Remodeling, 2025 Cost vs. Value Report). A neutral, broadly liked door like the shaker is a quieter way of saying you did not gamble. For a Vancouver homeowner, where the kitchen often carries a meaningful share of the home’s value, that matters.
The other reason is simpler. The shaker is easy to live with. It does not shout, it does not date the room to the year it was installed, and it gets out of the way so the counter, the floor, and the light can do their part. Timeless is an overused word, but it earns it here. The shaker reads as current in 2026 for the same reasons it read as right in 1956.
The Modern Slim Shaker
The most interesting movement in the style is not a new shape but a tighter one. The slim shaker, sometimes called a micro shaker, keeps the recessed panel and the square frame but narrows the rails and stiles dramatically. The effect is subtle and significant: the door looks lighter, more architectural, more in step with a downtown condo, while still carrying that familiar framed shadow line that a true slab door lacks.
This is the shaker’s evolution, not its replacement. Designers describe the shift as refinement rather than a break, and a growing number of homeowners are choosing the slim profile to bridge traditional and contemporary in one door (Houzz, 2026). The NKBA’s outlook backs the direction of travel: roughly 60 percent of designers expect minimalism to gain ground over the next three years, and the slim shaker is how minimalism enters a kitchen without going fully flat (NKBA, 2025). For a Yaletown loft or a Coal Harbour tower, the slim shaker often hits the sweet spot, clean enough for the space but warmer than a plain slab.
What Makes a Well-Made Shaker Front
Here is the part that gets overlooked. Every cabinet line sells a shaker, and from across the room they look alike. The difference shows up over years, and it lives in four places.
Material stability. A flat centre panel and a square frame have nowhere to hide movement. If the substrate swells, shrinks, or telegraphs through the finish, the door shows it. The best shaker fronts are built on engineered cores that stay flat through humidity swings, which matters in a coastal climate that runs damp for half the year.
Joinery and edges. Look at where the frame meets the panel and at the corners of the door. Tight, consistent joints and clean square edges are the signature of a well-built front. Loose joints and soft, rounded corners are where a cheaper door gives itself away.
Finish. A flat face is honest to a fault. Brush marks, orange peel, and uneven sheen all read clearly on a plain panel. A properly applied factory finish, evenly cured, is what lets a painted shaker still look crisp years later.
The hardware you do not see. A door is only as good as what carries it. This is where Bauformat’s German engineering shows: full-extension soft-close runners that let a drawer glide out completely and shut without a bang, and 3D-adjustable concealed hinges that let the installer dial each door into a perfect, even reveal and keep it there. Those even gaps around a shaker are not luck. They are adjustment, and they are what makes a row of doors look like one considered surface instead of a set of separate parts.
Bauformat has built cabinetry in Lohne, Germany since 1917, and the shaker fronts sit within the wider Bauformat collection, the broadest of the three ranges the brand offers alongside Baulux and the value-focused Burger. In Metro Vancouver the cabinets are measured, planned, and installed by the local team, so the precision built into the door survives the trip from the factory to your kitchen. A shaker is a simple door. Keeping it looking simple and exact for twenty years is the hard part, and that is the part that is engineered.
Frequently Asked Questions
Are shaker cabinets going out of style?
There is no sign of it. The most recent industry data shows the shaker still leading every other door style by a wide margin, at 58 percent of renovating homeowners in the Houzz 2026 study. Its appeal is built on function rather than fashion, which is why it has held its position through decades of changing trends rather than peaking and fading.
What is the difference between a standard shaker and a slim shaker?
Both share the same recessed flat panel and square frame. The slim or micro shaker simply uses much narrower rails and stiles, so the door reads lighter and more contemporary. A standard shaker leans traditional or transitional, while a slim shaker suits modern condos and minimalist kitchens without losing the framed shadow line that distinguishes a shaker from a plain slab door.
Do shaker cabinets work in a small Vancouver condo kitchen?
They do, and they often work better than busier styles. The clean frame keeps a small kitchen from feeling cluttered, and a slim shaker in a light or warm neutral can make a compact Yaletown or Mount Pleasant kitchen feel calm and considered. Paired with full-extension drawers, you also get full access to the back of every cabinet, which matters most when space is tight.
What colour shaker cabinets are most popular right now?
The market is moving away from all-white toward warmth. Soft off-whites and greiges remain a safe, broadly liked choice, but earthy greens, natural and matte wood tones, and deep colours on islands and lower runs are all gaining ground for 2026. The shaker’s plain face carries any of these cleanly, which is part of why it stays flexible.
The shaker endures because it never tried to be impressive. It tried to be useful, and that turned out to be the more lasting goal. Whether your kitchen sits in a hundred-year-old house or a brand-new tower, a well-built shaker front gives you a door that looks right today, will still look right in twenty years, and lets the rest of the room be the star. The simplest answer is usually the one that lasts.
Explore more from Bauformat BC
- Uncover the appeal of top traditional small kitchen styles perfect for petite spaces!
- Ultimate Guide to Elevating Your Kitchen Layout with Timeless & Classic Design Ideas
- Traditional Kitchen Cabinet Styles: Three Essential Tips by Bauformat
German cabinetry, planned and built for Metro Vancouver
The kitchen is one of the highest-return rooms in a home: the 2025 Cost vs. Value Report found a minor kitchen remodel recoups roughly 96% of its cost at resale. Choosing cabinetry that lasts is central to that return, which is where German engineering earns its place. Every Bauformat kitchen is manufactured in Germany, then measured, planned, and installed by our Vancouver team, built to fit your room to the millimetre.
See the Baulux, Bauformat, and Burger collections in person at 1410 Marine Dr Unit 205, North Vancouver, learn more about the manufacturer at bauformat.de.
Book a 30-minute consultation with our Metro Vancouver kitchen designers to plan a kitchen built to last.
The sink is the busiest fixture in any kitchen. You stand at it for prep, cleanup, filling pots, rinsing produce, and scrubbing the roasting pan that refuses to come clean. In a Yaletown condo with one compact run of cabinets, or a North Shore home where the kitchen opens onto the living space, that single basin shapes how the whole room works. Choose well and the daily rhythm of cooking feels effortless. Choose in a hurry and you live with the regret every evening.
This kitchen sink guide walks through the decisions that actually matter: the mounting style, the material, how many bowls, the size and depth, and the part most buyers overlook entirely, which is how the sink reshapes the cabinet underneath it. Because a sink is never just a sink. It is a system that includes the basin, the faucet, the cabinet, and the plumbing, and the smartest choice is the one where all four are planned together from the start.
Key Takeaways
- Pick the mounting style first: undermount suits stone counters and easy wiping, top-mount is budget-friendly and simple to retrofit, and apron-front makes a statement but demands special cabinetry.
- Material drives durability, noise, and upkeep. Stainless steel, granite and quartz composite, fireclay, and cast iron each behave differently in daily use.
- Single-bowl sinks are winning favour for handling large cookware, while double bowls still suit hand-washers who want separate zones.
- Sink choice dictates the sink-base cabinet. Heavy apron and fireclay sinks especially need reinforced support planned in advance.
- Metro Vancouver’s soft water is gentle on sinks, which widens your material options compared with hard-water regions.
Sink Types: How the Basin Meets the Counter
The mounting style is your first fork in the road because it determines how the sink looks, how easily you clean around it, and what your counter and cabinet need to accommodate.
Undermount sinks attach beneath the countertop, so the counter’s edge forms a clean lip over the basin. There is no rim sitting on the surface, which means you can sweep crumbs and water straight into the bowl. Undermounts pair naturally with stone, quartz, and other solid counters that can be sealed at the cutout. They have become the default for renovated kitchens, and undermount stainless steel consistently draws the highest search interest of any sink style according to market trend tracking through 2025 (Accio, 2025).
Top-mount, also called drop-in, sinks drop into a hole cut in the counter and rest on a visible rim. They are the easiest to install or replace, work with almost any countertop including laminate, and cost less. The trade-off is that rim, which collects grime and interrupts the wiping motion. For a rental refresh or a tight budget, a top-mount is a sensible, honest choice.
Apron-front sinks, often called farmhouse sinks, expose a deep front panel where a run of cabinet would normally sit. They have real presence and remain a steady favourite, with farmhouse styles posting strong year-over-year search growth into 2025 (Accio, 2025). They are also the most demanding to install, because the cabinet has to be built or modified to carry and frame them.
Integrated sinks are formed from the same material as the countertop, most often a solid surface or quartz composite, so the basin and counter are one continuous piece with no seam at all. They look immaculate and clean up beautifully, though they cost more and tie the sink’s fate to the counter’s.
A category worth its own mention is the workstation sink: a single deep basin with a built-in ledge that holds sliding cutting boards, colanders, and drying racks. These have surged, with search and sales tracking showing sustained growth and a peak in January 2026 (Accio, 2025). In a smaller condo kitchen where counter space is precious, turning the sink itself into a prep zone is a genuinely useful move.
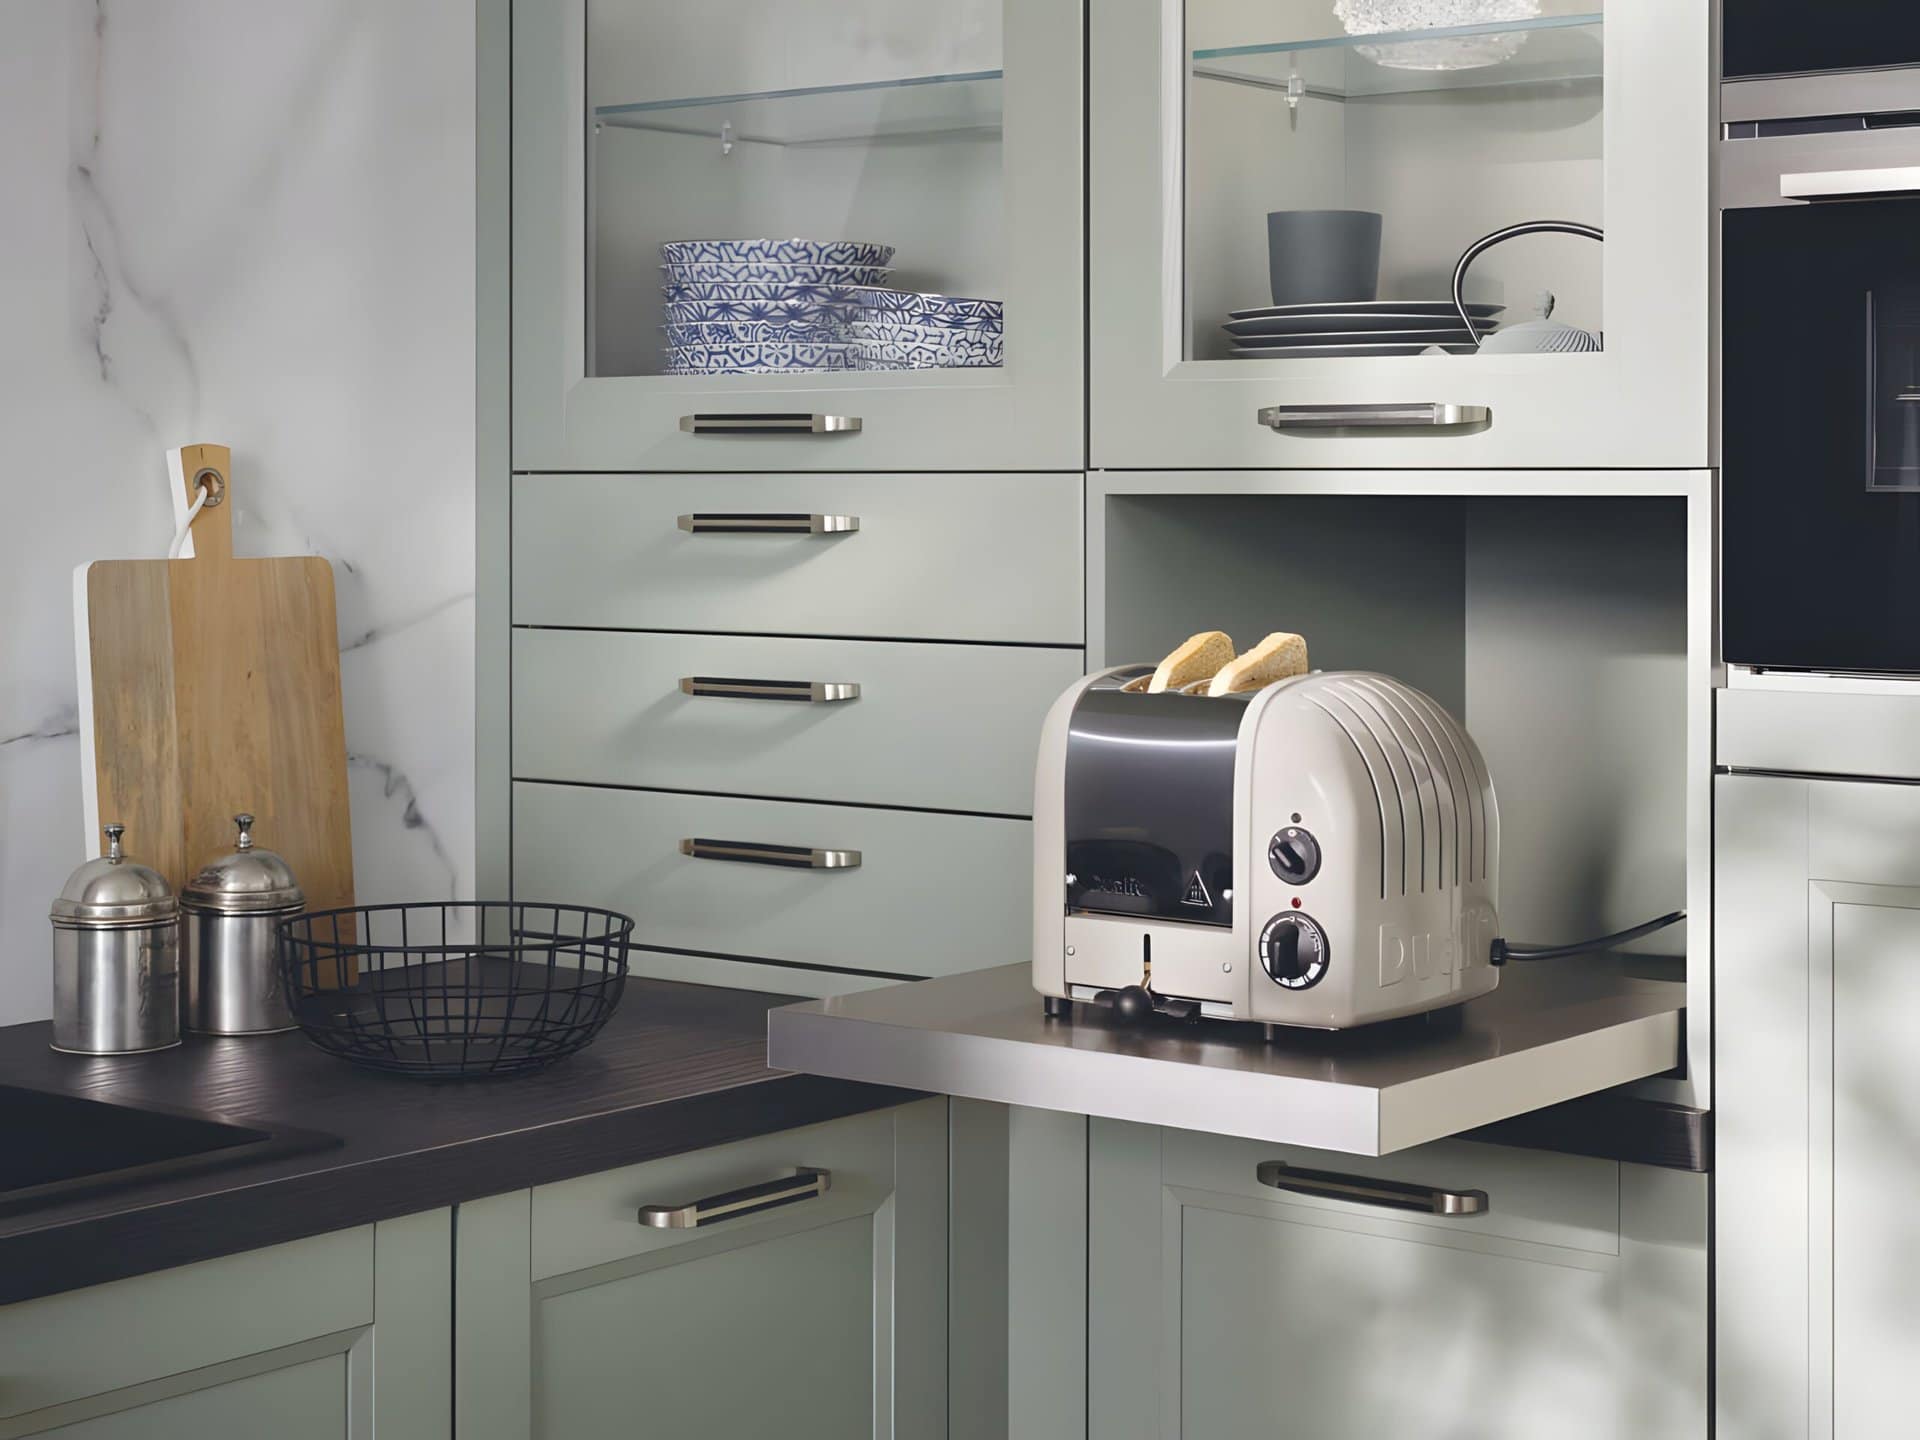
Materials Compared: Durability, Noise, and Upkeep
Material is where daily life shows up. Each one ages differently and asks for different care.
Stainless steel remains the most popular for good reason. It is light, affordable, heat-proof, and shrugs off stains. Gauge matters: a lower gauge number means thicker steel, and 16 to 18 gauge resists denting and dampens sound better than thin budget basins. Look for sound-deadening pads and a brushed or satin finish, which hides scratches far better than mirror polish. Its only real drawback is that it shows water spots, though that matters less in Metro Vancouver than almost anywhere else.
Granite and quartz composite sinks blend crushed stone with resin into a dense, matte basin that resists scratches, heat, and chips. They come in deep neutral colours, hide water marks well, and feel solid underhand. They are heavier than steel, which feeds back into cabinet planning, and very hot pans can mark lighter shades over time.
Fireclay is ceramic clay fired at high heat into a glossy, glass-hard surface. It is the classic farmhouse look: warm, smooth, and resistant to staining and fading. It is also heavy and can chip if you drop cast iron into it, and it almost always comes in apron form, which means serious cabinet support.
Cast iron with a porcelain enamel coating gives a thick, lustrous finish and excellent sound absorption. It is the heaviest option by a wide margin and the enamel can chip and show scratches from metal cookware. It rewards gentle treatment and the right cabinet beneath it.
Bowl Configurations: One, Two, or One and a Half
The number of bowls is genuinely a lifestyle decision, not a default.
Single bowl sinks give you one large, uninterrupted basin. They are easier to clean, and they swallow a baking sheet or a stockpot without a fight. The tide has turned in their favour, with one reader poll showing 71 percent choosing a large single over a standard double (The Sink Boutique, 2025). For most modern cooks, and for compact condo kitchens where every centimetre counts, a single bowl is the practical pick.
Double bowl sinks split the space into two basins, letting you soak on one side and rinse on the other, or keep prep separate from cleanup. They suit households that hand-wash often or like dedicated zones. The downside is that neither bowl is large enough for oversized pans.
One and a half bowl sinks pair a full-size basin with a smaller secondary one, often paired with a disposal or used for rinsing. It is a fair compromise for those who want some separation without sacrificing a generous main bowl.

Size and Depth: Matching the Sink to the Room
A sink that is too big crowds your counter and may not fit the cabinet; one that is too small frustrates you for years. Standard sink-base cabinets run 600 to 900 millimetres wide, and the sink must leave room for the cabinet walls and plumbing, so a 760 millimetre cabinet typically takes a basin around 685 millimetres or less.
Depth is where comfort lives. Bowls in the 200 to 250 millimetre range hide dishes and reduce splashing, which is welcome in an open-plan space where the kitchen is on display. Go too deep, though, and shorter cooks will be stooping over the basin all evening. In a small Vancouver condo, a single deep bowl around 230 millimetres often delivers the best balance of capacity and comfort without overwhelming a short counter run. Always confirm the sink fits the actual cabinet interior, not just the overall counter, before you commit.
Planning the Sink-Base Cabinet
This is the step most buyers skip, and it is where Bauformat’s approach pays off. The cabinet beneath the sink is not a generic box. It is a purpose-built sink-base cabinet that has to manage weight, plumbing, waste, and the loss of usable interior space.
Weight is the headline issue. A fireclay or cast iron apron sink, filled with water and dishes, can weigh well over 45 kilograms. That load cannot rest on a countertop alone. The sink-base cabinet needs internal support, often a reinforced rail or cradle, and an apron sink in particular requires the cabinet front to be cut and built around the exposed panel. This is precisely why these choices have to be locked in before cabinetry is made, not after. Bauformat cabinets are made in Germany and then measured, planned, and installed by the local Vancouver team, so the sink and its base are designed as one unit rather than reconciled on installation day.
Inside that cabinet, the plumbing eats space and the area under the basin is awkward. Bauformat sink-base cabinets address this with integrated waste and recycling bin pull-outs that tuck bins neatly around the trap, which is a real gift in a small condo where there is nowhere else to hide the garbage. Full-extension soft-close runners bring those bins all the way out so nothing gets lost at the back, and the 3D-adjustable concealed hinges keep doors aligned over years of daily slamming. Across the Baulux, Bauformat, and Burger collections, the sink base can be specified to match the sink you have actually chosen, whether that is a heavy apron basin or a tidy single-bowl undermount.
Pairing the Faucet
The faucet finishes the system, and a few practical points save grief. Match the number of mounting holes to your sink and counter: an undermount usually means the faucet mounts in the counter, while a top-mount may have pre-punched holes you need to fill or use. A tall gooseneck or pull-down spray head gives clearance to fill stockpots and rinse the deep corners of a single bowl, and a pull-down is almost essential with a large basin.
Reach matters too. The spout should land near the centre of the bowl, not against the back wall, or you will splash and miss. Finish is personal, though brushed and matte options hide marks and fingerprints better than polished chrome. Whatever you pick, choose the faucet alongside the sink, because the basin’s depth and bowl layout decide what height and reach will actually work.
Care and the Local Water Advantage
Most sink care is simple: rinse and wipe dry after heavy use, avoid harsh abrasives on enamel and composite, and use a protective grid in stainless steel to spare the finish from pots. Here Metro Vancouver hands you a real advantage. The region’s water, drawn from the Capilano, Seymour, and Coquitlam mountain reservoirs, is among the softest in North America, testing far below the 60 milligram per litre threshold for soft water (Hard Water HQ, 2026).
Soft water means very little mineral scale, so you will not fight the chalky limescale buildup that plagues sinks and faucets in hard-water cities. Water spots on stainless steel wipe away easily, fixtures stay clear, and your material choices are not constrained by scaling worries. One caveat: parts of Surrey, Langley, Delta, and Abbotsford that draw on groundwater can run measurably harder, so if you are outside the core mountain-supplied area, a quick check of your local water is worth the minute it takes.
Frequently Asked Questions
Is an undermount or top-mount sink better for a small condo kitchen?
For a renovation with a stone or quartz counter, undermount wins because it lets you wipe crumbs straight into the bowl and frees up the counter visually, which matters in a compact space. Top-mount makes sense if you are keeping a laminate counter or want the simplest, lowest-cost installation. The catch is that undermount needs a solid counter and a cabinet planned for it, so decide early.
Do I really need a special cabinet for an apron-front sink?
Yes. An apron sink exposes its front, so the cabinet has to be built or modified to frame and carry it, and because fireclay and cast iron versions are heavy, the base needs internal reinforcement. This is why the sink has to be chosen before the cabinetry is made. A purpose-built sink-base cabinet, measured and planned for your specific sink, prevents the problems that arise when a heavy basin is forced into a standard box.
Is single or double bowl the right choice?
Single bowl suits most modern kitchens because it handles large pans and sheet trays easily and is simpler to clean, which is why preference has shifted toward it. Choose double bowl if you hand-wash frequently or want a dedicated prep and rinse split. In a narrow condo cabinet, a single bowl almost always makes better use of the space.
Does Metro Vancouver’s water affect which sink material I should pick?
Happily, no. Because the region’s mountain-sourced water is very soft, limescale and mineral staining are barely a concern, so stainless steel, composite, fireclay, and cast iron all hold up well. The bigger drivers of your choice are weight, noise, budget, and look. If you are on groundwater in an outlying municipality, harder water is possible, so confirm your local supply.
A kitchen sink rewards the buyer who thinks about the whole system: the basin, the material, the faucet, and above all the cabinet that carries it. Get those four working together and you end up with a sink that fits the room, suits the way you cook, and holds up for the long haul. In a market full of compact Metro Vancouver kitchens, that kind of careful planning is what separates a sink you tolerate from one you genuinely enjoy standing at every day.
Explore more from Bauformat BC
- Fresh Takes: The Five Hottest Innovations in Kitchen Backsplash Design
- Exploring the Timeless Elegance of Quartz Countertops with Bauformat
- Unearth the Secrets of Bauformat’s Heat-Defying Kitchen Countertops
German cabinetry, planned and built for Metro Vancouver
The kitchen is one of the highest-return rooms in a home: the 2025 Cost vs. Value Report found a minor kitchen remodel recoups roughly 96% of its cost at resale. Choosing cabinetry that lasts is central to that return, which is where German engineering earns its place. Every Bauformat kitchen is manufactured in Germany, then measured, planned, and installed by our Vancouver team, built to fit your room to the millimetre.
See the Baulux, Bauformat, and Burger collections in person at 1410 Marine Dr Unit 205, North Vancouver, learn more about the manufacturer at bauformat.de.
Book a 30-minute consultation with our Metro Vancouver kitchen designers to plan a kitchen built to last.
There is a reason European kitchens keep turning heads in Metro Vancouver. Whether you are working with a compact Yaletown condo, a Kitsilano character home, or a North Shore townhouse, the European approach treats the kitchen as engineered furniture rather than a row of boxes. The result feels calm, considered, and built to last. And contrary to what many homeowners assume, that look does not have to come with a luxury price tag.
The trick is knowing which style you are actually after, then choosing the right fronts, palette, and details to get there without paying for things you will never notice. Below are four distinct European kitchen styles for 2026, each with a clear personality, plus a practical path to achieving the look affordably and the Bauformat collection that suits it best.
Key Takeaways
- Four European kitchen styles lead 2026: German handleless modern, Scandinavian, Mediterranean, and refined European shaker.
- Warmth is the year’s defining theme. The NKBA 2026 Kitchen Trends Report found 96 percent of industry professionals name warm neutrals as the most popular colour direction, and wood grain has overtaken painted fronts for the first time in years.
- You save money by spending where it shows (fronts, hardware, layout) and choosing value-driven collections like Burger for everything that does the same job behind a different door.
- German construction quietly does the heavy lifting: full-extension soft-close runners and 3D-adjustable concealed hinges deliver the smooth, quiet feel that makes any style read as high end.
- In a market where condo kitchen renovations run roughly 28,000 to 55,000 dollars, choosing a durable, well-planned kitchen protects resale value as much as daily comfort.
1. German Handleless Modern: Clean, Engineered, Minimal
This is the style most people picture when they think European. Flat, uninterrupted fronts. No protruding handles to catch a sleeve or collect grime. A grooved channel or recessed rail does the opening, so the eye travels across the cabinetry without a single visual stop. In a small Vancouver condo, that unbroken line is worth a great deal, because the absence of hardware makes a galley kitchen feel longer and less busy.
Handleless is far from a passing fad. It now accounts for around 80 percent of kitchens sold by some major European suppliers, and 2026 sees the look soften rather than disappear, pairing those crisp lines with warmer materials and calmer colours (Livingetc, 2026).
Palette: Think ultra-matte clay, mushroom, soft graphite, and warm off-white instead of stark, clinical white. A single deep tone on a tall bank of cabinets, balanced by a paler island, keeps the room grounded without feeling cold.
Fronts: Smooth slab doors in matte lacquer, ceramic, or glass, with a continuous handleless rail. The Baulux collection is built for exactly this, with ceramic, glass, and ultra-matte handleless fronts that resist fingerprints and wipe clean in seconds, a genuine advantage in a busy family kitchen.
How to get the look affordably: Reserve the premium ultra-matte fronts for the run you actually see when you walk in, and use a coordinated matte tone from a value-friendly line on the pantry wall or anything tucked around a corner. Skip decorative hardware entirely, since the handleless channel is the design, and you have just removed an entire line item from the budget.

2. Scandinavian: Pale Wood, Light, and Cosy
Scandinavian kitchens answer the grey Pacific Northwest winter beautifully. The whole philosophy is about coaxing light into a space and making it feel warm and lived in, which is exactly what a Vancouver home needs from November through March. Pale wood, soft textures, and uncluttered surfaces combine into something that feels restful rather than showy.
This is squarely where the market is heading. The defining direction for 2026 is warm minimalism, clean lines and uncluttered surfaces softened by natural wood tones, fluted panels, and earthy palettes that replace the cold minimalism of recent years (Nordiska Kok, 2026). Wood grain is now outpacing painted cabinets, with white oak leading at 51 percent popularity (NKBA 2026 Kitchen Trends Report).
Palette: Light oak or ash, warm oatmeal and linen whites, with one quiet accent such as a soft sage or muted blue. Natural light bounces around these tones, so a dim east-facing apartment suddenly reads brighter.
Fronts: Wood-grain slab or lightly grooved fronts, often mixed with a pale painted upper. The Bauformat collection carries the widest choice here, including realistic wood-grain fronts that let you set a light oak base against an oatmeal wall of cabinets for that signature two-tone Nordic balance.
How to get the look affordably: You do not need solid timber to get the feel. A high-quality wood-grain front gives the same warmth and grain movement at a fraction of the cost, and it shrugs off the humidity swings that real wood can struggle with near the coast. Put the wood-grain fronts on the lower cabinets and island where they read most, and keep the uppers in a simple painted finish to stretch the budget further.
3. Mediterranean: Warm, Textured, and Earthy
Southern European kitchens trade sleekness for soul. They are warm, tactile, and a little imperfect, built around earthy colour, natural texture, and the kind of materials that look better with age. In a Metro Vancouver context, this style brings welcome warmth to homes that can otherwise feel cool and glassy, and it pairs naturally with the tile and stone many local renovators already love.
The colour story supports it strongly. Natural, nature-inspired tones now top the rankings, with browns cited by 67 percent of industry professionals and warm neutrals such as sand, clay, and mushroom leading the way (NKBA 2026 Kitchen Trends Report).
Palette: Terracotta, clay, olive, warm cream, and toasted browns. The feeling is sun-warmed rather than saturated, so lean on muted, dusty versions of each colour rather than bright ones.
Fronts: Warm wood-grain or matte painted fronts in clay and cream tones, often with a subtle frame to add depth. The Bauformat collection’s range of wood-grains and painted finishes covers this comfortably, letting you build an earthy base and lift it with texture elsewhere.
How to get the look affordably: The character in a Mediterranean kitchen comes from the surroundings as much as the cabinets, so keep the cabinetry itself sensible and spend your texture budget on a handmade-look tile backsplash and a warm stone or stone-look counter. A zellige-style tile and a clay-toned front from a value collection deliver more atmosphere per dollar than any premium door ever could.

4. Refined European Shaker: Classic, Quietly Updated
For homeowners who want something timeless but not fussy, the modern European take on shaker is hard to beat. It keeps the recessed-panel door that reads as classic and familiar, then strips away the ornament and tightens the proportions so it sits comfortably in a contemporary home. It suits a Vancouver heritage house and a newer townhouse equally well, which is part of why it ages so gracefully on resale.
Its staying power matters in this market. With Metro Vancouver kitchen renovations tracking 20 to 30 percent above the national average and condo projects often landing between 28,000 and 55,000 dollars, a style that will not look dated in five years protects your investment (Vancouver General Contractors, 2026). Minor kitchen remodels also return strong value, recovering an estimated 70 to 80 percent of their cost at resale (Kitchen Cabinet Kings, 2026).
Palette: Soft sage, warm greige, creamy off-white, or a deep navy on the island. Greens lead the 2026 colour rankings, cited by 86 percent of professionals, which makes a muted sage shaker both classic and current (NKBA 2026 Kitchen Trends Report).
Fronts: A clean recessed-panel shaker front, paired with a simple knob or slim bar pull. The Bauformat collection includes shaker fronts that carry the precise German build underneath the traditional face, so the doors line up exactly and stay that way.
How to get the look affordably: Shaker is where the Burger collection shines, since it is the best-value line and the recessed-panel look does not depend on exotic materials to feel right. Choose restrained hardware, paint the whole kitchen one disciplined colour rather than three, and let the joinery and the quiet pulls carry the refinement.
What All Four European Styles Share
However different these four kitchens look, they are built on the same foundations, and that is where European cabinetry earns its reputation. Each is made in Germany, where Bauformat has been building kitchens since 1917, then measured, planned, and installed by the local Vancouver team so the fit suits your actual walls rather than a showroom assumption.
The hardware is the shared secret. Full-extension soft-close runners let you reach the very back of a drawer and close it with a whisper, while 3D-adjustable concealed hinges keep every door aligned for years and let an installer fine-tune the reveal on site. That engineering is what makes a modest front feel expensive, and it is consistent whether you choose Baulux, Bauformat, or Burger. The quiet, precise motion is the same across all four styles, which is exactly how a sensibly priced kitchen ends up feeling like a luxury one.
Frequently Asked Questions
Which European kitchen style is most affordable?
Refined shaker built on the Burger collection tends to give the most look for the money, because the recessed-panel style does not rely on premium materials to read well. Handleless modern can also be cost-effective once you account for the hardware you no longer have to buy. In every case, the biggest savings come from spending on the fronts and layout you see daily and choosing value finishes for cabinetry that sits out of sight.
Do wood-grain fronts hold up in Vancouver’s damp climate?
Yes. Engineered wood-grain fronts are designed to handle humidity and temperature swings far better than solid timber, which makes them well suited to a coastal climate. You get the warmth and grain movement that Scandinavian and Mediterranean styles depend on, without the seasonal expansion and contraction that can affect real wood, and wood-grain is one of the leading finishes heading into 2026.
Are handleless kitchens going out of style for 2026?
No. Handleless remains one of the most popular choices in European kitchens, and 2026 simply softens it by pairing those clean lines with warmer colours and natural textures rather than cold, glossy white. If anything, the warm-minimalist direction has made handleless feel more inviting and more livable than the starker versions of a few years ago.
Which style works best in a small Yaletown condo?
Handleless modern and Scandinavian both excel in compact spaces. The handleless look removes visual clutter and makes a galley feel longer, while pale Scandinavian wood and light tones pull more brightness into apartments that may get limited daylight. Both keep a small footprint feeling open rather than crowded, which matters when every centimetre counts.
European kitchen styles reward a clear decision more than a big budget. Pick the personality that fits how you actually live, whether that is the engineered calm of German handleless, the cosy light of Scandinavian, the warmth of the Mediterranean, or the quiet refinement of modern shaker, then let German construction carry the quality underneath. For Metro Vancouver homeowners, that combination of considered design and durable build is what keeps a kitchen feeling current and comfortable long after the renovation dust has settled.
Explore more from Bauformat BC
- Your German Kitchen, Step by Step: From First Sketch to Installation
- German Kitchen Design on a Budget: Your 2026 Options
- Unravelling the Secrets Elegance of Premium Custom Kitchen Design
German cabinetry, planned and built for Metro Vancouver
The kitchen is one of the highest-return rooms in a home: the 2025 Cost vs. Value Report found a minor kitchen remodel recoups roughly 96% of its cost at resale. Choosing cabinetry that lasts is central to that return, which is where German engineering earns its place. Every Bauformat kitchen is manufactured in Germany, then measured, planned, and installed by our Vancouver team, built to fit your room to the millimetre.
See the Baulux, Bauformat, and Burger collections in person at 1410 Marine Dr Unit 205, North Vancouver, learn more about the manufacturer at bauformat.de.
Book a 30-minute consultation with our Metro Vancouver kitchen designers to plan a kitchen built to last.
A great kitchen does not start at the showroom or with a paint chip. It starts with a tape measure, a rough sketch, and a few honest questions about how you actually cook, store, and move through the room. Designing kitchen cabinets is really a planning exercise: you are deciding where things live before a single panel is cut.
This guide walks through that planning process the way our Vancouver team approaches it, from assessing the space to taking cabinets all the way to the ceiling. Whether you are working with a compact Yaletown condo galley or a wider East Van family kitchen, the same logic applies. Get the plan right on paper, and the build, the install, and years of daily use all get easier.
Key Takeaways
- Start by measuring the room precisely and noting windows, plumbing, electrical, and ceiling height before you choose a single cabinet.
- Plan in three layers: base cabinets, wall cabinets, and tall units, then assign each a job.
- Base cabinets are typically 34.5 inches high and 24 inches deep, with widths in 3-inch increments from 9 to 48 inches (Wholesale Cabinet Supply, 2025).
- Drawers are winning over doors for base storage because they bring contents to you instead of making you crouch and dig.
- Lay out work zones using the work triangle: each leg between 4 and 9 feet, with the three legs totalling no more than 26 feet (NKBA, 2025).
- Corners and interiors need dedicated solutions early, not as an afterthought once the boxes are set.
- A made-to-order system lets you carry cabinetry to the ceiling and turn a wishlist into a buildable, measured plan.
Measure and Assess the Space
Every workable plan begins with accurate numbers. Measure each wall at the floor and again at counter height, since older Metro Vancouver homes are rarely perfectly square. Record the room’s overall width and length, then mark the exact position of every window, door swing, radiator, and bulkhead. Note ceiling height in a few spots, because a sloped or dropped ceiling changes what you can do up top.
Just as important is mapping the services you cannot easily move. Flag the plumbing stack, the electrical panel, gas lines, and any structural posts. In a concrete condo tower, relocating plumbing can be expensive or simply not allowed by strata, so the sink and dishwasher often anchor the rest of the layout. Walk the room and ask how you use it: where groceries land, where the garbage and recycling need to go, and which direction you naturally turn while cooking. Those observations shape the plan more than any trend.
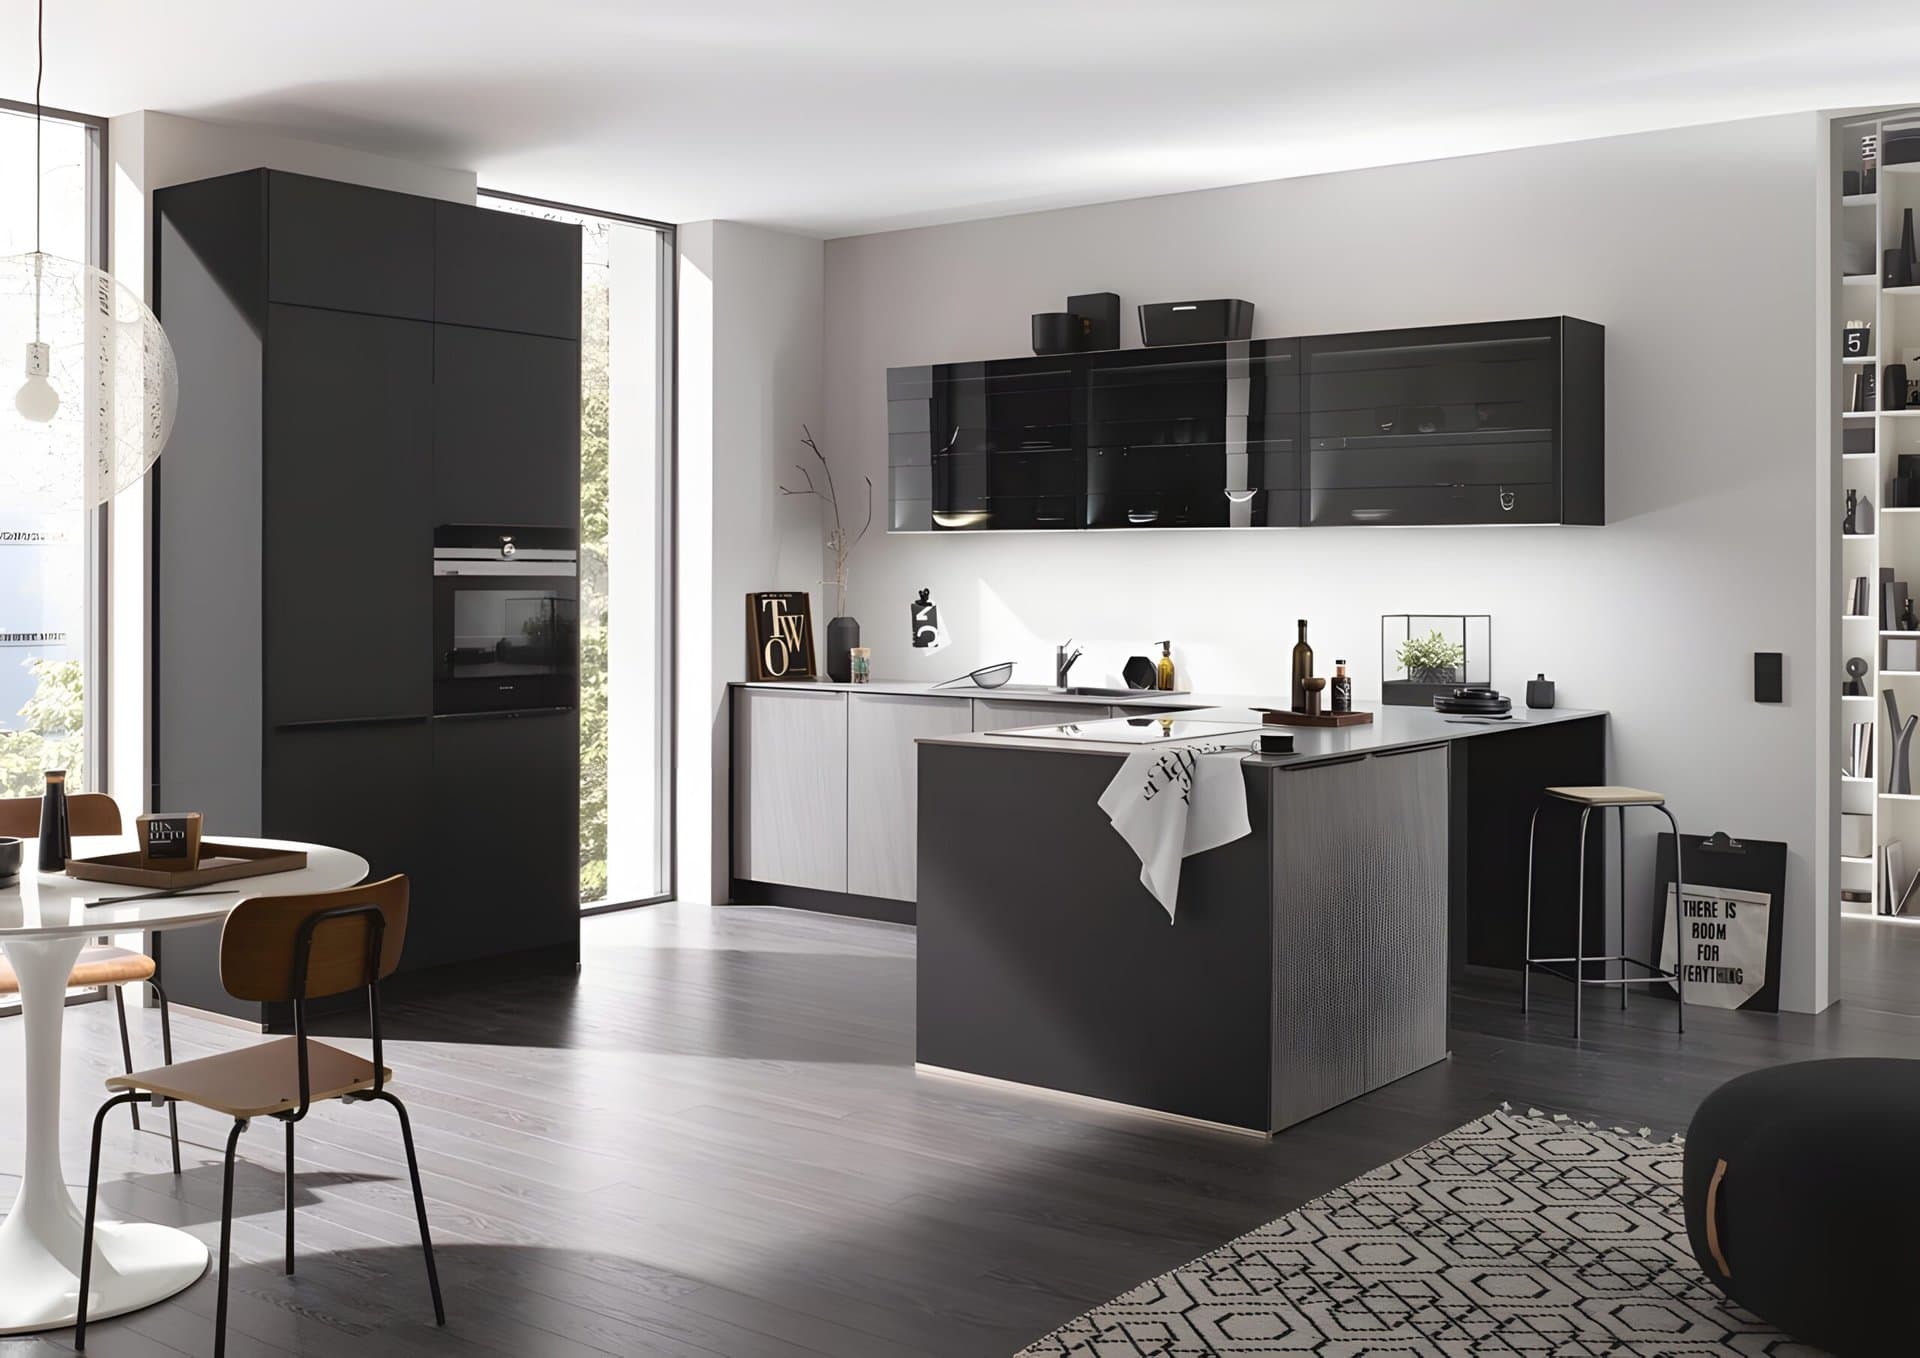
Plan Base, Wall, and Tall Cabinets
Think of cabinetry in three layers, each with a distinct role. Base cabinets carry the countertop and do the heavy lifting for pots, pantry items, and everyday tools. Wall cabinets handle lighter, frequently reached items and define the visual rhythm above the counter. Tall units, the full-height cabinets, hold a pantry, an oven tower, or a broom and appliance store in one efficient column.
Standard sizing gives you a useful starting grid. Base cabinets generally sit at 34.5 inches high and 24 inches deep, which becomes a comfortable 36-inch working height once a typical counter is added (Wholesale Cabinet Supply, 2025). Wall cabinets are usually 12 to 15 inches deep. Sketch the base run first, then the tall units, and let the wall cabinets fill in last. In a tight condo, a single well-placed tall pantry can replace a wall of upper cabinets and keep sightlines open, which matters in the open-plan layouts common across Vancouver’s newer buildings.
Choose Sizes, and Drawers Versus Doors
Cabinet widths come in 3-inch increments, typically from 9 to 48 inches (Wholesale Cabinet Supply, 2025), so designing is partly a puzzle of combining widths to fill each wall without awkward fillers. Plan the non-negotiable elements first: the sink cabinet, the cooktop or range, and the dishwasher beside the sink. Everything else flexes around them.
Then make the drawers-versus-doors call for each base cabinet. The industry has moved firmly toward drawers below the counter, and for good reason: a deep drawer brings its full contents out to you, so nothing disappears into a dark back corner. The NKBA’s recent trends research points to floor-to-ceiling cabinetry with more drawers and storage-packed islands leading homeowner demand (NKBA, 2025). A practical approach is to use wide drawer banks for pots, dishes, and pantry goods, and reserve doors for the sink cabinet and for tall items like baking sheets. Bauformat base units run on full-extension soft-close runners, so even a heavily loaded drawer glides out fully and closes quietly.
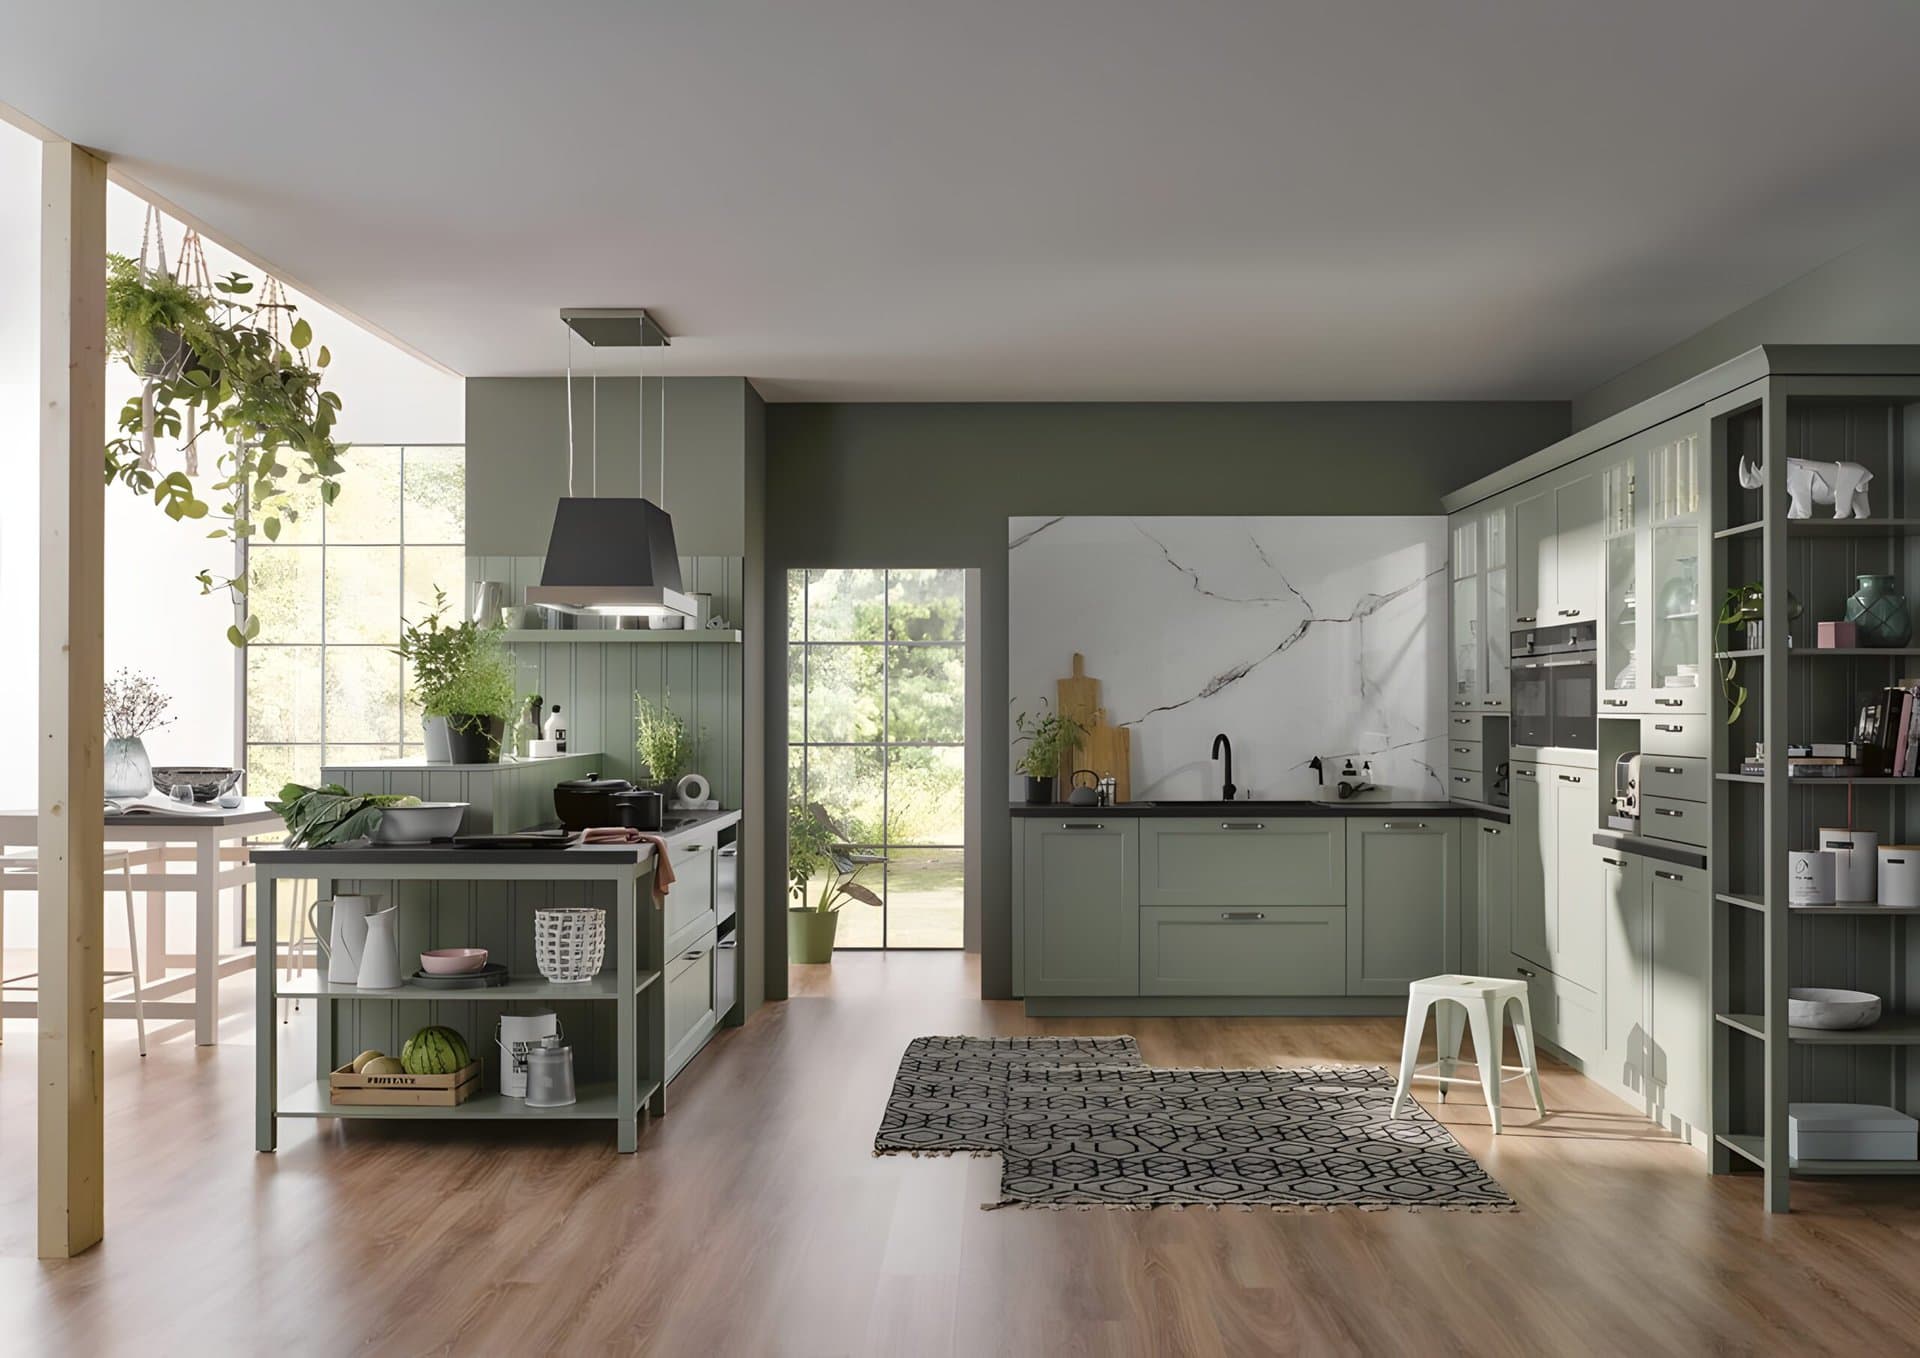
Lay Out the Kitchen Around Zones
With sizes roughed in, organize the room into zones that follow your workflow: a store zone near the fridge and pantry, a prep zone of open counter beside the sink, a cook zone at the range, and a clean zone around the sink and dishwasher. Cabinets then earn their keep by putting the right tools in the right zone, so knives and boards live by the prep counter and pots live by the stove.
The classic work triangle keeps those zones in balance. The guideline is that each leg between the sink, cooktop, and refrigerator should measure between 4 and 9 feet, with the three legs adding up to no more than 26 feet, and no major traffic path cutting through the middle (NKBA, 2025). For a single cook, allow at least 42 inches of aisle, and 48 inches where two people share the space (NKBA, 2025). In a narrow galley, the triangle naturally compresses into an efficient line, while a Vancouver island kitchen can use the island as the prep zone that ties the others together.
Choose Fronts and Finishes
Once the layout works, the look comes from the fronts. This is where you decide between a flat slab door for a calm, contemporary feel and a framed or shaker-style front for something warmer and more traditional. Consider the whole room: matte finishes hide fingerprints and soften bright West Coast light, while a handleless design with integrated grips or push-to-open mechanisms gives a clean, uninterrupted face that suits modern condos.
Colour and material choices ripple across the plan, so it helps to view fronts against your flooring and counter samples in real daylight rather than under showroom lights alone. Bauformat is made to order across the Baulux, Bauformat, and Burger collections, with Bauformat offering the widest range of fronts and Burger built around best value, so you can match a finish to both your taste and your budget. Mixing a darker base run with lighter wall cabinets is a reliable way to ground the room while keeping the upper half feeling open.
Plan Interior Storage and Corners
The inside of a cabinet is where a good plan becomes a great one. Decide early what each unit holds, then specify the fittings to match: cutlery and utensil organizers in the top drawers, peg systems to keep plates and bowls from sliding, and pull-out bins for waste and recycling tucked beside the sink. This is also where concealment pays off, and homeowner demand backs it up: NKBA research found that 87 percent of professionals say homeowners want pantry storage hidden behind cabinet doors or panels for a clutter-free look (NKBA, 2025).
Corners deserve special attention because a poorly planned corner swallows space you never get back. Rather than a dead box you reach into blindly, plan a dedicated corner solution such as a swing-out or pull-out system that delivers the contents to the front. Bauformat’s corner units, tall pull-outs, and smart interior fittings are designed to be specified during planning, not improvised later, which is exactly when these decisions are cheapest and easiest to make.
Take It to the Ceiling
One of the highest-impact moves in cabinet design is carrying the uppers all the way to the ceiling. The gap above standard wall cabinets collects dust and rarely earns its keep, while full-height cabinetry adds real storage and makes the whole kitchen read as intentional and built-in. The same NKBA trends work points to floor-to-ceiling cabinetry as a leading direction in current kitchens (NKBA, 2025).
Going to the ceiling is far simpler with a made-to-order system, because the top cabinets, or a finishing panel above them, can be sized to your exact ceiling height rather than left to a one-size box. Reserve that top tier for lighter, seasonal, or rarely used items, since you will reach them with a step stool. In Vancouver’s older homes with taller ceilings, this can mean a generous run of extra storage, and even in standard condo heights it removes the dust-trap gap and gives the room a clean, custom finish.
Frequently Asked Questions
What is the first step in designing kitchen cabinets?
Accurate measurement comes first. Record each wall’s length and height, mark every window, door, and bulkhead, and note where plumbing, gas, and electrical run, since those services are the hardest to move. Only once you have reliable numbers and an understanding of how you use the room should you start placing cabinets.
Should I choose drawers or doors for base cabinets?
For most base cabinets, drawers are the more practical choice because they bring their contents out to you instead of forcing you to crouch and reach into the back. Current NKBA trends research shows demand leaning toward more drawers and smarter storage (NKBA, 2025). Doors still make sense for the sink cabinet and for storing tall, flat items like trays and baking sheets.
How big should a kitchen be for a good cabinet layout?
There is no single minimum, since galley, L-shaped, and island layouts all work at different sizes. What matters is keeping the work triangle in range, each leg between 4 and 9 feet and the total under 26 feet, and leaving at least 42 inches of aisle for one cook or 48 inches for two (NKBA, 2025). A good plan adapts these guidelines to the room you actually have.
Is it worth investing in a well-designed cabinet plan?
A thoughtful kitchen update tends to hold its value well. The 2025 Cost vs. Value Report found that a minor kitchen remodel recouped about 96 percent of its cost at resale, the strongest return of any interior project (Zonda, 2025). A clear, made-to-order plan also reduces costly changes during the build, since the decisions are settled before anything is cut.
Designing kitchen cabinets rewards patience at the planning stage, where measuring carefully, layering base, wall, and tall units, and assigning every drawer and corner a job turns a vague wishlist into something buildable. With a made-to-order German system and a local Metro Vancouver team measuring and planning the space, the kitchen you sketch on paper is the one that gets installed, fitted to your home rather than forced into standard boxes.
Explore more from Bauformat BC
- What Factors Should You Keep in Mind When Choosing the Perfect Kitchen Cabinets? Incorporating Bauformat into Your Selection
- How to Maintain the Quality of Your Kitchen Cabinets
- Which Material Tops the List for the Ideal Kitchen Cabinet Construction?
German cabinetry, planned and built for Metro Vancouver
The kitchen is one of the highest-return rooms in a home: the 2025 Cost vs. Value Report found a minor kitchen remodel recoups roughly 96% of its cost at resale. Choosing cabinetry that lasts is central to that return, which is where German engineering earns its place. Every Bauformat kitchen is manufactured in Germany, then measured, planned, and installed by our Vancouver team, built to fit your room to the millimetre.
See the Baulux, Bauformat, and Burger collections in person at 1410 Marine Dr Unit 205, North Vancouver, learn more about the manufacturer at bauformat.de.
Book a 30-minute consultation with our Metro Vancouver kitchen designers to plan a kitchen built to last.
North Vancouver, BC, September 17, 2026
Where Can You See German Kitchen Cabinets in North Vancouver?
At 1410 Marine Drive, Unit 205. Bauformat BC now has its own address on the North Shore, where design consultations, door and finish samples and all three collections sit together by appointment. A Bauformat kitchen display also stands a few doors away in the Canadian Home Style showroom at 1420 Marine Drive, the flooring and cabinetry company that represents the line in British Columbia.
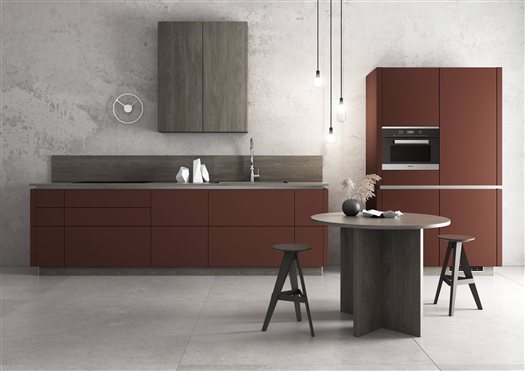
Image courtesy of Bauformat
What Are the Three Collections Offered by Bauformat BC?
Baulux, Bauformat and Burger. Baulux is the luxury tier, Bauformat sits in the middle, and Burger is the entry point into the range. The Bauformat line is built by a family-owned German manufacturer, in production since 1917. Seeing the three side by side is the quickest way to understand what separates them, and that is what the Unit 205 address is for.
What Happens at a Kitchen Design Consultation?
You sit down with the kitchen designer and work through the room itself. Bring measurements, photos or a floor plan, and you will leave with a clear read on layout, cabinet collection, finishes and what the project involves. Consultations at Unit 205 are by appointment, on 604-770-1284. Homeowners across the North Shore, Vancouver, West Vancouver and Burnaby book the same way, and the City of North Vancouver location keeps the drive short from either side of the bridge.
What Warranty Comes With a Bauformat Kitchen?
Two layers, and they cover different things. Bauformat carries a lifetime warranty on cabinet parts. Canadian Home Style adds a 3-year workmanship warranty on the installation, which is triple the usual term in this market. Every kitchen is designed, project-managed and overseen by Canadian Home Style, and the company stands behind the finished room. Homeowners planning a renovation can compare that against the guidance published by the National Kitchen and Bath Association.
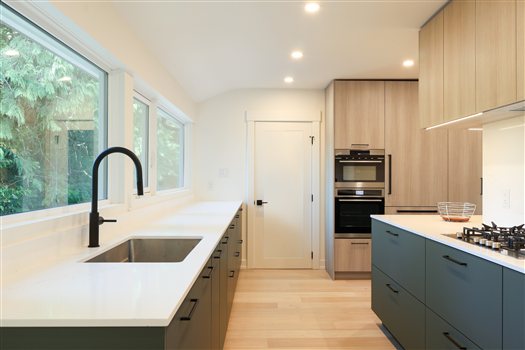
About Bauformat BC
Bauformat BC offers three cabinet collections in British Columbia: Baulux, Bauformat and Burger. The Bauformat line is built by a family-owned German manufacturer producing kitchens since 1917. Design consultations are held at 1410 Marine Drive Unit 205 in North Vancouver. These collections are sold, designed and project-managed in Metro Vancouver by Canadian Home Style, a family-owned flooring and custom cabinetry company trading since 1985, holding more than 165 five-star reviews and the 2026 Consumer Choice Award for North Vancouver in Flooring and Custom Cabinetry.
Contact
Bauformat BC
1410 Marine Drive, Unit 205
North Vancouver, BC V7P 1T5
604-770-1284
bauformatbc.com
Canadian Home Style
1420 Marine Drive
North Vancouver, BC V7P 1T6
604-980-6772
canadianhomestyle.com
Media contact: Sahel Jalali, Spokesperson, Bauformat BC
A kitchen should welcome everyone who cooks in it. For a person who uses a wheelchair, a relative whose balance has changed with age, or a household where three generations share the same counters, the difference between a frustrating room and an easy one often comes down to a few inches and some well-chosen hardware. Accessible kitchen design is not about a clinical, institutional look. Done thoughtfully, it produces a kitchen that simply works better for more people, and most guests would never notice the planning behind it.
That planning matters more than ever in Metro Vancouver. With property here at a premium and families choosing to stay put rather than move, more homeowners are renovating so that a kitchen serves them through changing needs. Across Canada, 96 per cent of people aged 65 and older say they want to remain in their own homes as they age (Affinity Health, 2025), and multigenerational households continue to climb (Statistics Canada, 2021 Census). A kitchen built around accessibility is, in practice, a kitchen built to last a lifetime.
Key Takeaways
- A maximum counter height around 34 inches with usable knee clearance underneath lets a seated cook work comfortably at the sink and a prep surface (ADA Standards for Accessible Design).
- Aim for roughly 60 inches of clear turning space and at least 40 inches of passage between facing runs so a wheelchair can move freely.
- Pull-out and pull-down storage brings items to the user instead of asking the user to reach into a deep, high, or low cabinet.
- Wall ovens, drawer dishwashers, and side-opening ovens are far easier to reach from a seated position than under-counter or drop-down appliances.
- Lever taps, touch controls, and D-shaped pulls reduce the grip and twisting that traditional hardware demands.
- Because Bauformat kitchens are made to order, counter heights, clearances, and storage can be tailored to the individual rather than to an average.
Counter Heights and Knee Clearance
Standard counters sit at about 36 inches, a height set for someone working on their feet. For a seated cook, that is too tall, and the cabinet below blocks any chance of pulling close. Accessible guidance lowers the work surface and opens up the space beneath it. The ADA Standards for Accessible Design set a maximum counter height of 34 inches for an accessible work surface, with knee clearance of at least 27 inches high, 30 inches wide, and 19 inches deep so a person can roll up and work facing forward rather than reaching sideways (ADA Standards for Accessible Design).
One height rarely suits everyone, which is why varied counter heights are so useful in a shared kitchen. A lower run at the sink and a primary prep zone gives a seated user a comfortable surface, while a taller section elsewhere serves someone who prefers to stand. Under the sink, leaving open knee space, and insulating or panelling the pipes so there is no risk of contact with hot surfaces, turns the sink from an obstacle into a usable station. The same open-underneath approach at one stretch of counter creates a genuine seated workspace rather than a spot to lean against.
Because each Bauformat kitchen is made to order in Germany and then measured and installed by the local Vancouver team, those heights do not have to be guessed from a catalogue. They can be set to the person who will actually use the room, including the depth of knee clearance and the position of the lowered run.

Accessible Storage That Comes to You
The hardest part of any kitchen is the storage you cannot reach. A reasonable seated reach range falls roughly between 15 and 48 inches from the floor, which leaves the back of a deep base cabinet and the upper shelves of wall cabinets effectively out of bounds. The answer is not to give up that space but to bring it forward.
This is where German interior fittings genuinely change daily life. Full-extension, soft-close runners pull a drawer all the way out so the back of it is as reachable as the front, with no stretching into a dark cavity and no slam at the end of the travel. Deep pan drawers replace low cupboards, so heavy pots slide out to the cook instead of forcing a reach down and back. Pull-out larder units bring an entire pantry into the open in one motion. For wall cabinets, pull-down mechanisms lower a shelf to within easy reach and return it when released, putting everyday dishes and dry goods back in play for a seated user.
Bauformat builds its kitchens around exactly this kind of hardware: full-extension soft-close runners, pull-out and pull-down storage, and smart interior fittings that organize drawers so items stay visible and within reach. The point of accessible storage is that the kitchen does the reaching, not the person.
Appliance Placement That Works From a Seated Position
Where an appliance lives, and how its door opens, decides whether it can be used safely from a chair. A few choices make a large difference.
A wall oven set at a height the user chooses removes the deep bend and the awkward lift over a hot drop-down door that a standard range demands. A side-opening oven door is easier still, because it lets a seated cook pull alongside rather than reaching across a downward-swinging door. Raising the dishwasher off the floor, or choosing a drawer-style dishwasher, ends the low bend that a conventional under-counter unit requires and brings the racks up to a comfortable level. A cooktop with front or side controls means no reaching over hot burners to adjust the heat, and leaving open knee space beneath it, again with protected pipework and surfaces, lets the cook sit right up to the pan.
The microwave deserves the same thought. Mounted over a range it becomes a hazard for almost anyone seated; placed at counter height or in a drawer it becomes one of the easiest appliances in the room. Planning these placements before cabinetry is built, rather than working around fixed boxes afterward, is what keeps the finished kitchen both accessible and good-looking.

Clearances and Turning Space
An accessible kitchen needs room to move, and this is the element most often underestimated. A wheelchair needs space to turn, and the widely used benchmark is a clear turning circle of about 60 inches, enough for a full rotation without a three-point shuffle (ADA Standards for Accessible Design). Between facing counters or a counter and an island, plan for at least 40 inches of clear passage, and closer to 48 inches if someone needs to pass behind a person already working at the counter.
Galley layouts can work well because everything sits within a short reach, but only if the two runs are far enough apart to turn between them. Tight U-shaped kitchens are harder, since the turning space has to live inside the U. In Metro Vancouver, where floor plans are often compact, this is where early planning earns its keep. Sometimes removing a peninsula, narrowing an island, or shifting a doorway frees up the turning room that makes the whole kitchen usable. Flooring matters here too: a smooth, slip-resistant, level surface with no thresholds keeps movement easy and safe.
Accessible Hardware and Controls
The smallest details carry a lot of weight, because they are touched dozens of times a day. Hardware that requires a firm grip, a pinch, or a twist of the wrist quietly excludes people with limited hand strength or arthritis, and creates daily friction for everyone else.
Lever-style taps, or touch and motion-activated faucets, replace the round knobs and stiff handles that are hard to grip with wet or weak hands. On cabinetry, D-shaped pulls give a generous opening that a whole hand or even a forearm can hook into, which is far kinder than a small knob that asks for a precise pinch. Soft-close runners and concealed hinges mean drawers and doors close gently on their own, removing the need to push a heavy door the last few inches.
This is where German engineering and accessibility line up naturally. Bauformat’s full-extension soft-close runners and 3D-adjustable concealed hinges were designed for smooth, low-effort movement, and that same effortlessness is exactly what makes a kitchen easier for a person with limited strength or reach. Choosing pulls, taps, and runners with accessibility in mind costs little and pays off at every use.
Planning for the Individual
The phrase universal design describes a space that works for the widest possible range of people without looking specialized, and it has become a defining trend in home renovation. In North America, the share of remodelers reporting that requests for aging-in-place features have risen over the past five years sits at 73 per cent (NAHB, 2025), and home adaptations are already the most common support older Canadians use, reported by 25 per cent of those aged 65 to 79 and nearly 52 per cent of those 80 and older (Statistics Canada, 2025).
What those numbers point to is the value of planning around a specific person rather than a generic standard. A guideline sets a sensible floor, but the right counter height depends on the user’s seated reach, the best storage depends on what they cook and how they move, and the ideal layout depends on the room. A made-to-order kitchen is what makes that level of fitting possible. Because Bauformat kitchens are planned, measured, and installed by a local Vancouver team, and offered across the Baulux, Bauformat, and Burger collections at different price points, the same accessible thinking can be applied whether the goal is a full universal-design renovation or a few thoughtful changes that keep a much-loved kitchen working for years to come.
Frequently Asked Questions
What is the ideal counter height for a wheelchair-accessible kitchen?
Accessible guidance sets a maximum work-surface height of about 34 inches, with knee clearance of at least 27 inches underneath so a seated user can pull up and work facing forward (ADA Standards for Accessible Design). Many households go further and install varied heights, a lower run for seated use and a standard run for standing, so the kitchen suits everyone who shares it. Because a made-to-order kitchen can be built to a chosen height, the surface can be matched to the individual rather than to an average.
How much space do you need for a wheelchair to turn in a kitchen?
Plan for a clear turning circle of roughly 60 inches so a wheelchair can make a full turn, and keep at least 40 inches of clear passage between facing counters or a counter and an island (ADA Standards for Accessible Design). In compact Metro Vancouver homes this often means rethinking an island or a doorway early in the design, which is far easier to do on paper than after cabinetry is installed.
Does accessible storage have to make a kitchen look institutional?
Not at all. The features that make storage accessible, full-extension drawers, pull-out larders, and pull-down wall units, sit behind ordinary cabinet fronts and are invisible until used. A kitchen can be fully accessible and still look like any other well-made German kitchen, which is the central idea behind universal design.
Can an existing kitchen be made more accessible without a full renovation?
Often, yes. Swapping knobs for D-shaped pulls, fitting a lever or touch tap, adding pull-out drawers and pull-down fittings inside existing cabinets, and relocating a microwave to counter height all improve accessibility without rebuilding the room. These smaller changes can be a sensible first step, with a fuller renovation considered later if needs change.
Accessible kitchen design is really just good design taken a step further: lower the surfaces that need to be reached, bring the storage to the cook, choose appliances and hardware that ask for less effort, and leave enough room to move. For Metro Vancouver families planning to stay in their homes and welcome more than one generation under the same roof, a kitchen built this way is not a compromise. It is a more thoughtful, more comfortable room that keeps working beautifully through every stage of life.
Explore more from Bauformat BC
- Why Large Families Should Choose Classic Kitchen Designs
- Spice Up Your Home: 7 Kid-Friendly Kitchen Designs That Combine Fun With Functionality, Featuring Bauformat
- Creating a Secure Kitchen Layout: Bauformat Family-Friendly Design Tips
German cabinetry, planned and built for Metro Vancouver
The kitchen is one of the highest-return rooms in a home: the 2025 Cost vs. Value Report found a minor kitchen remodel recoups roughly 96% of its cost at resale. Choosing cabinetry that lasts is central to that return, which is where German engineering earns its place. Every Bauformat kitchen is manufactured in Germany, then measured, planned, and installed by our Vancouver team, built to fit your room to the millimetre.
See the Baulux, Bauformat, and Burger collections in person at 1410 Marine Dr Unit 205, North Vancouver, learn more about the manufacturer at bauformat.de.
Book a 30-minute consultation with our Metro Vancouver kitchen designers to plan a kitchen built to last.
